Warming of the balcony with their own hands - a step by step guide in 4 steps
Table of contents
-
1 What is the difference between a balcony and a loggia
- 1.1 What you need to insulate the loggia
- 1.2 The choice of thermal insulation materials
- 1.3 preparation tools
-
2 The process of warming
- 2.1 Step 1: strengthening the balcony parapet
- 2.2 Step 2: assembling a floor covering
- 2.3 Step 3: insulation parapet and the side walls
- 2.4 Step 4: insulation of the ceiling
- 3 conclusion
This material should be of interest to all owners of apartments, which have a private balcony or loggia. In this article I want to tell you how simple insulation balconies with their hands to help make it a full-fledged part of your apartment. If you are tired to use your balcony exclusively for the storage of old unwanted things, read the article and learn how to properly insulate.
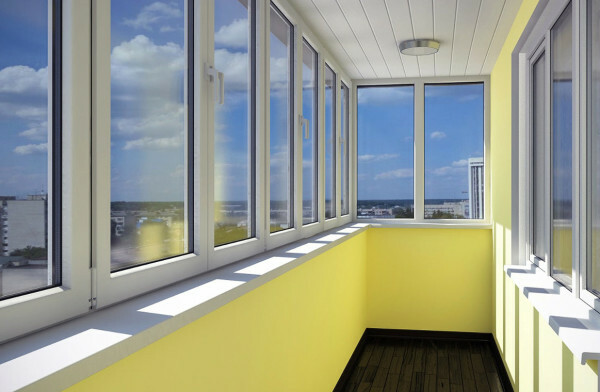
Insulated balcony after finishing.
What is the difference between a balcony and a loggia
To further no one had any confusion, first I want to explain the difference between the balcony from the balcony:
- Balcony always protrudes, beyond the vertical walls of the building. As the ceiling and floor balconies are concrete slabs concrete slabs with a console mounted to the front of the house. The vertical guard (parapet) is typically made as a welded metal structure which is installed at the front and on the sides of the balcony;
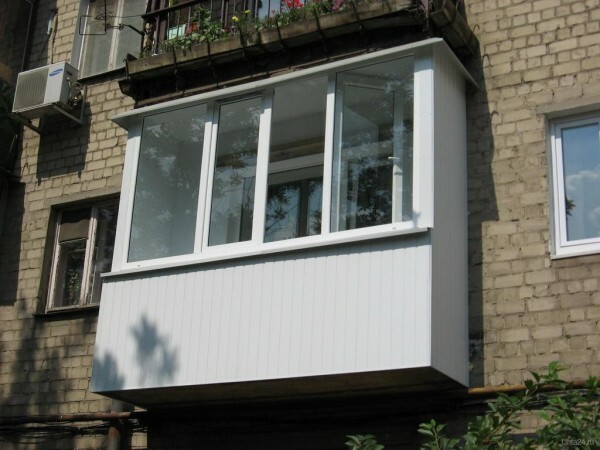
Typical balcony of a multistory building.
- Loggia always sunk deep into the facade. Structurally, it is an extension of living space, but separated from it by the capital outside wall with the balcony door. The floor and ceiling for balconies are intermediate floors and side walls made of reinforced concrete or brickwork. Parapet on the balcony is installed only on the front, and may be a welded fabrication of metal or light construction materials (foam concrete blocks, hollow brick, etc.).
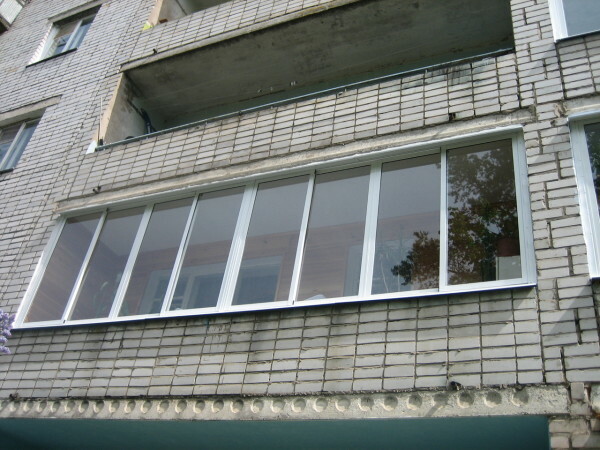
Loggia does not protrude outside of the building.
What you need to insulate the loggia
In the old tenement houses, apartments with balconies and loggias quite surrendered tenants without glazing. This means that there can freely get snow and rain, and throughout the year the temperature remains the same as on the street.
Apartments in modern buildings, often dealt with glazed balconies. Glazing helps protect it from rain and snow, but does not protect against the ingress of cold, wind and damp. Therefore, the temperature and humidity of the air in the glass-covered, but not warmed balcony is not much different from the weather outside.
I can say from personal experience that the simultaneous glazing and insulation balconies with their hands can solve several housing issues:
- Insulated and glazed balconies can be used not only as a storage room for rubbish, but as a full room of your apartment. All the more so at the utilities, you are still paying for it as for living space;
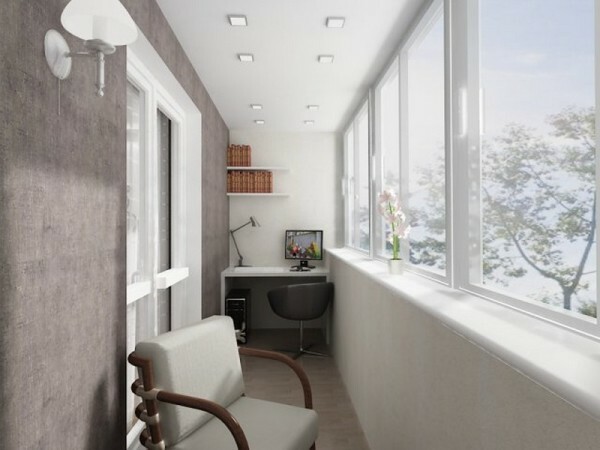
A study on the insulated balcony.
- When summarizing electricity and district heating, it is possible to equip the working office, small home studio, children's playroom, and even its own conservatory or winter Garden;
- If you want to increase the usable area of your living room or bedroom, and are willing to sacrifice a balcony, I propose to proceed as follows:
- First of all, qualitatively insulate balcony and install a panoramic window with double glazing;
- Next, let down or centralized heating system of the apartments;
- Dismantle the old window unit and the balcony door;
- It now remains to unite your room and balcony in a single living space.
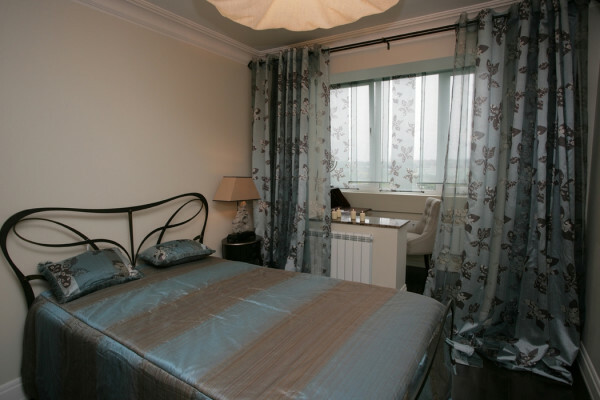
Bedroom, combined with warming loggia.
- The following sentence should be interesting to owners of one-bedroom apartments.
If you allow the layout of your home, at the expense of balconies and loggias, one-bedroom apartment is easy to turn into a two-room:
- First of all, you need to carefully insulate the loggia, and install triple-pane windows;
- Then the loggia sum heating, sewer and water pipes;
- Set the sink, plumbing and minimal set of kitchen appliances;
- The former kitchen is equipped with a living room, nursery or bedroom.
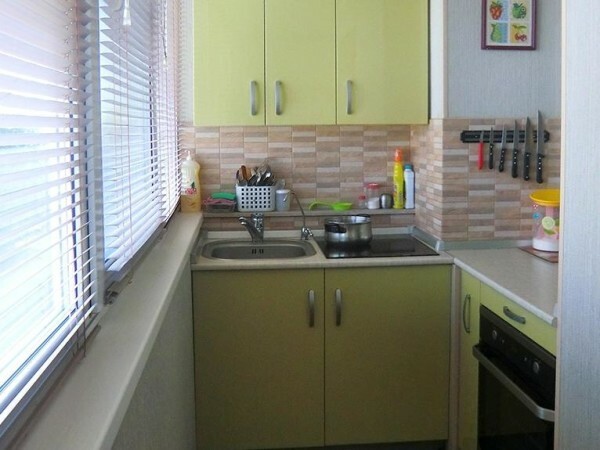
Transfer kitchen for warming loggia.
Even if you do not plan to convert the balcony at the living room, its insulation can help to significantly reduce heat loss in your home. Firstly, in the winter of this house will be much warmer, and secondly, it will reduce the monthly cost of heating and air conditioning.
The choice of thermal insulation materials
For warming balconies best to use rigid insulating material based on a polymer or rolled insulation based on mineral wool.
Those and other materials for thermal insulation has its advantages and disadvantages, so I continue to talk about their basic qualities in more detail:
- Foam - a stiff sheet heater which is made from welded together foam polystyrene granules.
It is characterized by the following features:
- construction foam sheets typically have a size of 1000x1000 mm, and may have a thickness of from 10 to 150 mm;
- They possess sufficient rigidity, have a very low thermal conductivity, and does not leak air and water vapor;
- The foam is considered to be the most inexpensive insulation, since its price is about 150-200 rubles per sheet size 1000h1000h50 mm.
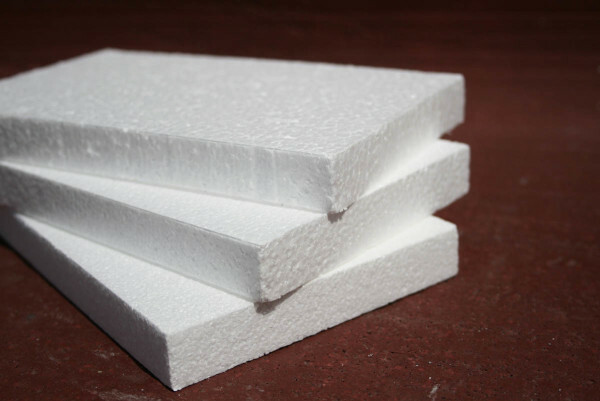
Sheets of foam for insulation.
- Extruded polystyrene (Epps or Penoplex) has similar performance properties, but differs much higher stiffness:
- Penoplex sheets can withstand considerable weight load, so I advise you to use it for warming the floor;
- Epps and foam are destroyed by ultraviolet radiation. Therefore, they can not be permanently leave in direct sunlight;
- For the same reason, it is desirable to perform final finishing no later than one week after the installation of insulation.
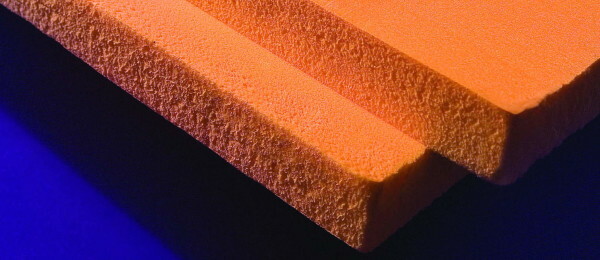
Extruded polystyrene foam has a dense and homogeneous structure.
- Foamed polyethylene foil (Penofol) is sold in rolls of 1000 mm in width, and a thickness of 3 to 12 mm. Penofol is most often used as an auxiliary heat and waterproofing material. It is placed as a layer between the core insulation and the inner decorative covering.
Penofol in the thermal insulation coating performs just three important functions:
- By itself, the polyethylene foam has low thermal conductivity, therefore, it serves as an additional insulation;
- Thin aluminum foil mirror film reflects infrared thermal radiation spectrum, so returns radiant heat from the radiator, back to the loggia;
- Plastic film totally permeable to water vapor, so the warm humid air from the room can not penetrate into the thickness of the main insulation. This prevents it from condensing.
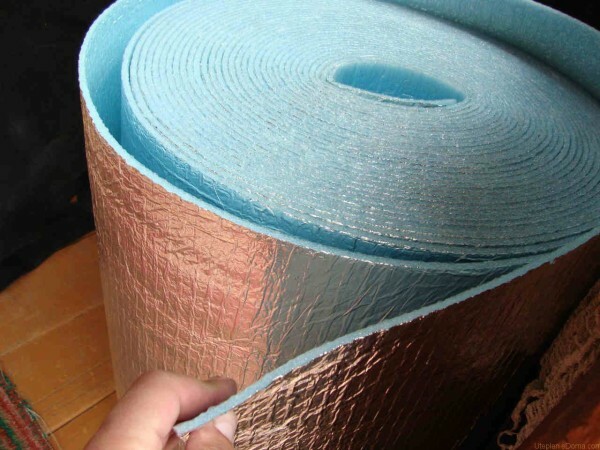
A roll of foil polyethylene foam.
- Basalt or rock mineral wool - a soft fiber insulation, which is made of interwoven thin fibers of molten rock.
Stone wool is considered a universal view of insulation, because it almost has no restrictions on use in construction:
- Mineral wool sold in rolls or in the form of rigid plates with a thickness of 20 to 100 mm;
- It has a low heat transfer coefficient does not burn completely, is not subject to the formation of mold, and has an unlimited lifespan;
- Stone wool good air permeability and water vapor, but when wetted, its insulating properties deteriorate significantly;
- To prevent the formation of condensation inside the insulation, mineral wool necessarily need to be mounted in conjunction waterproofing layer.
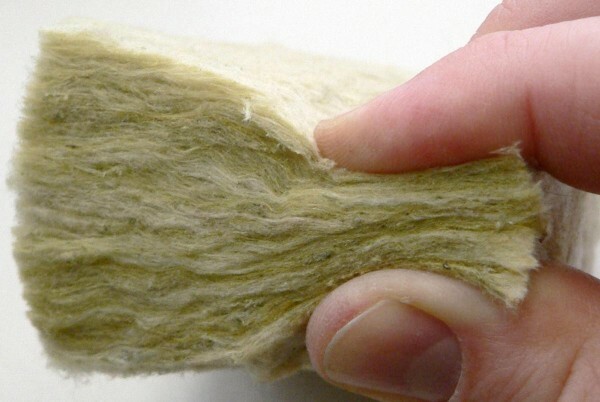
Stone wool is not destroyed by crushing, and non-irritating to human skin.
In addition to stone wool, commercially occurs glass wool, which is made of thin threads of the molten glass. Its fibers are very fragile and break easily, so after crushing this wool does not recover its shape. I do not recommend using it for thermal insulation of residential buildings, so that the small fiber glass can penetrate under the skin of a person and cause severe irritation.
preparation tools
To warm the balcony with your own hands, you can do the usual set of household tools:
- For drilling holes in concrete require electric hammer and a set of drills in diameter from 6 to 12 mm;
- The holes in the brick walls may be drilled using the hammer drill. You will need a set of drills with pobeditovym tip 6-12 mm in diameter;
- In the process, you will need to tighten a large number of screws. Therefore, I recommend using a cordless screwdriver with interchangeable nozzles and PH2 PZ2;
- Cutting bars for mounting batten easier to perform with an electric cutting machine, but if not, then you can use a regular manual hacksaw on a tree;

Cut machine for cutting wooden bars.
- For cutting and slicing insulation cladding panels, need a sharp knife with a building set of replaceable blades;
- From hand tools also need two hammer mass of 200 g and 400 g;
- Two flat and a Phillips head screwdriver;
- Small and large pliers or combination pliers;
- Building level, plumb rope, metal ruler and measuring tape length not less than 3 m;
- Polyurethane foam in large metal containers;
- In addition to insulation, materials must buy dry pieces of wood for the manufacture of the supporting frame, section of 60x60 mm;
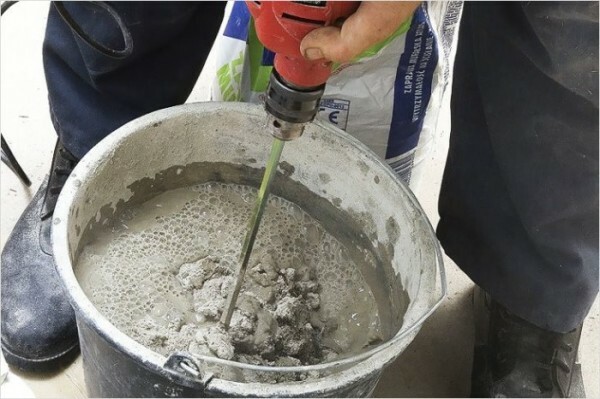
The photo shows the preparation of an adhesive solution for bonding the foam.
- for heat insulation materials Glue. It is sold as a dry mortar and is prepared directly at the work site;
- Wide aluminum metallized tape for ventilation;
- Plastic dowels with large washers for fastening insulation. The people often called umbrellas or parachutes;
- Depending on your preferences, for interior decoration can use the balcony of moisture-resistant gypsum board, plastic siding panel or board battens. In my opinion, for this purpose is best suited plastic siding.
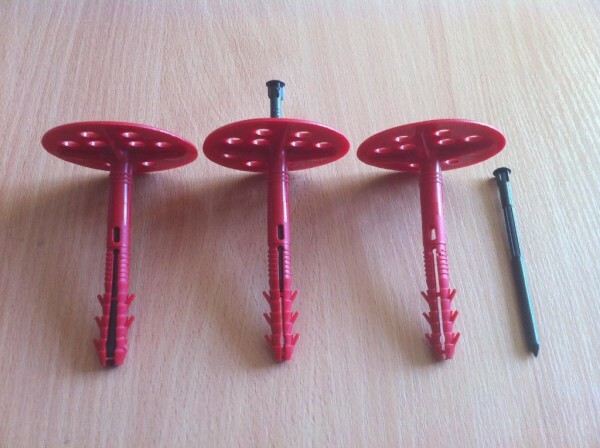
Plastic dowels with large washers for fastening insulation.
At night and in the daytime on the insulated balcony can be a significant change in air temperature, which in turn can lead to the formation of condensation on the walls and on the ceiling. Therefore, for interior finishing is allowed to use only water-resistant and cold-resistant materials.
The process of warming
Step 1: strengthening the balcony parapet
Warming of the balcony should be on the inside to start with the installation of windows, but in some cases this can cause problems. When building multi-storey buildings, balcony parapets are usually made in the form of light gauge metal fences, from welded steel bracket and square. Mount heavy bicameral glazed balcony on a parapet insecure, so before installing new windows, it needs to be strengthened.
I can offer three ways to strengthen the parapet:
- To strengthen the lasting and reliable balcony railings in new homes, you can use a simpler method:
- Parapet around the perimeter weld additional longitudinal beams of the profile pipe section 40h20 mm, or of steel angle section 40x40 mm;
- To the longitudinal beams, on each side of weld with mounting brackets of steel plates at least 4 mm thick. Each plate should have two holes 12 mm in diameter;
- Existing metal structure at several points to secure the further concrete slab floors, as well as the facade of a building or to the side walls of the balconies. For mounting you need to use Expansion anchor bolts;
- All metal railing rods to link the structure of fermicheskoy rebars of 12 mm diameter or profile pipe 20x20 mm. The extreme ends of the truss welded to the mounting brackets;
- After installation of the glazing, railing outside, you can sew decorative plastic siding panels.
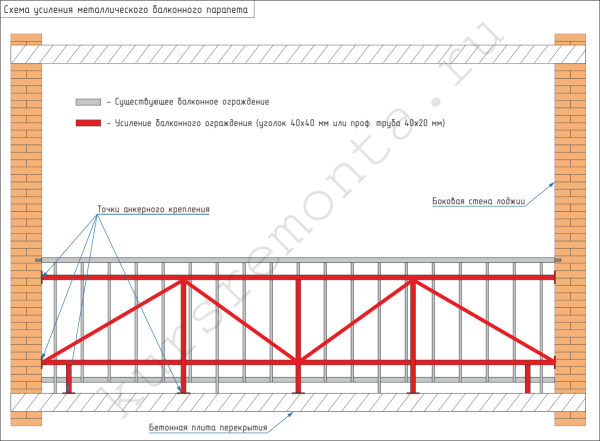
Scheme amplification of metal fencing loge (interior view).
- In older homes built in the Soviet period, the parapet can be unreliable, and very flimsy.
In this case, I recommend to use the second method:
- Inside build new balcony parapet of aerated concrete blocks or hollow bricks fired;
- At the junction of the new parapet in front of the house or the side walls of the loggia, set anchor embedded designs, at least 3 pcs. height;
- Top fix common railing of the wide board 35-40 mm thick. It must completely cover both of the parapet, and protrude inside the balcony and not less than 50 mm on each side;
- Old metal fence outside beauty sew saydingovymi plastic panels.
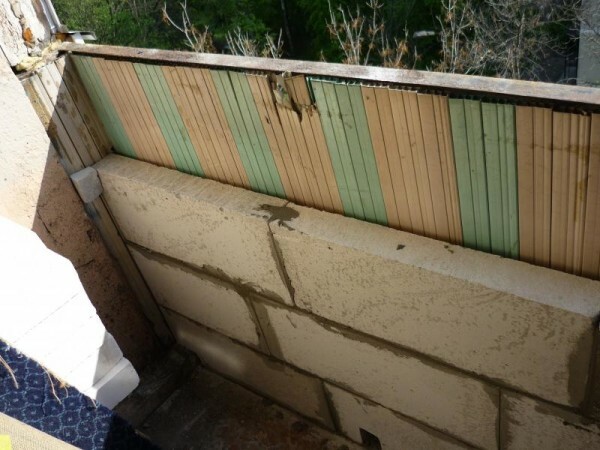
Strengthening the parapet blocks of foam.
- If your balcony fence is in poor condition, it is better to be dismantled, and in its place establish new parapet.
You can use the following method:
- By perimeter of the balcony slab overlap lay new parapet of bricks or hollow concrete blocks;
- After each row of concrete blocks, or after every third row of bricks around the perimeter of the parapet the masonry is necessary to lay the piping reinforcing metal mesh;
- The free ends of the binding should be welded to the anchor bracket on the front of the house or on the side walls of the loggia;
- On top of the parapet secure wide end railing board so as to protrude outwardly and inwardly balcony about 50 mm;
- Outside brick parapet need to plaster with reinforcing fiberglass and paint acrylic facade paint in any suitable color.
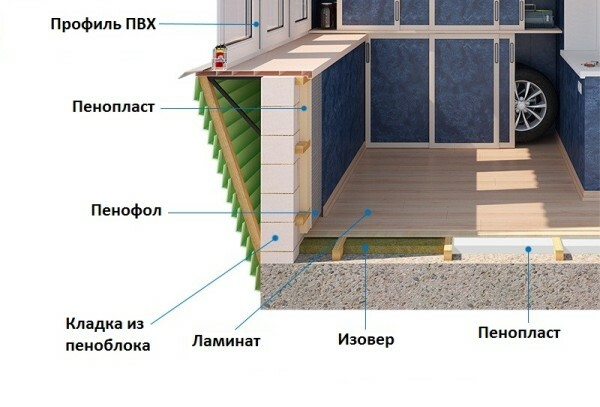
Scheme insulation and exterior parapet of foam.
Installation of metal windows requires a certain knowledge and skills, so this kind of work, I recommend to entrust to those skilled in this matter. Firstly, it is more reliable and secure, and secondly, they offer a guarantee on their work. Also, when ordering the installation of windows, you can get a discount on installation work.
Step 2: assembling a floor covering
Plates of the balcony slab usually have a small thickness, so before mounting the finishing floor covering, it is necessary to insulate qualitatively.
Warming of the floor panels can be made of foam, sheets of extruded polystyrene foam or mineral wool slabs.
The general principle of the use of these materials is about the same, so I'll tell you how it's done in sheets of foam:
- Concrete floor slab must be cleaned of debris, dry well, and cover with two layers of heated bituminous mastics;
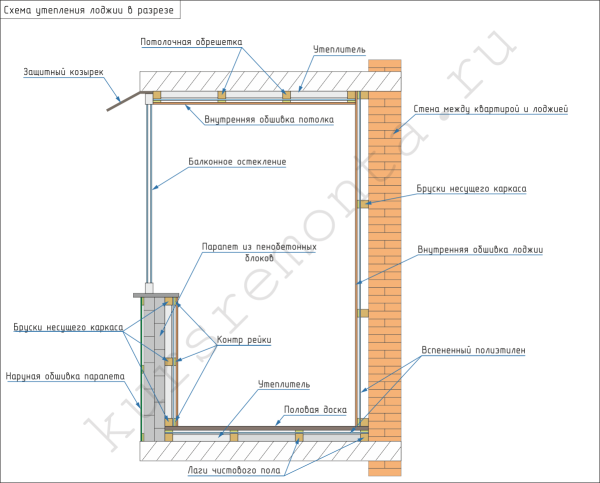
The diagram shows a heat insulation technology loge.
- If you use as insulation mineral wool, then the need for waterproofing lay on the stove vapor-permeable membrane hydroprotective or perforated plastic film;
- Along the balcony floor to fasten pieces of wood (logs) section of at least 60x60 mm. The last bars to be stacked against the parapet, and to a wall in the apartment, and between the average distance of the bars stand 300-400 mm;
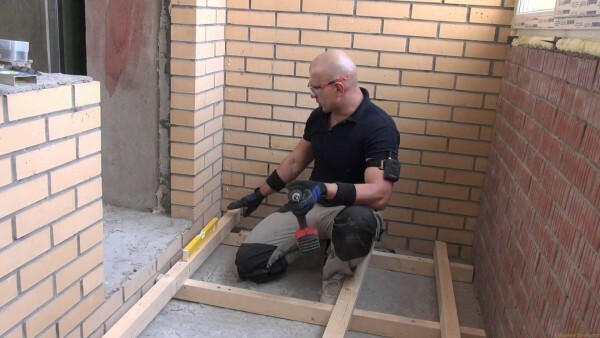
Joists need to stand strictly on the level.
- The gaps between the bars, tightly packed foam panels without gaps. If between sheets of foam remain small gap, then they need to fill with foam;
- Above the insulation and waterproofing of the longitudinal beams of the lay foil of foamed polyethylene (penofol);
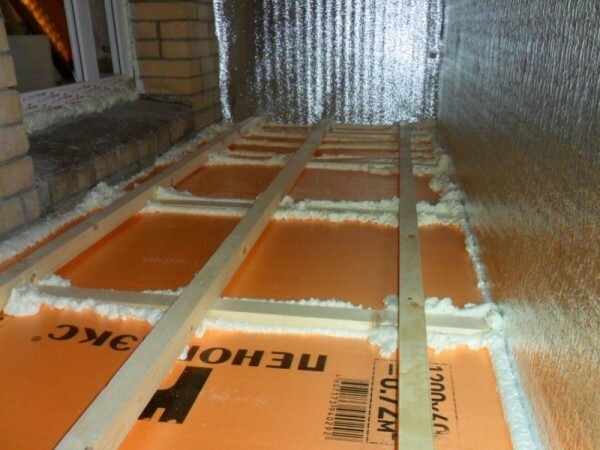
Installation of sheet Penoplex.
- Penofol need to be laid so that the foil side facing upwards, And the edges must be bent to the side walls, at 60-100 mm on each side;
- To provide ventilation gap between the finished floor and penofol, the longitudinal bars need to nail wooden slats counter 15-20 mm;
- Above the counter rails can be fastened Finish flooring. Everything for wooden floor on the balcony, it is necessary to use a grooved floor boards 40 mm thick.
- Laid floorboards need across the balcony, and fastened to the joists with galvanized screws.
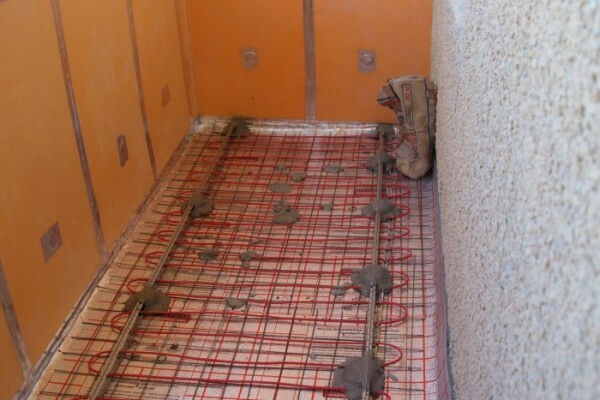
Under final floor covering can be laid heating cables electric floor heating.
If you want to lay on the balcony of linoleum or laminate flooring, then you must first arrange the draft floor. For this purpose it is necessary to fix the longitudinal bars sheets waterproof plywood or OSB at least 20 mm thick. After this rough floor should be sanded and put Finish flooring.
Step 3: insulation parapet and the side walls
For normal insulation balconies and loggias, very important qualitatively insulate the parapet and side walls, because they are in direct contact with the cold air from the street. Main wall between the apartment and the balcony you can not insulate it to freely transmit the heat from the warm room to the loggia.
Below is a step by step guide, which I'll talk about the warming of the walls and the balcony parapet, using foam and mineral wool:
- Before starting work, All concrete and masonry surfaces should be processed antiseptic penetrating primer. It fills the open pores between the particles of the material, and protects the wall from the mold by a heater;
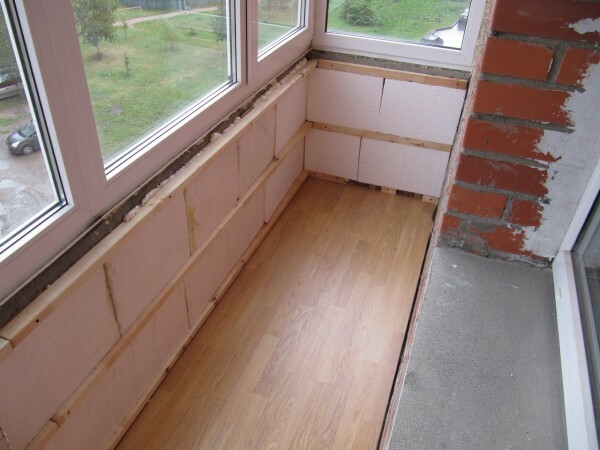
Installation of the wooden frame.
- Wall mount the base plate for mounting the inner lining finish. It is made in the form of battens of the vertical section bars 60x60 or 75x75 mm.
- On the walls of the bars should be positioned vertically, from the floor-to-ceiling. Recent bars are set at the corners of the balcony, and the intermediate attached to the side walls at a distance of 300-400 mm from each other.
- Supporting frame for convenient parapet made of three or four horizontal bars. The lower bar should be fixed to the parapet at the floor level and the upper bar to fix a railing plank. One or two intermediate timber mounted equidistant between the upper and lower bars;
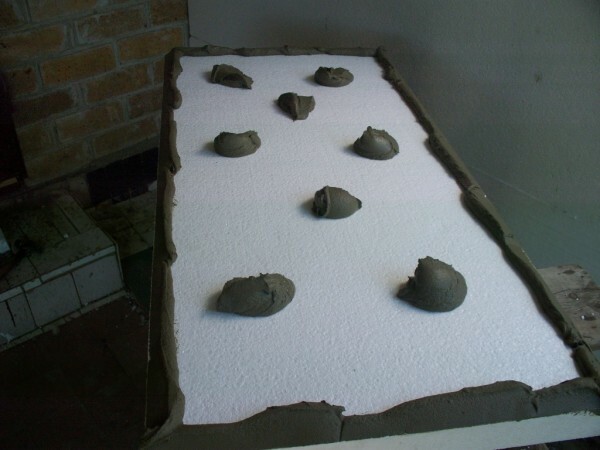
Proper application of glue to the foam.
- In the manufacture of load-bearing frame, I advise in advance to lay cables along the wall wiring, heating pipes or other hidden communications;
- If you plan to insulate a balcony foam, it must be cut into individual plates. The width of each tile must be such that it fits tightly between two adjacent bars of the supporting frame;
- Next, you need to prepare an adhesive solution. In the foam sheet put on several large spots of glue, and press it against the wall in the space between the frame bars;
- Thus, it is necessary to glue the foam to the walls and parapet of a balcony. If in some places will remain large gaps and cracks, they must blow with foam;
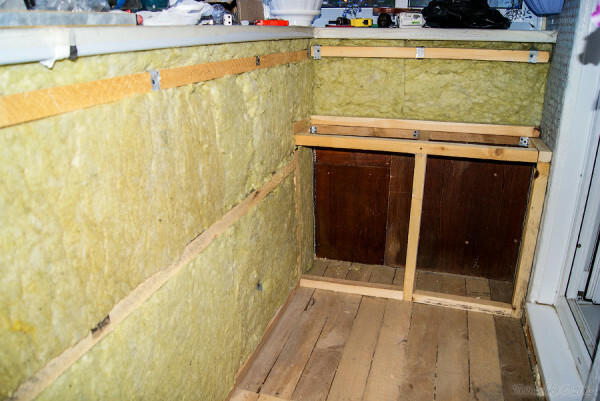
Instead of foam, mineral wool can be used.
- Wall insulation with mineral wool has a few differences:
- Before mounting the base plate on the wall is necessary to secure the waterproofing of the vapor-permeable membrane;
- For fixing mineral wool instead of glue necessary to use plastic dowels, More commonly known as "umbrella".
- After installation of the foam or mineral wool, to a block of wood needs to be fixed Penofol foil side facing balcony. It is convenient to use the furniture or staple gun;
- Above penofol necessary to secure wooden counter rail 20 mm thick. They will be used to secure the inner liner;
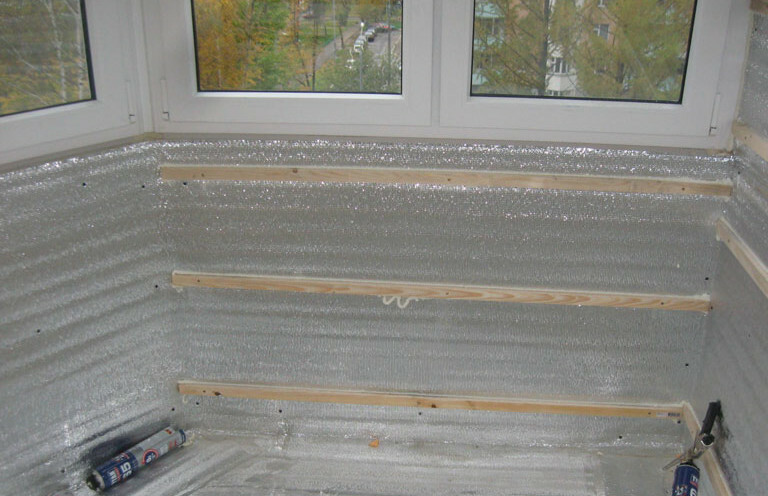
Installation penofol and fixing counter battens.
- When finishing the walls and ceiling you plan to use plasterboard, it is necessary to counter the rack mount vertically, Parallel batten bars;
- For mounting board lining or plastic siding counter rail should be positioned horizontallyIn four or five rows. The distance between them should be less than 500 mm;
- At the end of all, you will have to perform the final finishing of the walls and parapet, and at the junction of each wall and the floor, install a wooden or plastic moldings.
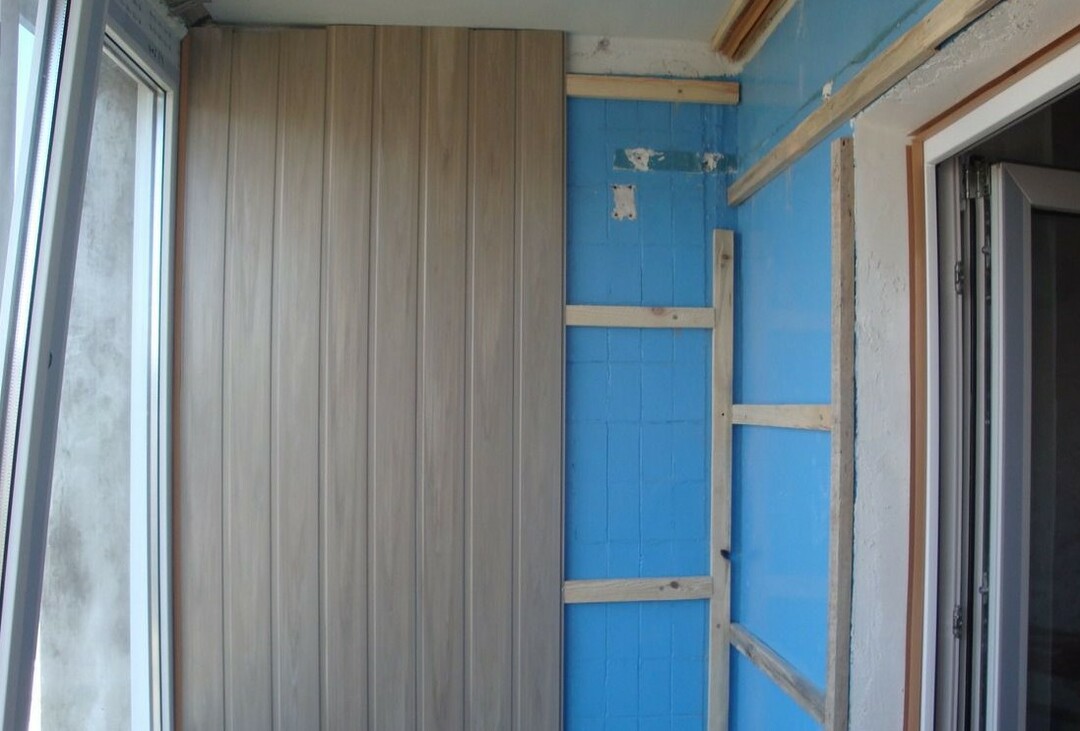
Location counter rails for fastening plastic siding (insulation is not shown).
In the manufacture of the supporting frame under the finishing trim, some artisans use a metal profile for drywall. At first glance, this option may seem more simple, but I recommend not to do so. The fact that metal has a higher thermal conductivity than wood, so the installation site of metal profiles, formed in the wall of cold bridges. They degrade the insulation of the balcony, and can cause the formation of condensation in the layer of insulation.
Step 4: insulation of the ceiling
If you plan to install on the balcony of a separate heating system, then we must not forget that the warm air from the radiator is always rushes up. In order not to heat the balcony neighbor from upstairs, I advise you to pay special attention to the insulation of the ceiling.
Insulation of the ceiling is done in the same way as the rest of the balcony insulation, but this work has its own characteristics:
- To prevent leakage of rainwater into the ceiling insulation layer, between the frame balcony glazing and the floor slab to install protective cover. You can buy ready-made or to be made of galvanized steel sheet;
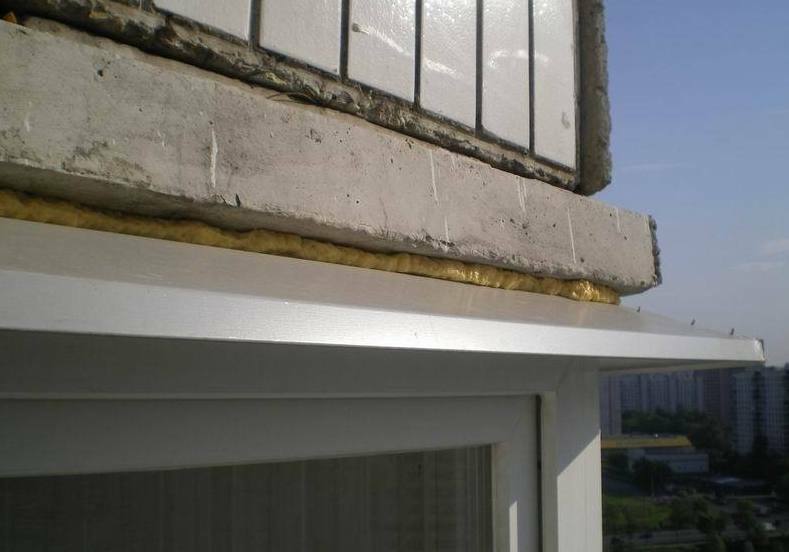
The gap between the visor and the floor slab is necessary to blow the foam.
- Concrete slab should be two-fold process of penetrating antiseptic water based primer;
- Before installing the insulation material on the ceiling should be fixed vapor-permeable membrane hydroprotective. It is necessary to ensure that the moisture from the ceiling does not penetrate the insulation;
- Over the waterproofing fix the longitudinal pieces of wood cross-section of 60x60 mm. The two extremes of the bar should be located in the most corners of the ceiling, and the intermediate bars are installed between increments of 300-400 mm;
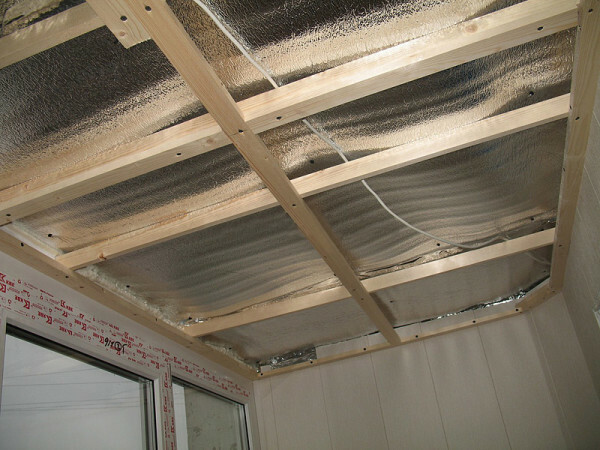
Ceiling wooden crate.
- insulation should be laid between the bars cut to width. By hydroprotective membrane it can not stick, so you need to use mounting dowels plastic "umbrella";
- To fill the gaps between the slabs of foam have to use foam core;
- If warm moist air from the room to get inside the insulation, there will be formed condensate. To avoid this, on top of the heater to the bars need to nail down a vapor barrier foil of polyethylene foam;
- Penofol need to be fixed to the ceiling so that it fell on the edge of each wall at least 80-100 mm;
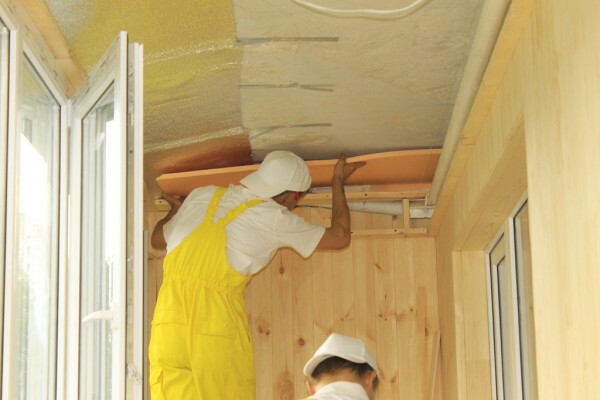
Installation of insulation to the ceiling.
- To ensure the integrity of the vapor barrier, all joints of panels and mounting brackets on the stapler, it is necessary to glue the metallized aluminum tape;
- Further finishing the ceiling finish is carried out in the same way as described in the previous section (paragraphs 11-14):
- By ceiling rails nail longitudinal or transverse slats counter;
- Bottom fix the finish decorative trim (drywall, paneling or siding panel);
- Carefully trim the dangling remnants penofol;
- According to the perimeter of the ceiling to install a decorative cornice or moldings.
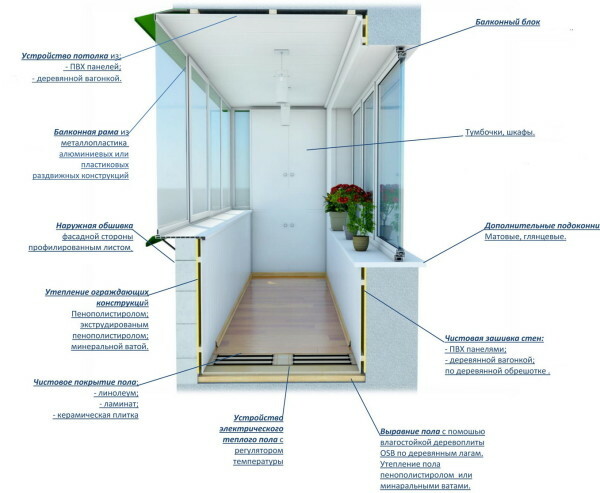
The general scheme of insulated balcony.
Even with full respect of insulation technology, condensation can form inside the insulating casing. To protect the wood from rotting and mold, it is important to observe two simple rules. Firstly, all the wooden parts before assembly process antiseptic impregnation. Secondly, between the plating and finishing heater, always leaving a ventilation gap of 15-20 mm.
conclusion
After reading this article, you can easily insulate yourself any balcony or a loggia in a city apartment. Visual guide on warming the balcony you can see the video in this article. All your questions and suggestions, propose that we discuss below in the form of comments.


