Plaster on the wood trim features
Table of contents
-
1 Facing surfaces of the timber clay solution
- 1.1 Preparation of the solution
- 1.2 stuffing shingles
- 2 Modern methods of plastering wooden walls
- 3 The basic principles of plastering
- 4 Summing up
Affordable, and most importantly - free, plaster on wood always lies beneath our feet. Its constituent components - clay and chopped straw and water. It is such a solution be lined with wooden buildings from ancient times.
Facing surfaces of the timber clay solution
Clay mortar for plastering wooden walls
Preparation of the solution
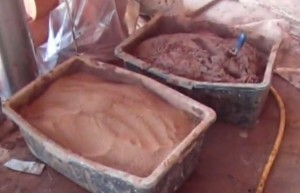
Before prepare a solution for plaster, clay required amount is taken and displayed on a flat and free from grass area. She then watered and kneaded to a doughy consistency, are added to a solution of chopped straw, add water and all kneaded until a homogeneous mass. Then the clay must be "ripen" for 2-3 hours.
After preparation of the plaster mixture can start plastering the walls with his own hands. Already covered with shingles walls are wetted with water or broom maklovitsej. They rub solution and leveled float. If in the process you are unable to work out all the prepared mixture, it can be used the next day. For this purpose, enough to add to the solution a little water and a good mix.
After lining the walls will be dry. In this period, the surface cracks that must overwrite mixture of clay and sand.
If they are covered with wallpaper in the far wall, the surface must also make amends.
When the plaster is completely cured, it strengthened grout plaster.
The fat content of alumina depends on the amount of straw is mixed into it. The higher the score, the more the straw should be added to the mixture. Now more and more instead of conventional straw reinforcing material to strengthen the lining and prevent cracking polypropylene fiber is used, a length of 1.5 cm. Masters recommend to use it if in the future the walls will be painted.
Simple stuff can be done independently. The feedstock will fit any braided plastic bag from the flour, cement, alabaster. Cut strips its width is 1.5 cm, then a strip along the required number of separate filaments which the appearance and shape will not differ from the industrial fiber.
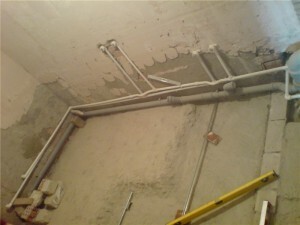
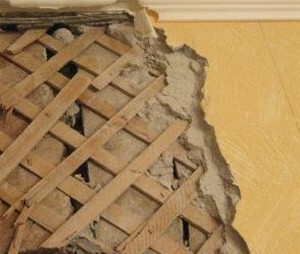
Preparation of walls under plaster - one of the most important stages of plastering. In the case of wooden walls it is in their trim shingles.
If done plaster wall under the tile, the shingles must be replaced with wire netting or pull the metal reinforcing mesh.
stuffing shingles
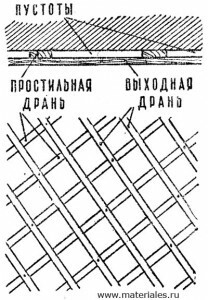
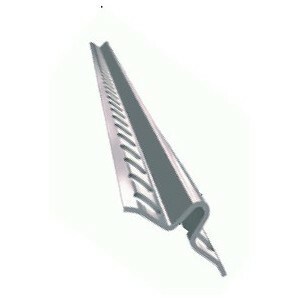
Lath (price - from 80 rubles).
Lath - a wooden planks or plywood strips 3-5 mm in width from 1.5 to 2 cm. Stuffed strips in two series: the first of them - "prostilnaya" shingle, the second - "output". For attaching them apply plaster nails, 2.5-4 cm long.
Prostilnuyu shingles, 3-4 mm thick, beat-to-ceiling parallel to each other with a pitch of 3-4 cm and at an angle of 45 ° to the horizontal.
Output shingles in thickness of 4-5 mm, was packed with 5.4 cm increments in the perpendicular prostilnym strips. As a result, on the surface of the walls is obtained diagonal grille, which is loosely fitted to the surface, but is securely attached to it. When working space is filled with a solution that provides a secure attachment of plaster to the wood.
Plaster consumption per 1 m2 of rendered depends on the flatness of the walls. The thickness of layers on the wood surface shall be not less than 20 cm. Too thin a layer will result in radiography of lath and plaster cracking.
To improve heat and sound insulation properties of walls is recommended obtyanut Pergamino, dense sacking or felt. Previously they need to handle antiseptic preparation and dry.
Before tiling the walls covered with felt water not wet, and just a little sprinkle.
If the plaster is made for painting or wallpaper, joints surfaces of different materials obbivat the metal reinforcing mesh which must be located on either side of the junction is not less than 5 cm.
Modern methods of plastering wooden walls
Works on wooden walls, gypsum plaster
Wood surfaces can be plastered and specially produced for this industrial mixtures universal and gypsum plasters. The latter have a high adhesion.
Made on the basis of plaster, light fillers and special modifiers polymers. The best-known material in this category is a mixture of "Rotband", developed by German company Knauf.
It is used as a plaster, brick, concrete, wood and sheet materials used indoors.
Before the work surface should be primed and mount the reinforcing mesh. Currently available are many universal primer based on acrylic copolymers. These compounds improve adhesion to subsequent coating.
There are also quick primer for processing wood, chipboard and wood-fiber surfaces.
The basic principles of plastering
Scratch coat, which is the first layer gallop, applied to the surface without gaps. Its purpose - combining the solution with the base material, filling of its pores, cavities and irregularities. Obryzg needs no leveling, it will be enough just to remove the explicit nodules.
- After the start of the curing solution is applied to the second of the layers - primer. It is intended for the main alignment wall plaster and create the desired layer thickness.
- The quantity of soil layer should not be more than 0.7 cm for the clay, lime, mortar, and combinations thereof, and 0.5 cm for cement mortars. As appropriate primer snapped in two layers and leveled.
- Third layer - skim. It is applied after the preliminary curing solution. The total layer thickness is 1.2 to simple plasters cm improved - 1.5 cm high - 2 cm.
- There are different ways how to plaster. The solution can throw, spray, spread, using convenient tools. The first two methods are required under the plaster coat. In most cases, the mixture is applied to the plaster trowel or spatula.
- Smearing of the solution - the most simple method, suitable for use with thick mixtures. Throwing by plaster will require you to experience and skill, but this method relates to the category of the most user-friendly and versatile, allowing to work with the compositions of different consistencies.
Note! The tool moves from the center to the edge of the Falcon, the solution attacks the surface to be treated. Do this sudden movement of the wrist, do not engage the whole hand.
- Nakidyvanie can be carried out from right to left and left to right, depending on the conditions of your work.
- Leveling plaster to obtain a flat surface - a key milestone. It can perform the spreader, a falcon or a rule.
- The final stage - the grout and smoothing. If applied to the decorative covering, such as a plaster stone, tree bark, or skin, simultaneously formed texture pattern.
- Surface overwritten wooden or foam float, movements round or distillation. At the same time strip the last minor defects in the lining.
Tip! When the skim coat has dried, it must be slightly wetted with water.
- From the standpoint of equipment, smoothing is virtually identical to the process spackling. As a result of this simple operation the surface of the lining becomes firmer and smoother.
- After plastering corners at the junction of surfaces should be smooth and sharp. For this purpose, it is best to use a triangular blade and trowel.
- After priming and leveling angle wooden poluterok lead with slight pressure on the surface at first upwards and then downwards. the procedure is repeated, if necessary.
Summing up
We hope our article has been helpful to you. In order to more accurately understand the technological and practical issues on our website provides detailed photo and video instruction, in which you will find the necessary information on the question.