 Before installing faucet on the sink should explore the theoretical part process before installing the faucet, better read on the rules to install it. Otherwise, you may run into a leak in the bathroom or toilet, if there is a sink at your place.
-
- carry mount faucet to the sink
- Parse connecting the mixer to the water
- What is flexible connection for cold and hot water
- Proper installation how to install the faucet on a sink made of stainless
- As setfaucet on the sink( video)
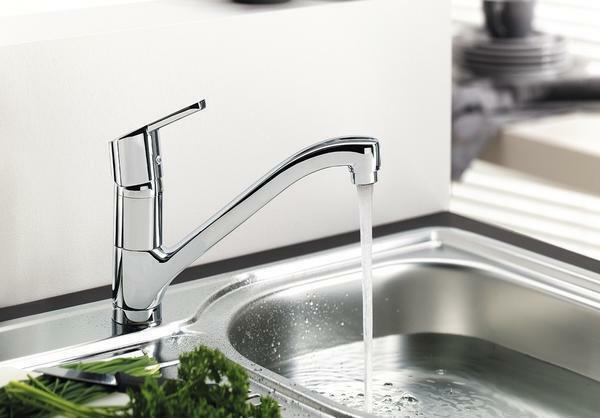
carry mount faucet to the sink faucet mount
to the sink, you can do it yourself without causing plumbing. The very first rule in installing a mixer, which must be used, is to remove the sink from the curbstone on which it stands. Also, you need to have plumbing tools for work.
To fix the mixer, it is necessary to screw the connecting hoses into it. Screwing should be done by hand, and then tighten the hoses, which are already screwed on a half-turn. To do this, use a wrench. In general, you will need a number of tools.
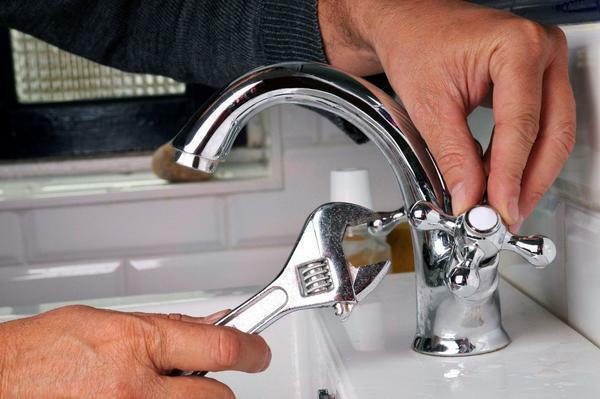 When installing the mixer need to use a wrench
To change the mixer, you will need:
- Screwdrivers;
- Adjustable wrench;
- Spanners;
- Lubricant;
- Dry cloth.
Next, clean the gaskets. Then put the seal, insert the connecting hose into the hole in the sink and put the mixer. But do not forget that the bottom of the sink should put the seal on the needle.
Be sure to put the seal on the stud or needle.
Place washer in metal and tighten nut as additional fasteners. Now you can put the sink on the curbstone and fasten the fastener.
As you can see, assembling the mixer is easy. It is attached without any problems. Always keep tools close to you that you may need at any time. Do not forget about the installation of seals, which prevent leakage. And then your mixer will work for many years.
We disassemble how to connect the mixer to the water pipe
To connect the mixer to the water supply, it is enough to have the wit and the tools necessary for this. If you previously had the experience of such an installation - excellent, if not, then do not worry. The connection is not complicated.
Installation of the mixer to the wall is carried out with the help of a tape FUM.Connection to the water pipe is done using eccentrics. They are screwed to the fittings that are found on the pipes of the aqueduct. The eccentrics shift the distance between the water pipes to the desired distance between the mixer inputs.
mixer circuit Fitting water pipes:
- becoming eccentric to the fittings;
- Screw the mixer block;
- Set decorative eccentrics;
- Screw the complete unit;
- Check the taps.
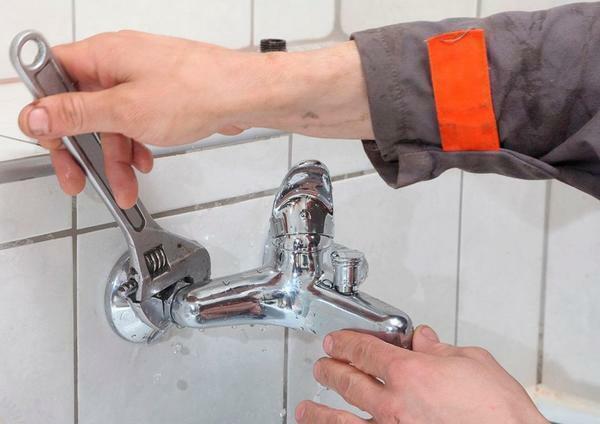 connecting the mixer to the water, you need to tightly fasten all nuts
you finish put eccentrics, it is necessary to attach the mixing block to them. We fasten it to eccentrics.
In the case where both sides of the mixer block go easily does not rotate without problems - you set everything correctly.
Then you need to remove the block and put decorative eccentrics, then the whole block with seals. At this installation is finished.
Installation of the mixer to the water pipes takes place literally in one hour. Follow the instructions and then you will put the mixer correctly. The main thing to remember is that all scrolls should go without problems and stupor. This means that you are doing everything right.
What is a flexible connection for cold and hot water
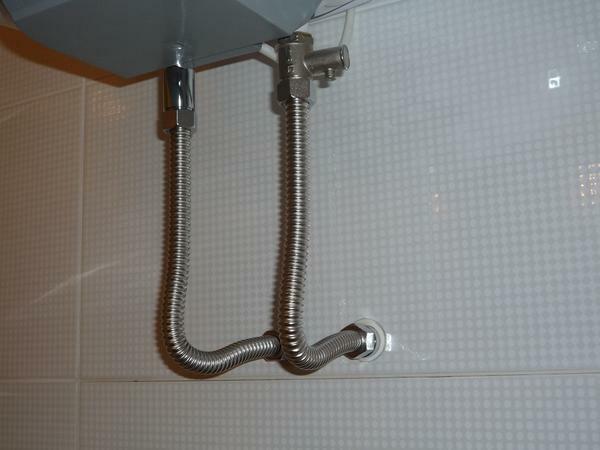
Compounds which are made of flexible materials - this is a great attribute to connect not only faucets in the kitchen, but the toilets and showers. This is an indispensable connection for connections, as it is reliable and it can run both cold and hot water.
flexible connection hose is made of rubber, which is covered by a metal braid designated fittings, nuts and washers. The hose is often made of rubber, which is used in the food industry. It perfectly bends and is durable in use. The diameter of such hoses can be different.
Rubber hose covered with a metal braid - that's what a flexible connection is.
 Flexible connection for cold and hot water are sold in the store with any fixtures
flexible connection comprises:
- rubber hose;
- Metallic braid;
- Fittings;
- Nuts;
- Gaskets.
The material for braiding is aluminum, stainless steel or nylon. They protect the connection from external environments. Aluminum braid, as a rule, serves 3-4 years. Stainless steel braid is used for 8 years. Nylon - more than 15 years.
Flexible connection is often used in plumbing. A durable rubber hose allows the connection to bend under different loads. Metal braid protects it from external influences and aggressive environments. A fittings with nuts perfectly attach the connections to the conductive parts of the pipeline.
Proper installation: how to install the faucet on a sink made of stainless steel
The correct installation of the mixer are hidden nuances, which at first sight are not visible man in the street who is going to do this installation. Especially, it is important to know the rules of installation on the sink, which is made of stainless material.
First of all, you need to prepare a table top for installation. How it is done, we proceed to install the mixer itself. To do this, the first thing to wrap the threads of flexible hoses with a special tape or use a polymeric sealing thread, screwing them into the faucet body.
Please note that when screwing in the hose, do not support them with a metal braid. You just pull it out.
 Before installing the mixer worth watching instructional videos with master class
installation mechanism of the mixer on the sink of stainless steel:
- Wrap the threads of the flexible hose;
- Thread the hose nuts into the mixer holes;
- Extend the mixer body to the stainless sink;
- Adhesive sealing tape;
- Insert the fastening elements into the grooves of the sink;
- Apply a sealant around the perimeter;
- Put the washer and mixer on the countertop.
Following this mechanism of installation, you will put the mixer on the stainless steel sink correctly.
The installation of a mixer on a stainless steel does not cause trouble. Even if you have a sink made of fine metal, you just need to make a plywood insert to put it on the back side. Then the mixer will stay strong and securely on the stainless steel sink.
How to install the faucet on the sink( video)
Put faucet on the sink can be like a plumber and owner of the house. If you have all the necessary tools for plumbing at your fingertips, then the installation will take you only a couple of hours. Observe all the rules and the installation mechanism to put the mixer correctly. And then you will be happy to use tap water.

