Any equipment in the house is selected taking into account the owner's tastes and creating maximum comfort in it. Bathroom is not an exception, but it is equipped with plumbing products that can last a very long time - their replacement with cosmetic repairs is usually not done. All this time the equipment should work without failures, therefore the installation of communications requires a careful approach and the implementation of all the rules.
Contents
- Installation of a bath
- Installation of a cast iron bath - preparatory stage
- Installation of a cast iron bath
- Installation of legs for a cast iron bath
- Installation of a drainage system
- Installation of a cast iron bath on bricks
- Earthing
- Installation of a cast iron bath
- Several tips
Despite the fact that modern bathsmarket are made of a variety of materials, cast iron products are in constant demand. This is due to their strengths, such as:
- strength;
- ability to retain heat for a long time;
- good sound insulation;
- the weight of the bath, giving it stability and allowing it to be installed both along the wall and in the center of the room.

Bath selection
The choice of bath depends on the availability of sewerage and water distribution. If it is prepared or there are old communications, then the product is selected taking into account their parameters.

In addition, there are other subtleties, which pay attention when choosing a bath:
- Room design - the product is selected taking into account the interior of the room, the more so that the choice of shades of enamel allows it to be done without much difficulty.

- The size of the bathtub should match the parameters of the doorway - otherwise it will not be possible to carry it through it without risk of damaging the box.
- The quality of the enamel coating - there should be no chips or scratches on it.
- Reviews of the manufacturer of selected sanitary equipment.
Installation of a cast iron bath - preparatory stage
Before proceeding directly to the installation of a cast iron bath, the following preparatory steps are carried out:
- Dismantling of old equipment, if any.
- Installation of water distribution and sewerage system.
- Wall and floor finishing with tiles( article http: //stroiremdoma.ru/ kak-vylozhit-kafel-v-vannoj /) at the request of the owner.
Installation of the cast-iron bath
The installation of the bath is carried out at the site of its placement. To bring the product into the room better together, however, as well as to establish - its great weight at work is rather a disadvantage than dignity.
At work, in addition to the bath itself, you will need:
- set of legs - usually it goes with the product, but sometimes it is bought separately;

- siphon;
- overflow drain;

- adjustable wrench;
- level;
- screwdrivers;
- bolts;
- sealant.
Installation of legs on a cast-iron bath
- In order not to damage the enameled surface, the floor in the room is covered with cardboard or thick polyethylene film.
- The product is laid on the litter sideways, bottom to the wall, at a distance of about 70 cm.
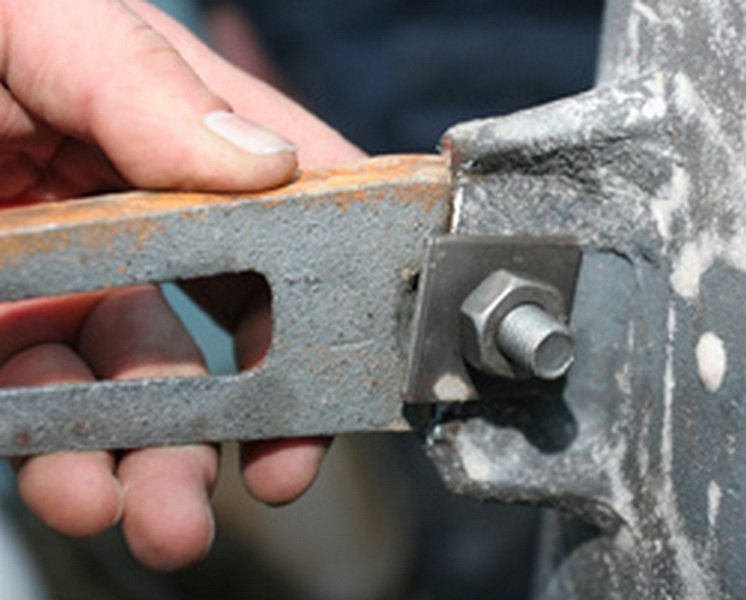
- A special support is installed on special brackets located on the bottom, using bolts and a swivel wrench or metal wedges.

The best option is to purchase adjustable feet - they will help to set the product level. Otherwise, the floor must have a perfectly flat surface.
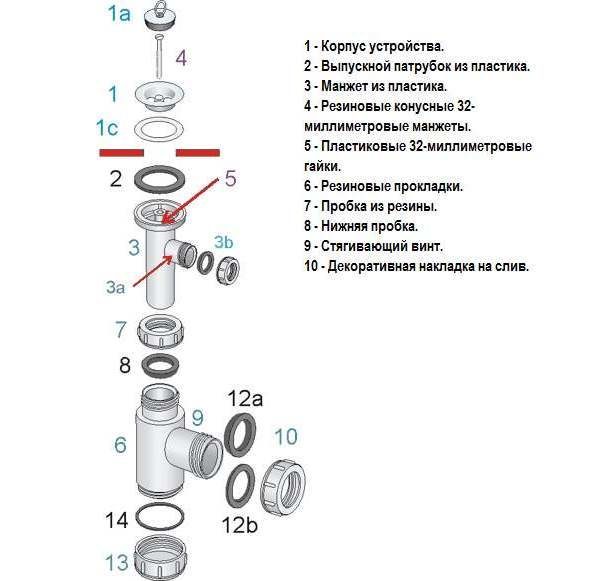
Installation of the drainage system
- The siphon is connected to the drain hole through the rubber washers.
- The overflow is installed with the obligatory use of rubber gaskets and is connected to the hose for draining water.
- With the help of a coupling, the overflow pipe is attached to the siphon.

For reliability all joints are treated with silicone sealant.
Installation of a cast-iron bath on bricks
During the operation of a cast iron bath, the legs can loosen. This contributes to the weight of the product, poor-quality fasteners, etc. As a result, the structure is warped and the water does not completely drain into the sewer. To correct the situation is difficult, so often a cast-iron bath is installed on a brick frame.
There are several types of supports for a bathroom made of bricks:
- two scaffoldings;

- poles around the perimeter of the product;
- supports in the corners or sides of the bowl;

- solid platform of brick;

- bed for the bottom of the bath.
The last option is used most often: a brickwork is made in two bricks, then a half-brick is added along its sides and a groove( "bed") for the bottom is created using a mortar.
The solid platform is located between all the legs of the bathtub. Before laying out a brick, chalk is applied to the floor with chalk or pencil.
To ensure that the structure does not collapse under the weight of the bath, the masonry must dry at least one day. Only then you can put a bath on it. After its installation, the brickwork is again coated with a solution - to improve the adhesion.
When using any method of installing a bath on bricks, remember the slight inclination of the product( 2 cm) to the drain hole. This is done for better water discharge into the sewage system.
Earthing
A large number of electrical appliances installed in the bathroom are a source of danger to human health. Therefore, the earthing of the bath was a necessary element in its installation. Modern products have a special jumper for fixing the wire.

For earthing, a long insulated cable( 2 m or more) with a cross section of 6 kV / mm is used. The other end of the wire is connected to a special distributor or a metal water pipe.
Installing the cast-iron bath
- After the two legs are installed, the bath is carefully turned over and placed on them.
- A reliable support is placed on the other side, and the remaining supports are fastened.

- The bath is leveled with screws in adjustable feet.
- The locking nuts are tightened.

- The flexible hose is connected to the sewer.
- The gap between the wall and the bathroom is filled with silicone sealant.

- The control bath content is checked: the tightness of the structure and the correct installation are checked.
Alignment is carried out from one side and the end of the product. If the bath is near the wall, then the clearance from it should be 1-2 mm.
Installation of a cast iron bath, video:
A few tips
- If the floor in the room is not too strong, then under the supports put metal or plastic pads with a thickness of at least 5 mm.
- Thin metal legs, which sometimes come complete, require the installation of additional supports. Only in this case, the fixing of the cast-iron bath will be reliable.
- For a normal siphon, the distance from the floor to the bottom of the product should be from 14.5 cm.
- The cast-iron bath will stand more reliably if you use a combined installation method - on the legs and brick support.
- The metal drainage grille of the siphon is more reliable than plastic - it is more rigid and tightens the rubber rings.


