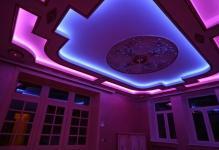
 Lighting an apartment using LED tapes will significantly reduce electricity costs, highlight the interior features of the LED or simply diode lighting has become an integral part of the ceiling decor. In the interior of such a luminous detail creates a special atmosphere, and can serve, for example, as a space zonator.
-
- The principle of the LED strip on the ceiling
- Why LED strip
- Choosing a LED strip for lighting the ceiling
- Installing the LED strip on the ceiling with your own hands: calculations
- How to mount the LED strip on the ceiling
- Where to attach or glue the LED strip
- LED "starry sky"
- LED strip for ceiling lighting( photo)
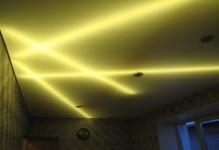
Principle of operationLED strip on the ceiling
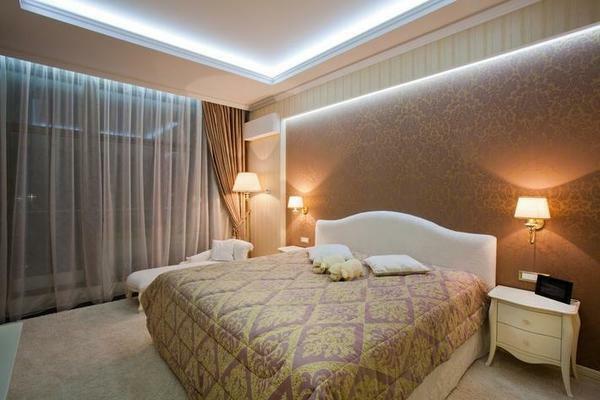
The basis of this lighting is that the tape is placed in a gypsum cardboard box. It is located on the second level of the suspended structure, and it turns out that it will eliminate eye contact with the light source.
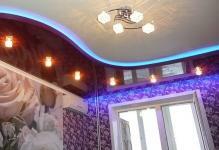
Such an installation will give the impression that the lighting is on its own, the light wave is stretching from nowhere. It will gently and densely spread along the perimeter of the ceiling, more precisely - along its contour.
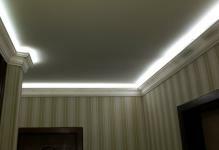
Sometimes we use an LED strip that fits into a wide ceiling foam plastic baseboard. Usually it is a plinth that mimics stucco molding. In this situation, the skirting board is fixed to the wall along its lower part.
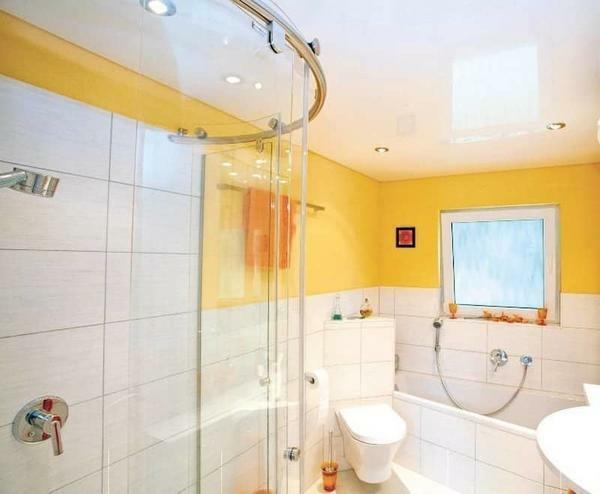
The box is convenient to use for lighting suspended ceilings.
Why LED strip
LED strip in many parameters is the preferred type of lighting.
This product:
- Simple installation;
- The lighting element in it is long-lasting - that is, you can use it for a very long time;
- Economical in electricity consumption;
- The level of heat generation is very low.
 With the help of LED strip it is possible to visually expand the area of the room, to decorate the interior items of the
With all these advantages and an affordable price, such sets become preferable. And if you are going to make a fashionable combined double-level ceiling today, then buying a drywall and profiles, a stretch cloth, get a LED light at once.
Selecting an LED strip for lighting the ceiling
Decide on what kind of backlight you need. And this can be the following types - monochrome and multicolor. The monochrome shines only in red, only in blue or only in white. Multicolor RGB-backlight changes color on the signals of the controller, you will control them.
How to choose an LED strip by several criteria:
- Brightness of the glow. This indicator is influenced by the LEDs that stand in the product. The calculation is simple, the larger the dimensions, the better the brightness of the glow. For example, SMD5630 is equal to 18 Lumens, and SMD3528 is equal to 5 Lumens.
- The density of the installation of LEDs. The higher this density, the brighter the illumination is.
- If to speak about power, then for main lighting it should be at least 14.4 W / m, and for local - no more than 10 W / m.
- Power Supply. Here, the power and type of the power source are estimated. To pick up a tape for this indicator, calculate how much energy LEDs consume and add a 20% power margin here.
- Build quality. This means that it is better to look more closely and see exactly how the LEDs and resistors are soldered.
- Degree of protection. There are such options - silicone and silicone. And the first option is used on the street and in places with high humidity.
Of course, look at the brand - which producer, how many on the market, what his reputation is. Evaluate the design of the tape, and the availability and adequacy of the price.
LED strip installation on the ceiling with your own hands:
calculations If you decide to install a multicolored LED tape, note that there is a controller there, it switches the colors, and the diameter adjusts the brightness.
To connect the circuit, a power supply unit is required, which performs the task of the step-down transformer. It is very important to calculate the power of the device.
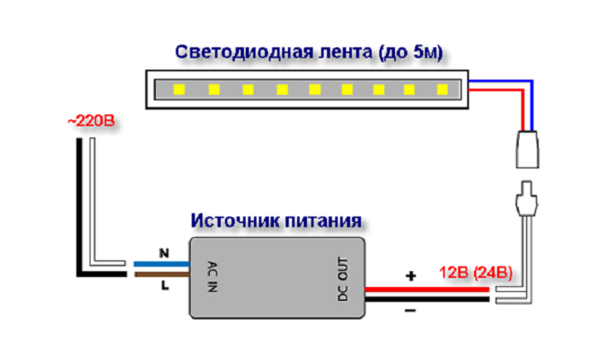 Connection of the LED system to the electrical network is carried out through a special power supply
Example: It is necessary to correctly calculate the power of the step-down transformer for a 5 meter tape SMD 3528 with a power of 9.6W.To do this, multiply the 5 m by 9.6 W and get 48 W.True, this will not be enough, since we need a stock in this situation. Therefore, the correct ratio is 1.25.Simple mathematics, and it turns out that 1.25 times 48, it turns out 60. Therefore, the power supply is needed at 60 watts.
How to mount the LED strip on the ceiling
To install the tape, follow the instructions step by step.
How to mount the tape:
- First, determine the length of the LED strip, if necessary, trim the strips to the required value;
- If necessary, cut the ribbon to special ready-made tags, so as not to damage the contacts;
- In the case of a color ribbon, first connect it to the controller, on its connectors there are labels for the color of the wires;
- R - means red, G - green, B - blue, for black wire the terminal is designated either 24V or 12V;
- After that, connect the controller to the step-down transformer, the main thing is not to allow errors with reverse polarity, otherwise the tape device will simply burn;
- Assembled circuit connect to the network 220 volts, check the correctness of the assembly;
- If everything was done correctly, you can finally glue the tape to the ceiling by first unplugging it from the controller.
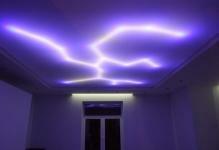
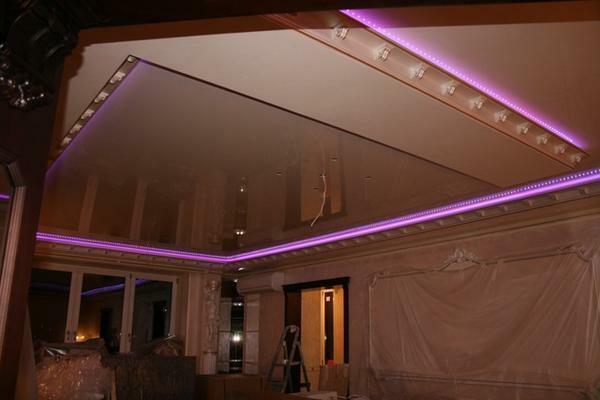
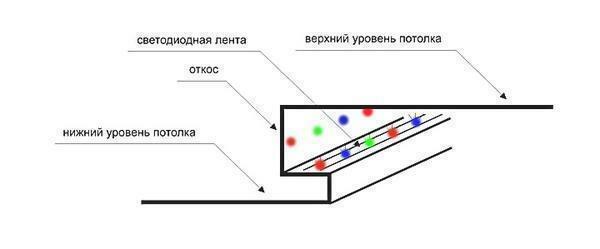 Schematic diagram of contoured and directional illumination in the suspended ceiling It happens that the quality of the controller leaves much to be desired, in this case, it can be soldered before the tape is embedded. The wires from the connectors are suitable here.
Where to attach or glue the LED strip
There are three places for attaching the tape - a ceiling cornice, a concrete ceiling or a niche on a multi-tiered structure.
Since this tape has an adhesive base, it is very easy to attach, you simply remove the protective layer, and it remains only to fix the tape to the right place.
Be sure to prepare the surface so that the tape is snugly seated perfectly, and could not then move away. For example, for an ordinary concrete ceiling, it will be sufficient to level, putty and primer. Ceiling niches are prepared the same way.
Metal and gypsum boards must be insulated with a special material or film.
LED strip mounting for tension ceilings( video)
Starry sky LEDs
But for the popular "starry sky" backlight, the ribbon does not work. Although an unscrupulous seller can convince you otherwise. No, we need separate LEDs.
And here there are important operational issues:
- Many LEDs do not need to be connected to a 220 V network, the logic of comparison with flashlights, where 3 diodes glow from 6V will be wrong;
- LEDs simply can not withstand the reverse voltage, which after straightening will be 310 V, they will just break through and there will be a short circuit;
- The power supply can be calculated by the number of LEDs, 10 watts per 100 LED, and the extra power to the power supply will not hurt;
- Usually for the "starry sky" enough 20 diodes;
- Together with the power supply, get a controller and a breaker for 5-8 sections of the diodes, in which case you will get real flashing asterisks.
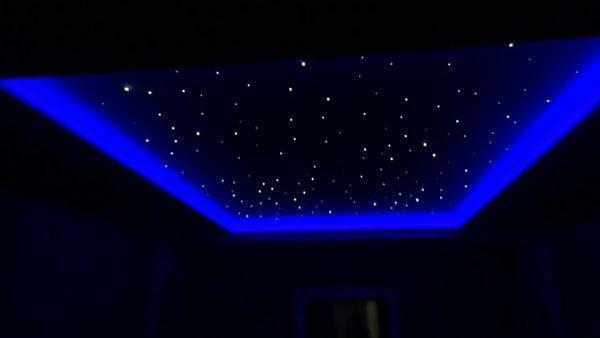 Using LED lighting systems, it is possible to simulate a starry sky on a false ceiling
Do not forget to observe the polarity during soldering of individual diodes. The output of the positive of the diode is always longer, besides it is indicated by a key. The conclusions are easy to break, be careful.
And for each output you need to pull an insulating pipe, which is called a cambric. Otherwise, there will always be a risk of short circuits after installation.
Installation of the "starry sky" is very simple - they are simply glued to the ceiling with building silicone. And then adjust them so that the light does not fall sideways. But this is about the stretch ceiling.
Installation instructions for the "starry sky" from LEDs( video)
In gipsokartonnom also have to cut an extra plate for the ceiling niche. It drills holes exactly in the number of diodes, and on the front side everything is closed with a translucent plate. The electrical part is assembled and the whole structure is built into the ceiling niche. LED strip is beautiful, modern, unusual, and affordable. Fast and inexpensive, but the effect is stunning and the atmosphere in the room is soft and cozy.
Successful work!
LED ribbons ceiling illumination( photo)