 Reliable electrical wiring in the apartment - a guarantee of safety for its occupants If you undertook a major overhaul in an apartment, you need to conduct the wiring before finishing work. After installing large turns at a certain distance, you need to hide the electrical wires. Various fixing materials can be used for this. Before carrying out the work it is desirable to get an indicator screwdriver, a voltage indicator and a multimeter.
-
- Chandelier and three wires from the ceiling
- Chandelier 2 wires: installation diagram
- How to fix the cable to the ceiling
- Posting by floor or ceiling: which is better
- The gasket is made on the ceiling in the apartment: Step by step instruction
- Wiring options for ceiling wiring( video)
Chandelier and three wires from the ceiling
Installing a three-wire chandelier on the ceiling is quite simple. First you need to determine the purpose of each wire. We do this using the electrical circuit of the device. Usually a white wire is a phase, blue is zero, and green is a ground. If you do not have an electrical circuit, you can use a multimeter.
Do this in the following order:
- First, set the multimeter to the "continuity" mode.
- Then short-circuit the dipstick. Remove the light bulb from the chandelier.
- Determine the location of the phase and spring contacts.
- Find the zero wire. To do this, you need to install a multimeter probe on the side contact of the cartridge. Touch the bare wires with the second probe. When you touch one of the wires, you will hear a beep. It is this wire that will be zero.
- Determine the phase wire and the number of circuits using a multimeter.
 Before connecting the chandelier, you need to determine the phase wire using the
 meter. If the chandelier has only one circuit, the third wire will be grounded. In order to verify this, you need to attach one probe to the metal part of the chandelier, and the other to the 3 wires.
The installation of the chandelier is carried out in the following order:
- First you need to turn on both keys located on the switch.
- Touch the ends of the wire with a voltage indicator. When in contact with the phase conductor, the lamp on the indicator should light up.
- Mark the phase wires. To do this, use the marker.
- Disconnect the circuit breaker and check each wire separately.
- Connect the phase cables of the chandelier to the phase cables of the wiring. Do not forget to connect the null wires. For this, it is best to use a terminal block. Make sure the chandelier is working. This completes the installation.
Chandelier 2 wires: installation diagram
If two cables are sticking out of the chandelier, then it can be attached to the ceiling in several ways. Everything will depend on how many cords stick out directly from the ceiling. Before starting the installation, check that you have not damaged the wires.
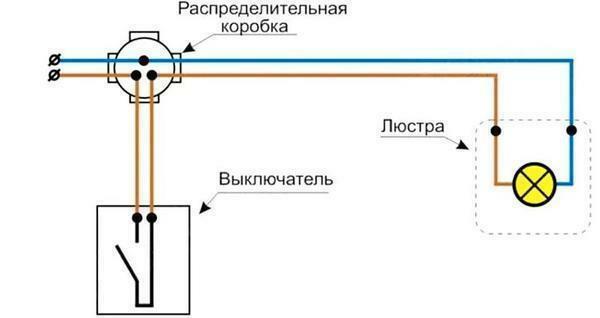 Chandelier connection scheme
If two wires protrude from the ceiling and chandelier, proceed as follows:
- Connect the cables using the terminal block. Do not forget to pre-determine where the phase is and zero.
- Determine where the junction box is located.
- Connect the zero cable, which is located directly in the junction box, to the zero wire that comes out of the lighting fixture.
- Connect the phase cable to the chandelier and switch.
Remember that the phase wire must be opened using a switch. In addition, the phase must be connected directly to the central contact, which is located in the electrical cartridge.
If there are two cords on the chandelier and three on the ceiling, then you need to first determine the type of each wire. As a rule, 2 of them are phase ones. The third wire must be the conductor. If you have 3 or 4 cords on the chandelier, you first need to fix all the zero wires, after which they must be carried directly to the ceiling cable.
How to fix the cable to the ceiling
Most often, the wiring is fixed to the ceiling using a tray mounted on the bracket. This fastening is reliable and easy to install. If the wiring is attached using this method, then you need to place several shelves in parallel with each other. The bracket must be secured to the ceiling. To do this, use the bolts, which must first be screwed into the anchors.
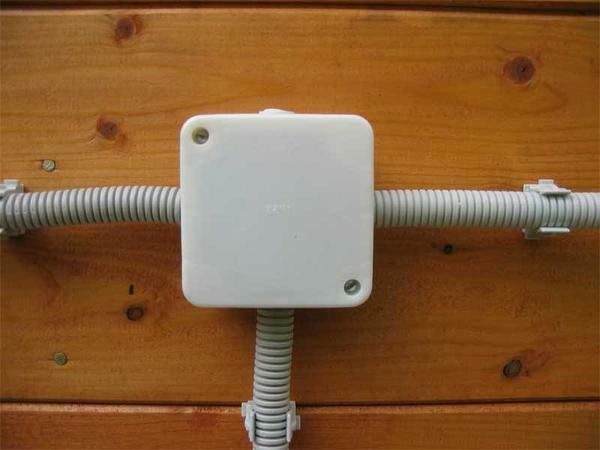 If the wiring is installed in a humid room, use a special corrugated pipe
to fix the cable to the ceiling. If you want to use the simplest option, you can attach the cable with a stud. This fastener should be installed strictly in the middle of the ceiling. This method of fastening is useful for creating several levels.
If the mains wiring is laid, it is secured using a cable tray. Usually such products are made of steels. However, in some cases, the cable tray is made of galvanized wire.
You can also fix the cable to the ceiling with:
- Corrugated pipe. Experts recommend giving preference to corrugated, if you have suspended ceilings with a galvanized system.
- C-shaped suspension.
- Punch tape.
Posting by floor or ceiling: which is better
Laying the wiring through the floor is more labor-intensive than laying on the ceiling. However, this design has several advantages. First of all, the cables will be reliably hidden and protected from corrosion. In addition, the risk of damage to wiring during installation work is excluded.
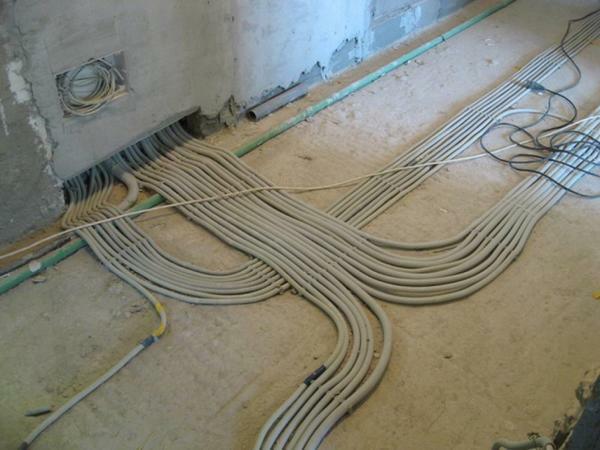 The main disadvantage of laying electrical wires around the floor is the difficulty of performing repair work as a result of wiring damage.
Flush-mounted wiring algorithm:
- The wiring is first carried out from the electrical panel.
- Do in the walls of the strobes.
- Place the lags on a concrete base.
- Pull out the wires in a special protective channel.
- Ground the cable duct.
- Connect the wires to the junction box.
- Secure the cable channels in the shroud.
Remember that laying conductors without the use of a cable channel can only be done if you seal the cable with a special solution. After completing the work, do not forget to check the electrical characteristics of each circuit.
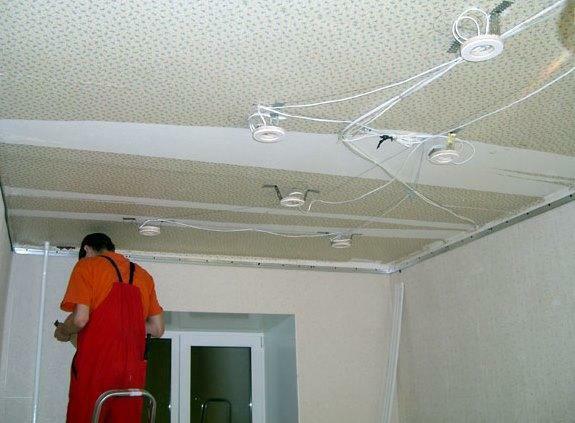
The gasket is led on the ceiling in the apartment: step by step instruction
In order to connect the wiring, you do not need to call an electrician. You can install the electrical wiring in the house on your own. First of all, you have to decide how far from the ceiling the system will be suspended. It is believed that the optimal distance from the wiring to the ceiling is 10-20 centimeters.
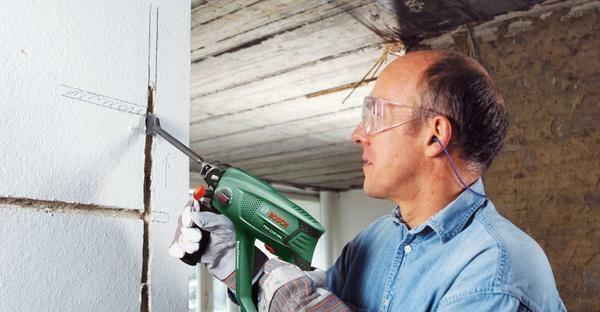 Concealed installation of wiring is carried out by means of wall chipping
If a soft spring of several large turns is suspended from the ceiling, it will be an inductor. Under the influence of the current, it will either stretch or contract. Everything will depend on the direction in which the current moves.
In order to connect the wiring to the ceiling, follow these instructions:
- Mark the wall.
- Identify the locations of the distribution boxes.
- Attach the handset to the ceiling.
- Pull out the cable.
- Connect the cable strands by soldering.
- Insulate the wires.
- Ground the wiring.
- Check the integrity and operability of the structure.
Wiring options for ceiling wiring( video)
To install the wiring to the ceiling, you need to select suitable fixing materials. When installing cables, take into account the material of the ceiling lining. For example, if the ceiling is made of concrete, then use corrugated tubes. In the case where the ceiling is wooden, it is advisable to use steel pipes. If desired, conduct the posting on the floor. This method of laying is the most time consuming and time consuming.


