 Gypsum board - the main element necessary for the installation of basic structures It is important to pay attention to the finish of the ceiling when repairing. Qualitatively executed ceiling will look stylish and beautiful, and the coating will last a long time. A gypsum cardboard box on the ceiling can be made by hand. In this case, serious preliminary preparation of materials, tools, as well as instructions, which will help in step-by-step installation of the ceiling, will be required. The design of the box can be made very diverse. It will hide all the unsightly elements of the original ceiling and wiring.
-
- Plasterboard box on the ceiling: structural features
- Height of the gypsum board on the ceiling: correct calculation
- How to make a gypsum board on the ceiling on its own
- Gypsum board installation technology( video)
-
The okraton has a lot of advantages. With it, you can hide all communications and wiring. He also hides defects on the ceiling. The box allows you to install lighting fixtures of various types.
In order to proceed with the installation, it is first of all necessary to choose a drywall. The basis for the production of the material is gypsum, along which the paper is located.
Paper performs several basic material functions.
Paper layer function in drywall
- Protects gypsum;
- Supports stretching;
- Allows you to keep the sheet tension internally.
 Before starting work, you should familiarize yourself with the installation rules for the
. These functions are used when working with this material, which in turn is divided into several types.
Types of plasterboard
- Normal. It is used for finishing dry rooms for finishing walls and ceilings.
- Waterproof. It is specially impregnated with a protective mixture. It does not allow the appearance of fungus and mold, and also has water-repellent properties.
- Fire-resistant. The material contains effective refractory mineral fibers and additives.
When choosing a material, it is important to pay attention to its quality. The acquisition of poor quality drywall will lead to unnecessary waste of funds and the inability to use the material for its intended purpose.
The height of the plasterboard box on the ceiling: the correct calculation
When choosing a drywall it is important to take into account the dimensions of the sheets, because for each type of surfaces they have different characteristics and requirements.
When installing the box, it is important to adhere to the correct dimensions of the structure. This is due to the difficulty of installing the box.
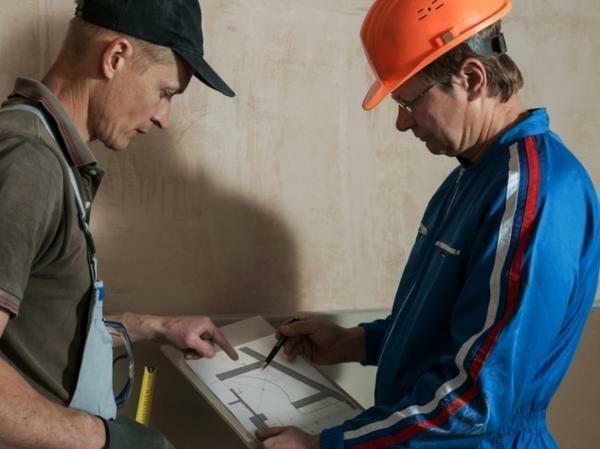
 For the execution of the drawing of the future product, it is necessary to measure the dimensions of the dwelling and take into account the wishes of the customer.
. For each room, original plans of structures are developed, which should be adhered to. The following indicators can serve as an example of settlement work.
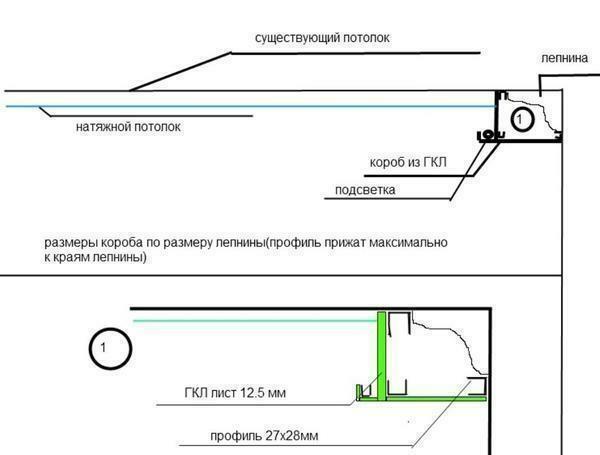
Height calculation parameters
- The height from the bottom of the duct to the ceiling must be no less than 120 mm;
- The depth of the box is 100 mm.
- The lower part of the box can be variable, its length does not affect the installation of the structure.
After calculating and verifying the height, you can directly proceed with the installation of the gypsum board box structure.
How to make a gypsum board on the ceiling yourself
It is necessary to mount the box yourself very carefully. It is important to follow all the regulations and installation rules, as this will depend on the success of the entire installation.
Rules for installing plasterboard boxes:
- Make sure that the surface of the ceiling is level, without defects and changes. If necessary, plaster and plaster the surface.
- Use a special aluminum profile only of the factory design. Material for the profile must be of high quality and tested, use of other materials is unsafe.
- Apply labels for the gypsum board to make the necessary holes for the lighting fixtures.
- Attach the sheets to the frame and plaster.
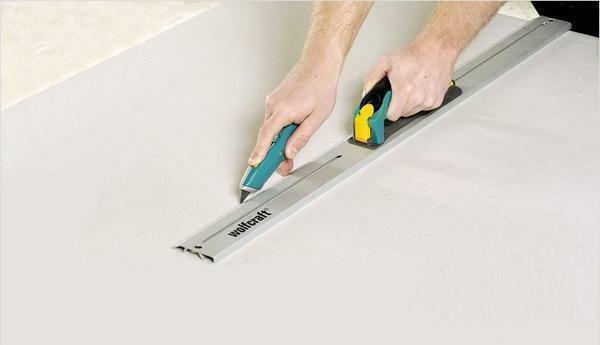 Before starting the installation, you should prepare the required GKL sheets of the required size
. When an approximate plan is planned, you can start installing the plasterboard box.
Step-by-step actions:
- Make markup using a pencil. An important role is played by the width of sheets of plasterboard.
- Assemble the guide profiles. Holes in the wall are pierced around the perimeter. The design contour should first be applied to the floor, after which you transfer the drawing to the ceiling. The markup must be accurate.
- Fasten the screws to the contour of the metal profile. To do this, you need to drill holes, after hammering in them dowels.
- Move the structure to the ceiling surface. Drill holes and plug dowels in them.
- Carry out the measurement control.
After this you should start installing the suspension.
It is important to pay due attention to fastening the guides. They must be on the same level as the entire length of the structure, and they must not bend. For work you need to use only the best materials.
Installation of hangers must be carried out, strictly following the instructions.
Drywall installation technology( video)
Suspension stages
- Cut the suspensions with metal scissors. It is the size of the hangers that will determine the size of the drywall box.
- Secure the cut hangers on the guides using self-tapping screws.
- Attach the guide profile to the suspensions.
- Attach the wiring to the ceiling. Secure the wires.
- Attach metal guides. To do this, cut the cross guides. Attach them to the guide using self-tapping screws, perpendicularly.
- Cut out the required length and width from the sheets. Finished elements to attach to the bottom of the box.
- Assemble the structure, fix it with screws.
Installation will be quick and easy if preliminary calculations and measurements are accurate. Professionals advise to carry out all actions in strict sequence, strictly observe the safety procedures and use only high-quality materials.
How to properly fill the ready box
Putty - finishing the box of gypsum board. It can make the surface ideal, and the wrong actions can spoil the entire appearance of the finished structure.
Required tools:
- Spatula basic;
- Spatula auxiliary.
Two spatulas will be the main working tools.
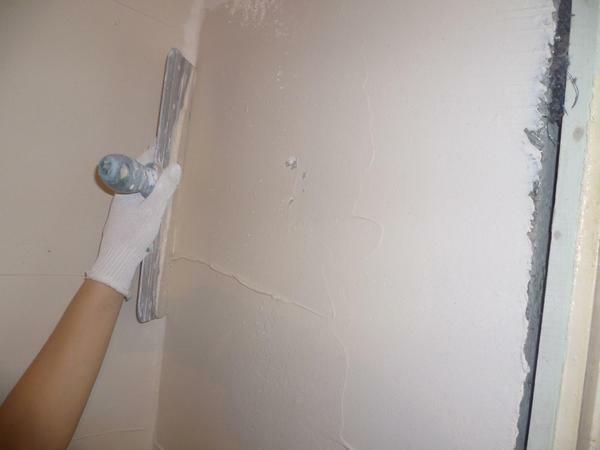 Final installation phase - thorough priming of the
In the process of work, putty knives should be in the hands. This will ensure a permanent transfer of putty on the main spatula. It also allows you to remove excess filler from the ceiling surface.
With the help of a narrow spatula it is easy to apply the main layer of putty, and even it should be leveled with a wide spatula.
Steps of puttying the box:
- Using a perforated corner, form a geometric protrusion.
- Apply the mixture on both sides of the outer edge, which is located closer to the edge of the structure.
- Trowel with a large, and then a fine mesh.
When performing the putty at all stages of work, it is important to use mixtures of the same manufacturer to avoid incompatibility, and as a result, flaking the surface.
Gypsum board plasterboard( video)
Installation of a plasterboard box is a practical solution for finishing the ceiling. When choosing a drywall it is important to consider the type of room in which the repair will be carried out, its purpose and the level of humidity. The materials used must be of the highest quality, the manufacturer must be tested and be in demand among consumers. Mounting actions must be performed in strict sequence - this will ensure the quality of the installation.


