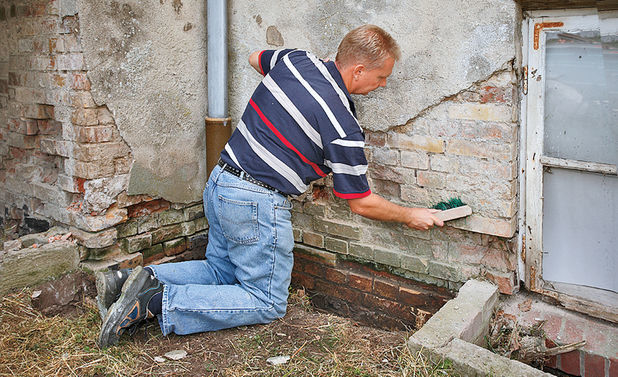
Repair the facade of the house with your own hands, you must start by sealing the existing cracks in the facade of the house. If there are no such cracks, then you are lucky, and if not, our article with photos and videos will help you! Where to begin? First, we remove the top layer of the old house finish, in order to determine the size and depth of the crack. After "picking" the material on the sides of the slit for better further adhesion to it with cement. We shall ground.

Most often it is necessary to fill them with cement mortar, and top it with reinforced putty, but you can fill it with foam. If there is any doubt about the depth of the crack, it is better to strengthen it with a reinforced mesh. Using a putty knife, apply glue, and glue the net on it( make sure that the grid does not protrude and snug tightly).When a fault in the brickwork, you need to shift the entire section of the brick, but if you plan to putty the masonry, the principle remains the same.

The repair work is finished, go to the preparatory. It is necessary to clean the walls of the remnants of "antiquity".The next step is priming. Using a roller, we process the walls of the house at least twice. Primer, like all subsequent materials, we take for outdoor work( for example, acrylic).After complete drying, it is necessary to level the walls and corners. To align the corners, we apply corners to all parts of the house that require it. With the help of plaster, we straighten all the flaws of the house. The thickness should be about 2 cm - not less. After drying, we skim. Now the facade, as in the photo, is ready for applying decorative plaster or plaster for painting.

Uncomplicated repair of the facade of a private house with your own hands with the help of plaster "bark beetle": mix the solution in a bag, as indicated in the instructions to your plaster. Consider the nuances: the water should be 15-20 degrees, you need to pour the mixture into the water( not vice versa), after stirring, you need to wait 2 minutes, then move again. Mix a small amount. If you do not have the experience, to achieve a neat result you will be long, so the solution will dry up. The application layer should correspond to the size of the fractions indicated on the label. Using a metal spatula, we apply plaster. Each row should be applied close to each other.

For convenience, you can, with the help of a level, draw a small area and work in parts. To do this, glue paint tape on the border, reach it, after drying( about a day), glue and glue on the back and apply the same thickness of the plaster layer. To check the degree of dryness, we use a plastic float - if it sticks - is not ready. The last stage is mashing. It is carried out vertically, horizontally or by movements in a circle. The grater does not need to be heavily crushed and create "waves."After you have wiped the first row, immediately proceed to mashing the second. To smooth the joints, spray them with water. Do not divide the entire process for lunches, smoke breaks and the like - it is advisable to do everything at once. The most favorable season is spring or autumn and windless weather.

For clarity, you can see below video repair facade of a private house with your own hands .