Every housewife prefers that the kitchen is equipped with modern and convenient technology, which saves cooking time. Engineering thought of the largest manufacturers of household devices( Samsung, Zanussi, Bosch, Elektrolux, Hansa) does not stand still and with each year there are more and more advanced devices.

connection of the hob to the electrical network
To be sure of reliability and safety, you need to know how to properly connect the electric stove or oven, what are the features and key points:
- first , hooking the hob to the mains must necessarily provide a protective earth. Find out whether it is or not, you can by counting the number of contacts on the plug or in the socket for the electric stove. Their number must be odd.
For example, for a 220V network, the number of contacts is 3, for a three-phase 380V-5 network.
The grounding pin on the plug may look like a pin, slightly longer than the others, or metal plates on both sides of the plug housing.
In electrical wiring of old buildings or apartments it was not always provided for grounding, so you will have to lay a new electrical cable from the switchboard. This wire must be connected to a common network using a residual current device( RCD) or a circuit breaker;
- second , if the maximum power of the electrical installation is more than 3.5 kW, it is necessary to lay a separate supply cable, since the standard 220 V wiring in the apartments can become very hot and fail. A small oven can be connected without installing a separate cable;
- third , this cable should not be loaded with other electrical appliances and a circuit breaker must be installed in its circuit( to connect an oven with a power of 3.5 to 5 kW - an automatic machine for 25A, and for more powerful plates - 32A).
Algorithm for connecting the hob and oven
How to connect the oven or stove to electricity yourself? In most new or newly renovated apartments, separate cables and a hob outlet are already installed and it remains to purchase a suitable plug. However, there are still kitchens without these devices.
The general procedure for this situation is as follows:
- Check the voltage for which the home appliance is designed and which connection diagram is recommended by the manufacturer. Such information can be obtained from the user's manual( operating instructions), and also, having examined the connection point on the device itself.

hob and oven connection
Hobs can be designed for connection to the network of 220V and 380V, and household ovens - at 220V.The terminals for connecting the power cable from the factory are already mounted with jumpers that implement the circuit for connection to a 220V socket.
Conventional kitchens in multi-apartment buildings do not have 380V network outputs( this contradicts the current SNiP), but can be equipped with 220V outlets.
- Carry out installation in the electrical panel of a separate automatic network protection( Filling Station) and lay a separate cable from it. The current rating of the gas station and the method of connection depend on the expected load.

how to connect an electric cooker yourself
To connect electrical installations with a power not exceeding 5 kW, this value will be 25A, and the cross-section of the cable core is not less than 2.5 mm2.In the case of using more powerful devices - 36A or 40A, the cross-section is 6 mm2, respectively.
Read more about cable sectioning here
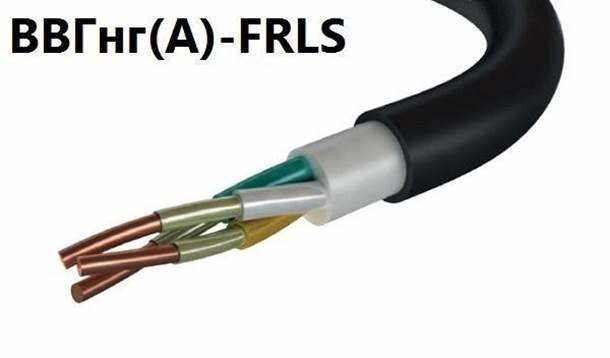
The cable mark should be chosen non-flammable, double insulation, moisture-proof, for example, VVGng. To connect to a single phase, the cable must contain 3 cores, a 4-wire cable is required to implement a two-phase circuit, and a 5-wire cable for a three-phase connection.
- Install the outlet and connect the plug with the cable. How to choose the correct plug and socket, will be described below.
Some electricians prefer to connect hobs and ovens through terminal blocks fixed to the wall without using a plug and socket. This method is not entirely convenient to use. For example, if you need to dismantle the hob, you have to climb into the terminal box, and when you install everything, switch again. With connectors such as plug-socket, this procedure is much easier.
How to install the hob. Installation method
Cooking panels - a kind of built-in household appliances, respectively, before you connect the stove, you need to understand the technology of this very "embedding", otherwise - the installation of the product in the kitchen cabinet.
To perform the task yourself, you need a small set of hand tools:
- electric drill;
- electric jigsaw;
- screwdriver;
- knife;
- ruler, square, pencils and cardboard.
The mounting is carried out in three stages:
Marking the future cutout for the panel. It is necessary to accurately measure the width and length of the installation dimensions with a ruler.
It is most convenient to produce a pattern that can be easily made from cardboard. In some models, such templates can be included in the package.
Draw the lines of the future cut with the ruler and the square on the table top. You can make a spacing, not more than 1 mm, to ensure easy entry of the panel.

Installing the hob in the cradle
Cutting out the recess for installing the panel. You need to start by drilling holes in the corners of the marked rectangle. The diameter of the drill must not be less than 9-10 mm. Type of drill - for wood or metal.
The next step is sawing with a jig saw. The saw blade should have a shallow tooth and be designed for finishing. To prevent the formation of small chips, the place of the future cut can be sealed with a paint tape.
Fret saw blade into the drilled hole, press the sole firmly against the table top and then start the cutting, gently holding the jigsaw along the marking lines at a low speed.
Panel mounting and mounting. In the completed window, insert the cooking plate, and seal the work surface with the countertop with a special sealant or sealant on a silicone base. If necessary, the landing window can be expanded with a file or repeated cutting of the jig saw.
Bottom the panel securely fasten to the table top with the clips from the kit. After fixing, wipe off any excess sealant or cut off the protruding parts of the seal with a knife.
How to implement the connection scheme for the hob and oven
According to the current building codes and regulations( SNiP), the connection of the electric stove must be done only by radial method. In other words, a separate cable, stretched from the main switchboard, must be allocated to the cooking surface. It is absolutely forbidden to install other sockets and electric consumers on such a cable.
Diagrams connecting the oven and cooking surfaces in the apartments provide for the use of only one phase of the 220V network.

connection diagram of the
hob If the power input on the terminal board of the cooker is initially assembled for use in a 220V network, it must be remounted for operation with a three-phase 380V network. To do this, use a screwdriver to loosen the terminal clamps and remove the jumpers. As a result, there should be 5 connection points.
Also, for a more even load distribution, it is possible to mount a circuit using 2 phases, zero and ground.
In the wiring diagrams in the operating instructions, the phases are designated as 1L, 2L, 3L, zero conductor - N, and grounding - "ground".

It happens that some manufacturers do not install terminal blocks, but draw out colored wires from the appliance that can be connected together.
To determine the purpose of the wires, remember that ground wire is yellow, with a longitudinal green stripe, the color of the "zero" is blue or blue, the "phases" are painted in any other color.
The panel to the radial cable can be connected through the terminal box box or the socket.
There is no difference in the schemes and methods of connecting fixed plates and embedded surfaces.
The plate to the wall outlet or wall box is connected via a power cable. If this is not included in the product, then it is purchased separately, guided by the rules for selecting the cross-section and number of cores mentioned above. A plug is mounted on the same cable.
Video of connecting the hob to the
network What should I install the hob for the hob and the oven? Tips for choosing
All sockets designed for a current strength of more than 25A are considered to be power. By the method of installation, they are divided into:
- external, invoices. Mounting of sockets of this type is made directly on the plane of the wall. They are easy to use when laying cables open way. In addition, these sockets are most safe for installation in wooden houses and in premises with high humidity. It is this type of outlet that has the best moisture and dust protection;
- internal, installed in special podrozetniki, mounted in the thickness of the wall. They find the greatest distribution in brick and panel houses, when decorating walls with sheet materials, such as GVL.
By purpose and design features, the sockets are divided into:
- designed for operation in single-phase networks 220V;
- designed for operation in networks with three phases, 380V;
- having a separate contact for earthing or without;
- with clamps, securely holding the connection to the plug. Fixation can be push-button or threaded, with the help of a union nut;
- with integrated devices, eg RCD, trip time relay;
- with curtains covering the sockets of the outlet. It is very convenient to use this type in families where there are small children. In such an outlet it is impossible to insert any other object, except the plug.
Before buying a socket for an electric stove, it is necessary to make a choice, which should be based on the following criteria:
- of the calculated maximum current. For ovens( capacity up to 3-3.5 kW), the values in 16 - 25A are sufficient, for a plate with a power of up to 7 kW - at least 32A, and for more powerful installations - 63A.In such sockets and corresponding forks, contact pins are thicker, the insulator material is more refractory;
- number of working phases. For connection to 220 V, a socket and a plug with three contact groups are used, and in 380V networks - with five;
- degree of protection. The protection of electrical appliances from impacts is indicated by the code IPXX, where XX is the number.
The first encodes the degree of protection from penetration of solid objects into the shell.
The second is the anti-penetration code for liquids. The higher the number, the higher the protection class.
For example, 00 - the protection is missing completely, i.e. the contacts are open. And IP68 - the maximum degree of protection, in which the possibility of getting inside the outlet and the plug of dust and water( even with complete flooding) is absolutely excluded.
The cable is connected to the plug and socket in several ways.
The first way - the cable core is released from the insulation by 0.5 cm, is inserted under the clamp and clamped with a screw. The second way is more reliable: the conductor is cleaned from the insulation by 1.5 cm, wrapped around the ring around the screw and pressed. The area of contact will be greater, the contact is more reliable.
The socket or terminal box should be attached to the wall near the plate, securely, using screws or screws, in such a way as to fulfill the following conditions:
- on the socket or the box, do not get liquid from the plate or sink;The
- socket( box) should be accessible to an electrician, but be hidden, do not mind.