SHARE
IN SOCIAL MEDIA
The pediment is a rather significant element of pitched roofs, which is endowed with a protective and aesthetic function. To the smallest detail, you should think over the options for its arrangement even at the design stage of the structure. Next, we will talk about the methods according to which the roof gable is sheathed and built, and all materials and technologies existing today will be presented.

A pediment is an element of pitched roofs, which is endowed with both a fencing and an aesthetic function.
Content
- 1 What is a pediment and what is it for
- 2 Pediment: the finishing touch to building construction, variety of configurations
- 3 Gables of houses: photos of design variations
- 4 Roof pediment: basic approaches to self-creation
- 5 How to make a gable roof pediment: theoretical aspects of construction
- 6 Pediment of the house: useful practical advice for performing calculations
-
7 Roof cornice: step by step instructions for shaping
- 7.1 How to make an ebb on the pediment: the subtleties of work technology
- 7.2 Aerated concrete pediment: a few secrets of masonry
- 7.3 Brick pediment: basic steps of creation
- 8 How to make a visor on the pediment yourself: a quick guide
- 9 Gable cladding: variety of materials used
-
10 How to close the gable of the roof of a house: a few more finishing options
- 10.1 How to sheathe a pediment with siding: detailed instructions
What is a pediment and what is it for
What are roof gables? These are sections of the wall, which are bounded on the sides by slopes, and at the bottom by a cornice. When it comes to gable roofs, it is worth noting that they are often presented in the form of a triangle or pentagon.
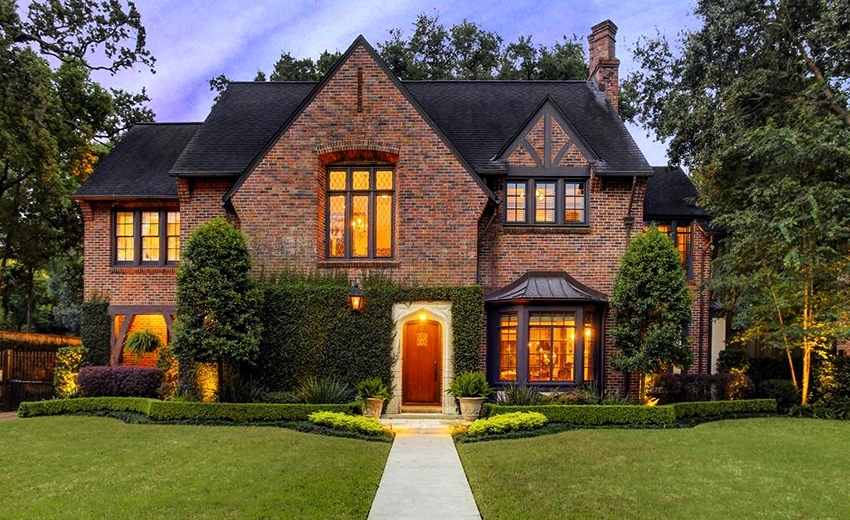
The gable roof gable represents the shape of a triangle or pentagon
It is interesting! In some sources, under the gable of the roof, they mean only a part of the wall under the slopes, laid out simultaneously with the main walls by the masonry method. In relation to wooden structures, the term "gable wall" is often used.
As for the need to erect pediments, it is fully justified by the most important functions with which they brilliantly cope:
- Protecting the attic rooms of the gable roof from the wind, as well as precipitation in the form of rain and snow.
- Maintaining a comfortable temperature. A gable roof involves the equipment of a residential attic room, which simply needs to be insulated. Even if it will not be residential, the unfinished gables will turn into a "black hole" for the heating system, bringing the figures in the bills of the owners of the house to exorbitant values.
- Providing additional rigidity to the roof structure. The pediment creates an auxiliary support for the rafters, partially unloading them. This, in turn, has a beneficial effect on the level of reliability, as well as the durability of the roof, especially if the house is located in an area characterized by strong gusts of wind.
In addition, the gable of the roof of the house gives the structure a spectacular appearance. Thanks to decorative materials, you can easily renew the look of an aging building without spending a lot of money on it.
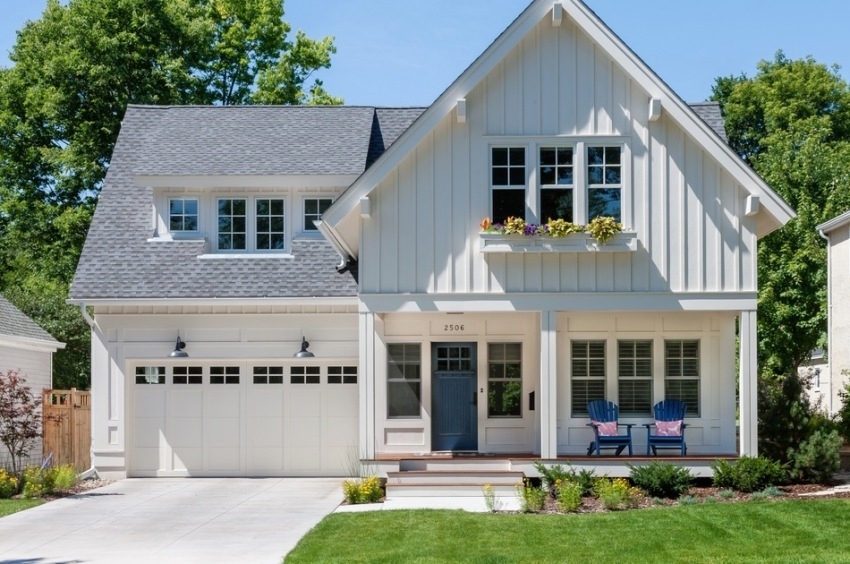
The gable also provides additional rigidity to the roof structure
Pediment: the finishing touch to building construction, variety of configurations
Although in the minds of most people, the pediment is associated with a triangular or pentagonal element, these two forms of design variations are not at all limited. Photos of gables amaze with a variety of configurations. Modern architecture presents the following types:
- Keel-shaped. In this case, the name speaks for itself. Despite the elegance, such a solution is rarely used in modern architecture, since such a roof element smells of antiquity.
- Semicircular. This option, like the previous pediment, is currently also practically not used in construction. However, the reason for the low popularity lies in the complexity of such a design.
- Trapezoidal. It resembles a trapezoid, the large side of which is located at the bottom. This design has found wide application in the construction of semi-hip roofs.
- Triangular. The presented type is perhaps the most common today. If the roof is symmetrical, the triangle, respectively, will be equilateral.
- Male. It is made of logs in the form of a triangle and is a continuation of the gable walls' crowns.
- Interrupted. The horizontal cornice of such a pediment is interrupted in order to insert one or more windows.
- Luchkovy. Its shape resembles a semi-oval bow tie. In the case of an increase in the degree of steepness of the bend, it takes the form of a semicircle.
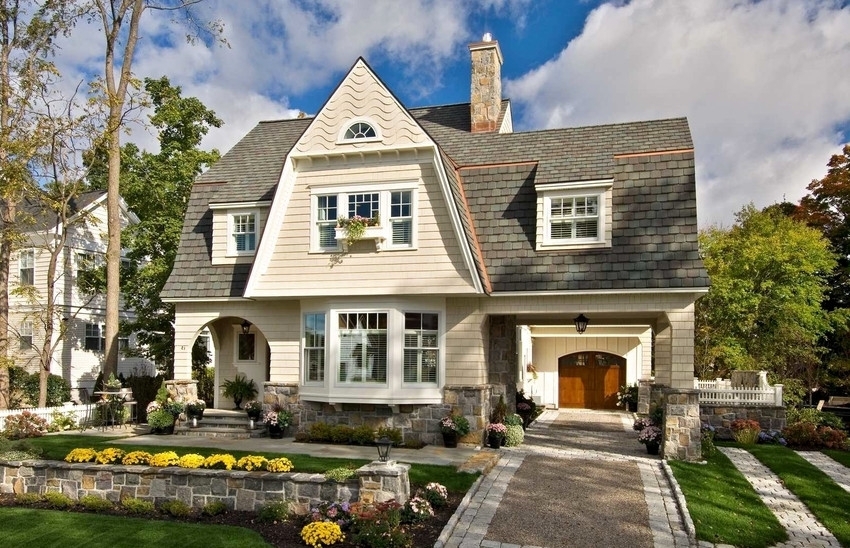
The pediment can be keeled, semicircular, trapezoidal, triangular, bow
In addition, today you can also find stepped structures, the side parts of which are made in the form of ladders, and the roofing is made without creating front overhangs.
Gables of houses: photos of design variations
Today there are many ways of arrangement and options for decorative finishing of pediment planes. Of course, the decision largely depends directly on how the owners plan to use the space located under the roof. However, it is necessary to take into account what kind of materials the construction of the building box and roof is supposed to be.
How to make a roof gable? Often it is performed in the form of:
- prefabricated frame made of wooden slats with laying of a heat-insulating layer and external cladding with clapboard or siding;
- brick or aerated concrete masonry with further surface finishing with cement-sand plaster;
- masonry of a bar or log in the form of a continuation of the vertical part of the load-bearing walls of a log structure.
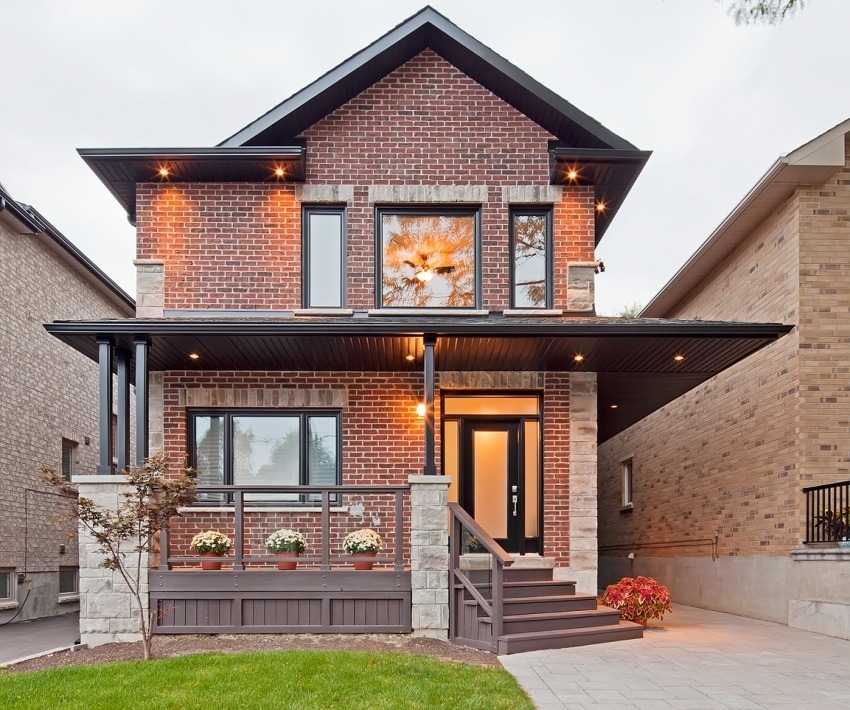
Note! Often, the design of the gable of the house significantly affects the overall appearance of the front of the building. Thus, for structures with complex broken roofs and additional slopes, the decoration of the pediment walls must exactly correspond to the general style of the building.
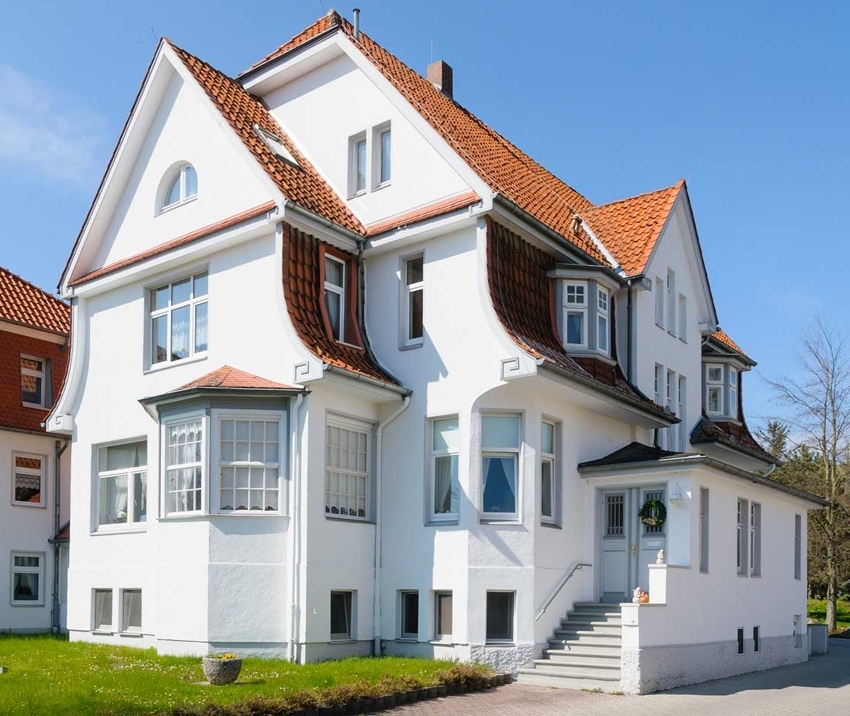
The design of the pediment greatly affects the overall appearance of the building facade.
Looking through the numerous photos of roof gables, you can see that the building is characterized by a very spectacular view, the roof of which consists of 4 gable sections. In the presented case, four triangles or trapeziums become an integral element of the facade part. In this regard, for brick and wooden houses, the structure is adjusted in such a way that visually the masonry looks like a single whole.
Roof pediment: basic approaches to self-creation
Today, in the process of erecting low-rise buildings, three main approaches are used to the issue of the correct design of the gable of a house. Perhaps the main difference lies in the method of erecting and tying the gable vertical walls to the rafters and the roof frame.
For compact one-story buildings, as a rule, pediment elements are produced simultaneously with rafter assemblies according to a single template, which serves as a guarantee of the highest design accuracy. In this case, the installation of a gable roof is carried out, starting with the installation of gables, ridge beams, and only at the next stage rafter pairs and struts are exposed. Due to this, it is much easier to assemble the pediment of the building.
For large buildings, differing in the significant dimensions of the roof slopes, the filing of the gables is performed after the rafters, lathing and all the structural parts of the frame are installed. The more complex the roof structure, the later the gable elements are constructed.
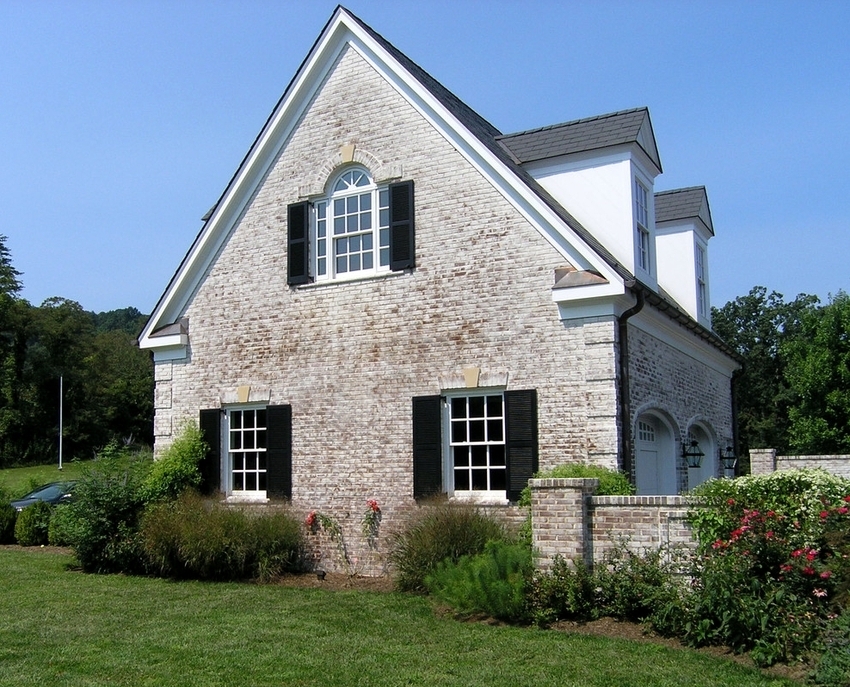
For small one-story houses, gable elements are performed simultaneously with rafter assemblies
Brick buildings can be erected according to the combined scheme. If the plane of the pediment is planned to be closed with aerated concrete or brickwork, it is built until the rafter system is organized.
Note! Pre-designed gables, although they greatly facilitate the process of erecting the rafter frame in the event of strong winds, suggest a rather careful adjustment of the dimensions so that gaps do not form between the masonry and the overhangs due to the mismatch of dimensions beams.
Perhaps the simplest method of assembling the pediment is to organize the frame structure of the lathing from wooden planks or beams, laying insulation, waterproofing layer, as well as filing the pediment with plastic siding or clapboard. It is worth noting that the process of laying insulation on the gable of a building is in many ways similar to the procedure for insulating a roof.
How to make a gable roof pediment: theoretical aspects of construction
Speaking about the sequence of work on the arrangement of the pediments, it is worth noting that it is determined primarily by the material that was preferred. Often the choice arises between brick and wood.
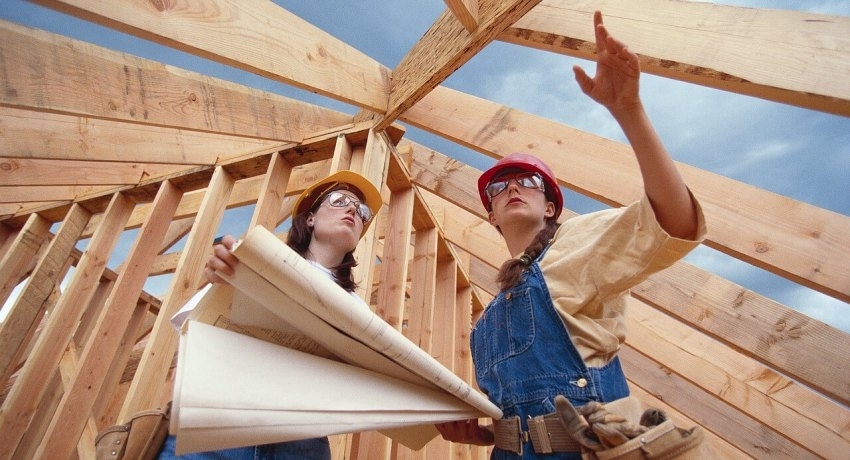
The gable roof gable can be made both before the installation of the roof, and after
You can make half brick masonry with a viscous mortar. To give the material the desired shape, it is enough just to carry out the processing with a saw.
Important! The consumption of bricks per square meter, taking into account the fit, is approximately 35-40 pieces.
In this case, it is preferable to use hollow brick, since its weight is significantly less compared to classical material, which means that the load on the foundation is minimal.
Having decided to use wood, first of all, you should form a frame, and then finish with boards with a thickness of 30 mm. At the same time, plywood, which is characterized by resistance to moisture, is very often used for sheathing the gable of a bath.
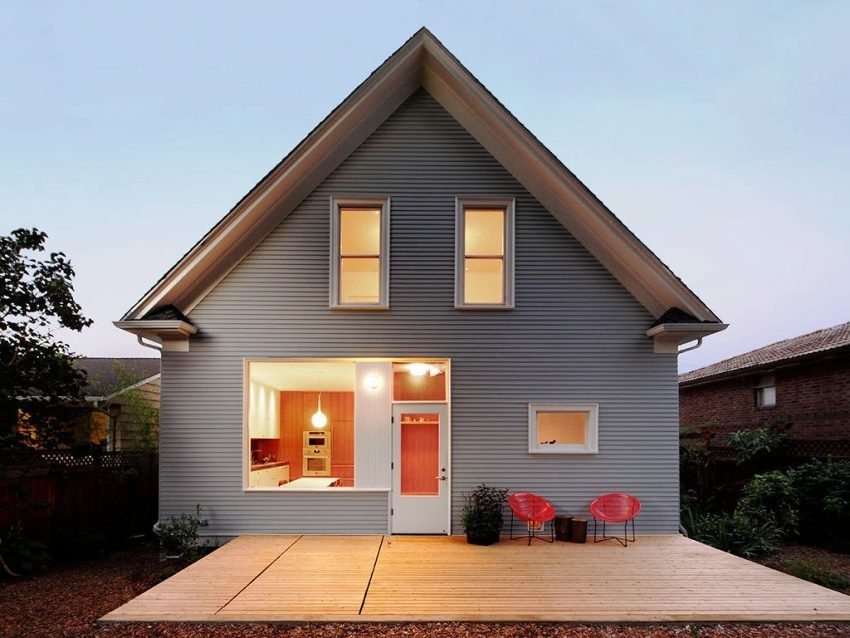
If you turn the attic into a living space, the pediment, like the roof itself, must be insulated
In order to give an attractive appearance from the outside, you can install siding or lining, which will become an excellent protection against moisture and create the effect of thermal insulation.
If it is planned to turn the attic into a living space, the question arises of how to sew the gable roof gable.
Note! Experts recommend using basalt-based mineral wool for this, but if it is not available, standard foam is quite suitable.
To carry out the installation, a frame is formed from the boards. Their width should correspond to the thickness of the insulation. Often, 15 mm is sufficient. After that, on the outside of the pediment, sheathing with clapboard or siding with a layer of vapor barrier is performed, and inside the structure is closed with boards or shields.
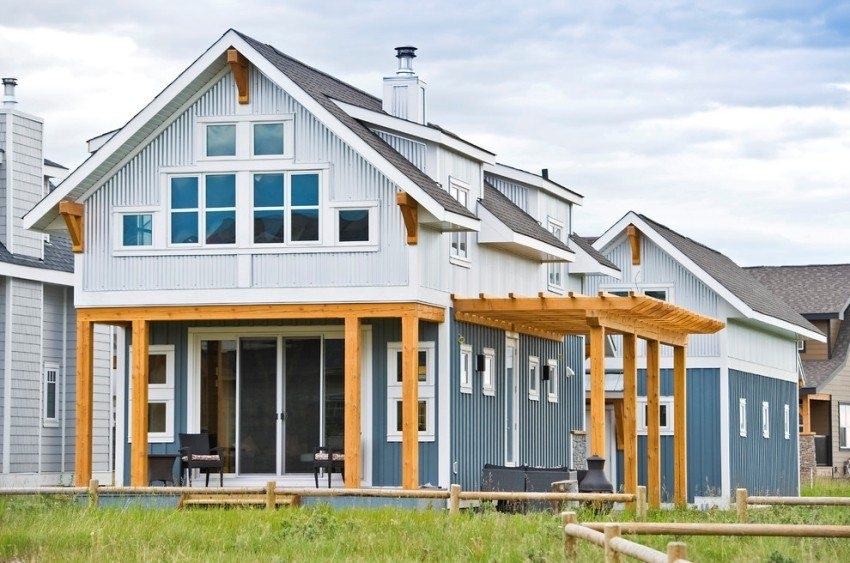
Sheathing the pediment with clapboard or siding is performed in the same style as the whole house
Armed with the knowledge of how to make a pediment, you can create unrivaled comfort in your home by keeping it warm and well protected from wind and rain.
Pediment of the house: useful practical advice for performing calculations
You can calculate exactly how much building materials will be required to finish the gable of the roof, guided by the knowledge of the school geometry course, more precisely, the formula for calculating the area of \ u200b \ u200bthe figures.
Note! To determine the area of a pediment of a classic triangular shape, you should use the formula: S = 0.5 B * H, where S is the area expressed in square meters, B is the width of the structure (length of the base), and H is the height figures.
In the process of calculating the area of the attic walls for the height, it is necessary to take the distance from the overlap of the ceiling of the first floor to the ridge of the roof. In this case, the length of the base should be taken as the dimensions of the wall on which the pediment is being arranged.

Armed with the knowledge of the school geometry course, you can calculate the amount of building materials required for finishing the pediment
The calculation of the amount of materials for a triangular gable is in no way related to whether the roof is symmetrical. The area of the attic walls, presented in the form of triangles, does not change due to the difference in the slope of the roof slopes.
To determine the area of trapezoidal gables of wooden houses, you need to be guided with the following formula: S = C * (A + B) / 2, where S is the area, C is the height, A and B are the length of the bases (walls and roof plane). Thus, the amount of material required to finish a trapezoidal attic wall is the result of multiplying the height by half the sum of the lengths of the bases.
Related article:
House in the English style: following tradition and modern features
Features of the architecture of different eras. Modern classic style. One-storey houses, cottages. Facade decoration. English landscaping.
If the shape of the wall does not coincide with the standard geometric figure, it is conventionally divided into several right-angled triangles, determine the area of each of them, and then sum the resulting values.
Having completed the calculation of the pediment, it is necessary to determine the dimensions of one element of the material, which will act as a finishing one. For this, the value of the length of the sheet or panel is multiplied by the width. The next action is quite predictable: the area of the gables is divided by the area of the material element, thus calculating the total number of units of building raw materials.
If the pediment has a non-standard shape, it is conventionally divided into several right-angled triangles and the area of each is determined separately
Roof cornice: step by step instructions for shaping
The process of creating a gable cornice is a mandatory procedure during the installation of any type of roof. If you can sometimes close your eyes to visual characteristics, the practical functions of these elements cannot be ignored.
Arrangement of the eaves overhang can be carried out by one of the following methods:
- lengthening the rafter legs;
- increasing the length of the rafters by filly.
The first method is incredibly simple. In the presented case, the cornices are formed by means of elongated rafter legs, the edges of which protrude beyond the ramps. To increase the length of the overhang, it is enough just to pick up longer beams for the rafters.
In the second case, the lengthening of the edges of the rafters, in contrast to the first method, occurs with the help of filly - stackable parts, for the production of which thinner boards are used.
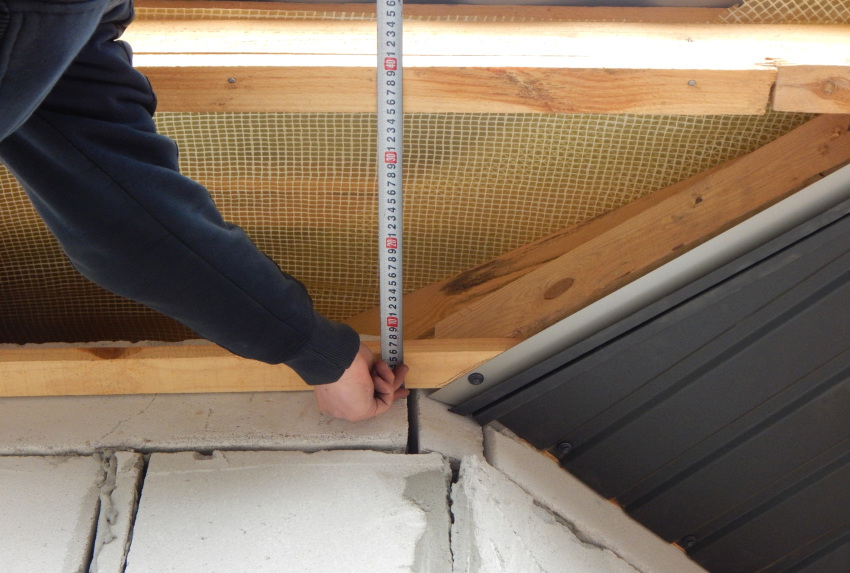
Arrangement of the eaves overhang is made by lengthening the rafter legs or increasing the length of the rafters by filly
The choice of the method of forming the eaves directly depends on the length of the slopes and the parameters of the roofing structure.
Speaking about how to make a cornice on the pediment, it should also be borne in mind that the finished overhangs need to be hemmed. This process can be performed using one of the following technologies:
- Direct filing. It implies the creation of a special box, which is located at right angles to the wall of the building, it is to it that the material is attached.
- Diagonal hem. In this case, the eaves are attached in such a way that the material is parallel to the roof slopes.
Note! The laying of the foundation for the eaves overhangs occurs at the very end of the work associated with the installation of the rafter system. When the lathing is completely ready, the rafters should be laid out in a single level, after which the wind boards can be attached to them.
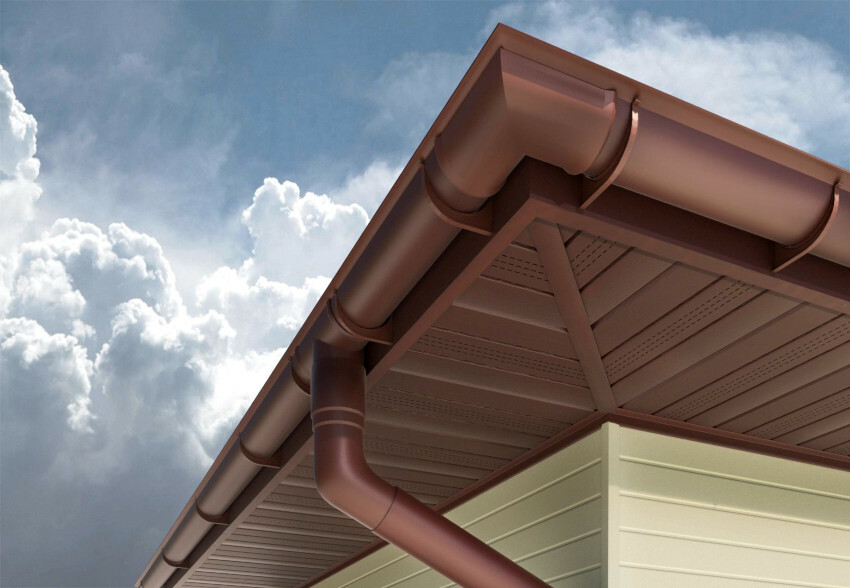
Overhang filing can be straight or diagonal
It is not difficult to independently design the eaves of the structure. To do this, it is enough just to carefully study the installation technology. Competently designed and well-ventilated gable overhangs will become reliable protection of the roof from premature destruction.
How to make an ebb on the pediment: the subtleties of work technology
The organization of the ebb involves the execution of a series of specific works, and it is incredibly important to do everything correctly using measuring instruments. Thanks to this, it will be possible to avoid distortions, distortions.
To complete the work, you have to stock up on the following tools:
- grinder;
- hacksaw;
- tape measure;
- hammer;
- self-tapping screws;
- pliers;
- roofing nails;
- screwdriver;
- level;
- with a cutter knife.
The first step is to install the rafters on which the roofing material will be laid. For them, you should take wooden blocks, the thickness of which is 50 mm, and the height is 80 mm.
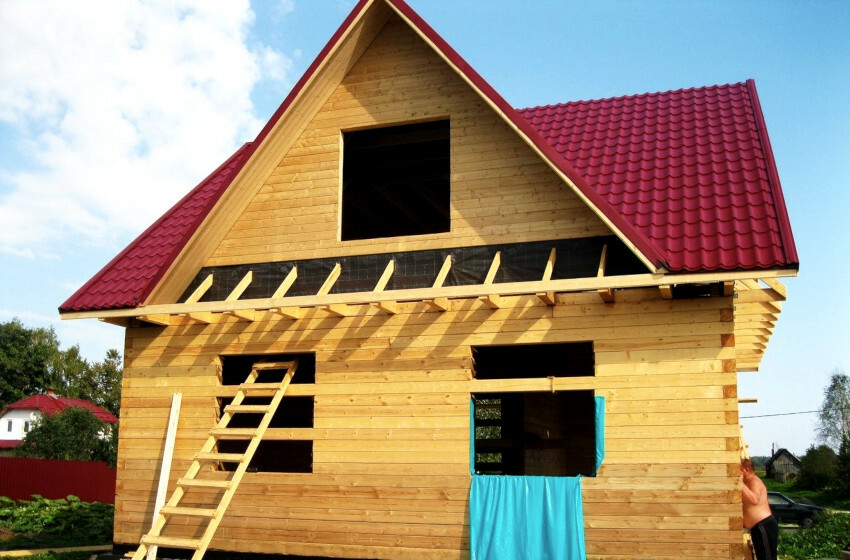
Ebb rafters are attached to the wall at a distance of 60 cm from each other
Note!The tree must certainly be well dried, not have knots. Before use, it should be impregnated with special compounds against fungi and insects.
The angle of inclination of the rafters is in the range from 20 to 45 degrees. In this case, the final value is selected taking into account the amount of precipitation that falls in a particular area. With regard to the width of the ebb, this value should not be less than the size of the roof overhang above the wall. This is often about 500 mm. This length is sufficient to prevent rainwater from entering the building facade.
According to the rules for organizing the gable of the roof, the rafters are attached to the wall at a distance of at least 600 mm from each other. After the roofing material is fixed on them and the crate is laid, it is necessary to seal the joints of the wall with the ebb.
In the event that the rafters replace the wall of the house, which is used instead of the pediment, some craftsmen form a slope, and a metal ebb is fixed on top of it with self-tapping screws. This design is characterized by reliability, protects the attic from the influence of precipitation, and also provides the ability to effectively drain water from the pediment.
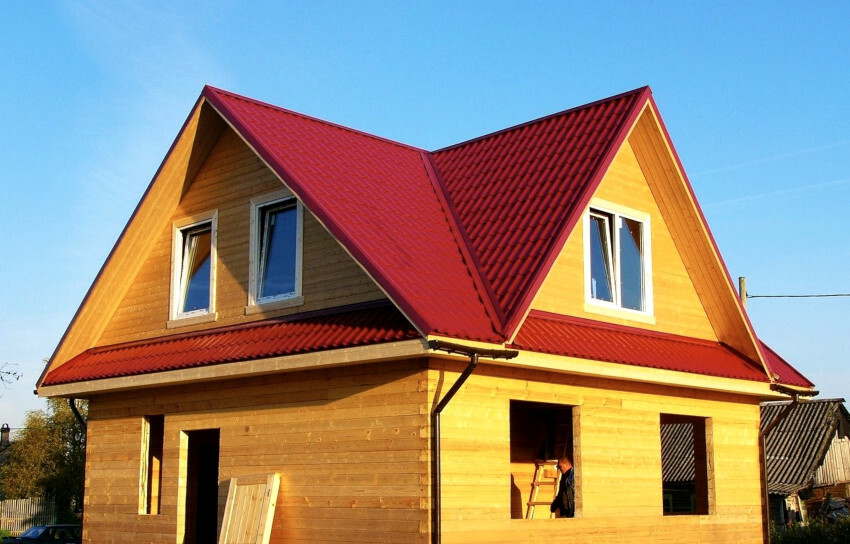
The angle of inclination of the low tide should be between 20 and 45 degrees
Observing the above recommendations, it is easy to independently cope with the task of installing an ebb tide, turning it into a home decoration.
Aerated concrete pediment: a few secrets of masonry
Before proceeding with the organization of the pediment of a building made of aerated concrete, a number of calculations should be carried out. If the pediment is characterized by a rectangular shape, they are completely uncomplicated. First of all, it is necessary to determine the indicator of the height of the roof (ridge), and then calculate the area of the pediment. This can be done following the rules of elementary geometry.
Note! Calculating the height of the skate is the most important task at this stage. In the process of determining this value, especially when it comes to single-storey structures, it is important that the ratio of the height of the pediment and the height of the wall is 1: 1. Thus, you can turn the attic into an additional room.
Laying a gable of aerated concrete involves the following sequence of steps:
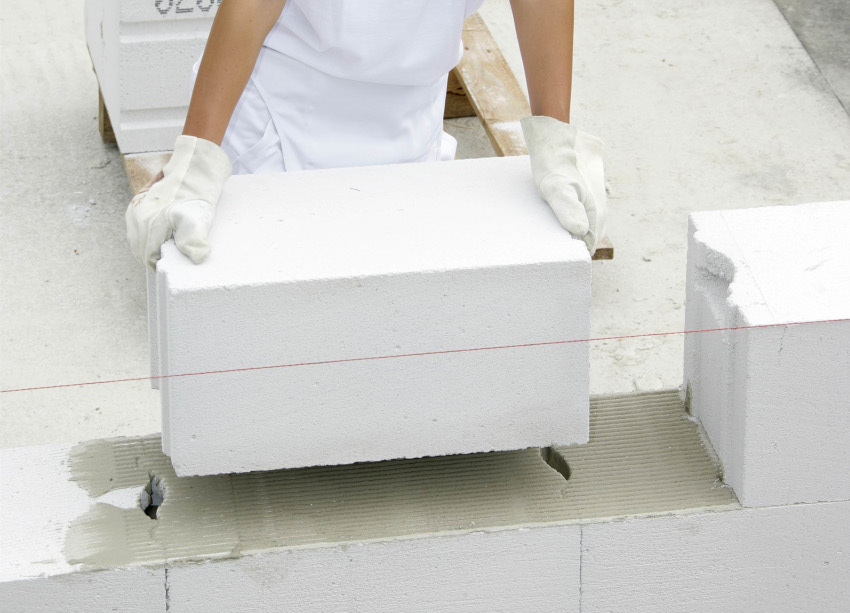
The laying of gas blocks for the pediment is done in the same way as the laying of the walls
- After calculating the height and area of the pediment, you can start marking the end walls. For triangular buildings, everything is simple: you just need to find the middle of the lower leg. In the designated place, the rail should be fixed - thus, the center of the future pediment is marked.
- Having stretched the laces from the top of the rail to the edges of the facade, you need to find the two remaining lines of the triangle along them, after which you can lay out the extreme rows. Then they start laying the blocks.
- If you plan to equip the attic with a window, you have to take into account the place for installing the window unit. Having laid out several rows of gas blocks to the level of the opening, you need to make markings and place the frame on the blocks. After that, you can continue to lay the blocks close to the frame.
- After all the blocks are laid, the final stage remains - cutting the blocks. It is necessary to get the smooth sides of the product slopes. Cutting off a straight line, you should focus on the laces, and then grind the irregularities with a special grater.
Armed with the knowledge of how to lay out gables, you can be sure that the roof will be laid on a very solid base on each side of the façade.
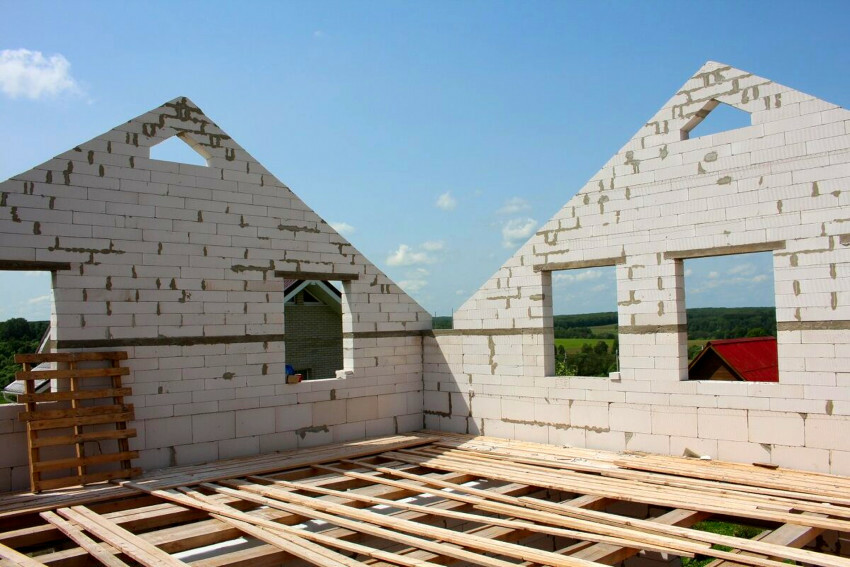
If you lay out the gables according to the rules, then you can be sure that the roof will be laid on a very reliable base.
Brick pediment: basic steps of creation
The process of organizing the roof gable with your own hands is performed in a certain sequence:
- Along the perimeter of the building, in places where it is planned to erect a pediment, brickwork is carried out in two bricks, but not in length, but in its thickness.
- A new row of masonry is first driven out without the use of mortar.
- On the tensioned rope on the side bricks, marks are created taking into account the future thickness of the seam along which the product is cut. Due to this, the slopes will turn out to be smooth, and not with jagged edges.
- The end wall is trimmed according to the tensioned rope.
- The pediment is driven out according to this principle to the very top.
- Then you have to align the sides.
- The masonry is strengthened by means of reinforcing elements every 4-5 rows.
- Depending on the dimensions of the pediment, reinforcing supports are being erected inside the attic or attic. They are placed perpendicular to the plane of the base masonry.
In addition, if a decision was made to arrange windows on the pediment, the need for additional reinforcement of the above-portal masonry must certainly be taken into account.
The peculiarity of brickwork is that it is driven out without going beyond the bounds of the stretched rope. The initial production of cut bricks that correspond to the shape of the slope will save you from further laying gaps on an already formed extension.
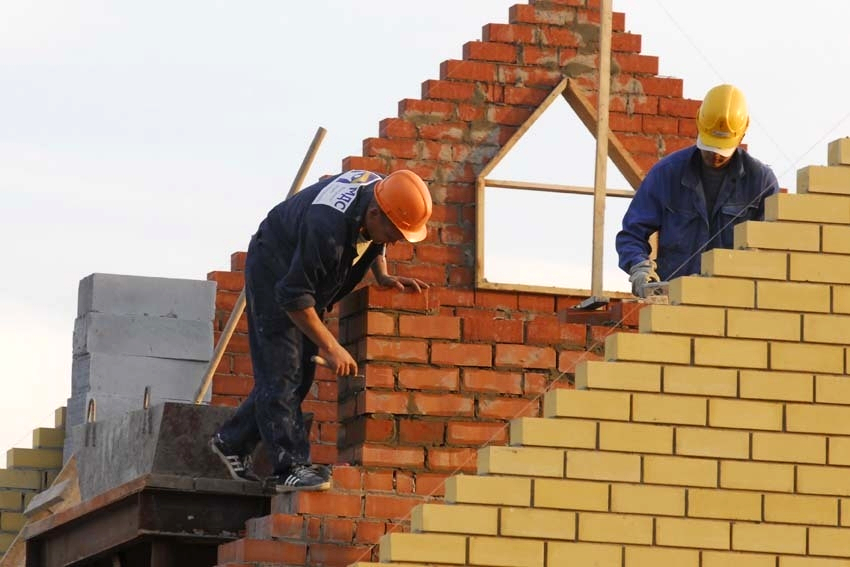
The difference between brickwork is that it is performed without going beyond the bounds of a stretched rope.
Important! If a massive pediment is supposed to be erected, reinforcing pilasters should be built in order to strengthen the wall.
Speaking of the gable roof gable made of bricks, it is worth noting that it is capable of ensuring the long-term operation of the entire structure. At the same time, its construction does not imply significant expenditures of money and the use of complex technological solutions. In addition, the presented option is characterized by a decent appearance and no need for special care.
How to make a visor on the pediment yourself: a quick guide
In order to provide full protection against water ingress, the best option would be to organize a visor with a ramp width of at least 60 cm. At the same time, it is desirable that the design of the product is not too conspicuous and does not spoil the general appearance of the structure.
As for the overall roof slopes, it makes no sense to make a cantilever structure of the visor for them. A much more rational solution would be to equip a canopy with outriggers. Often they try to ensure that the width of the visor is not less than the width of the foundation strip.
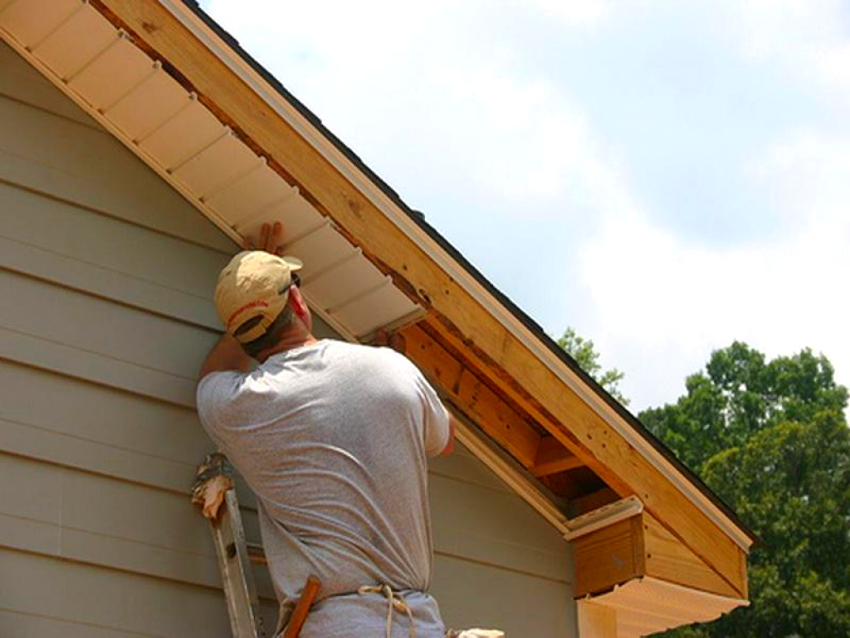
You can finish the cornice using corrugated board
The easiest option is to form a visor on miniature wooden rafter supports, which in their structure resemble filly. At the same time, it is necessary to make and secure the supporting structure of the visor before the pediment is closed by means of lathing or siding.
As for the design of the gable canopy, it should be characterized by rigidity and at the same time lightness. To do this, it is necessary to sew several bars of the crate on the rafter mini-supports. Ideally, you can design a visor with a continuous lining of the slope with a rail or clapboard. In this case, the slope is recommended to be formed from the remains of soft roofing material and sewn up with metal tiles or slate.
After the flooring has been laid, care should be taken to protect the area where the roofing material of the canopy adjoins the wall.
Helpful advice! The junction area of the visor is easy to arrange in the form of gutters of the gutter system. Thanks to this, it is possible to minimize the amount of water that flows down to the visor along the surface of the pediment.
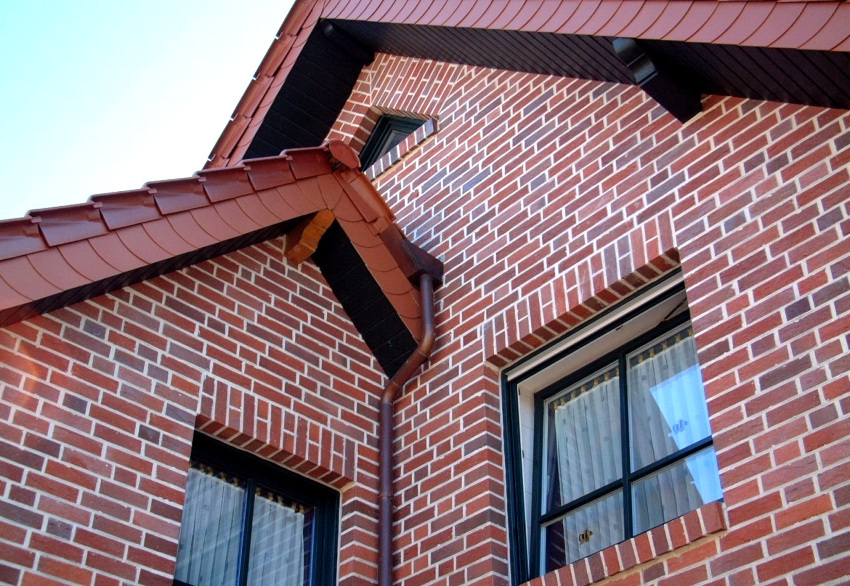
The width of the slope must be at least 60 cm
The simplest solution is to seal the joint between the metal and the wall material by means of a sealant or by gluing a tape of roofing material. Then it is necessary to form and sew a narrow strip of metal curtain rod over the sealed layer.
Gable cladding: variety of materials used
Speaking about how to sheathe the pediment, many experts advise giving preference to siding. The presented technology involves the use of special panels that are designed to decorate the facades of buildings. Outwardly, they are similar to boarding and are conveniently fastened to each other by means of an end lock.
Siding is good because it does not imply additional decorative finishes and can retain its original appearance and technical characteristics for at least several decades.
For finishing the gable with siding, one of the following types of material can be used:
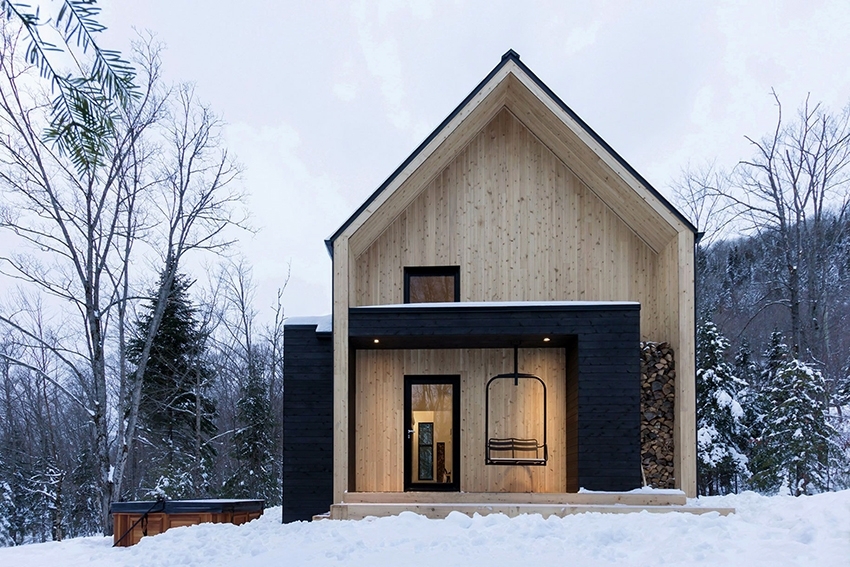
The wooden cladding of the pediment is made using glued lining
- Vinyl. Being made of polyvinyl chloride, it is a solid monolithic single-layer lamella of a certain configuration. The material is not prone to cracking during operation and is not subject to biocorrosion.
- Metal. Such plastic is characterized by high strength and durability. In addition, it tolerates fairly significant temperature fluctuations.
- Wood. Glued lining is made from wood fibers, which are mixed with adhesive resins, after which they are pressed under the influence of high temperature and high pressure.
- Cement. The surface of cement slabs is stamped with a pattern that imitates natural wood or other natural materials.
Important! When installing cement siding, it is imperative to use respiratory protection. In this way, the lungs can be protected from the ingress of silicon dust, which can cause serious illness.
Continuing the topic of how to sew up the gables, special attention should be paid to the ceramic version, a feature of which is that it can be used to decorate the facade in a unique design. At the same time, it seems that the building was erected from natural material.
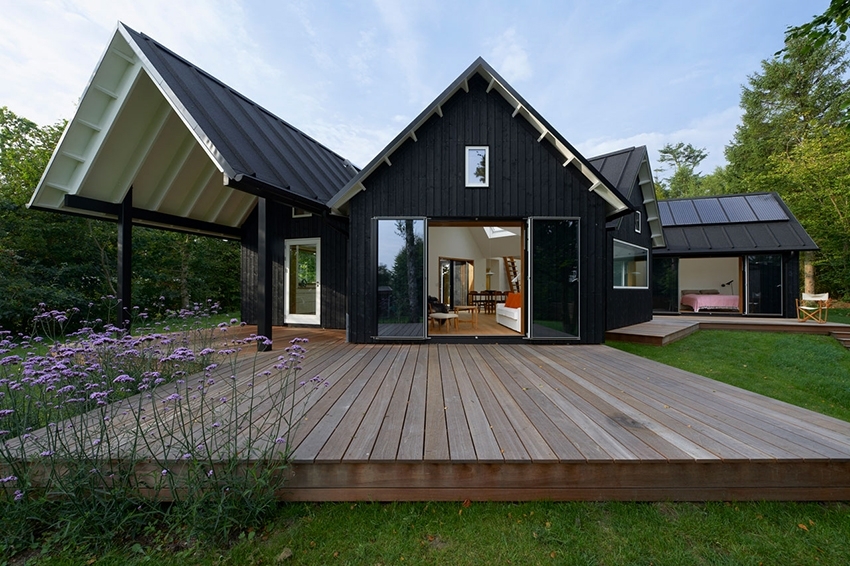
Metal sheathing is characterized by high strength and durability
How to close the gable of the roof of a house: a few more finishing options
In addition to such common siding, other finishes are also popular. The most modern solutions include:
- plastic;
- profiled sheet;
- block house or lining.
The term "plastic" often refers to panels made of polyvinyl chloride that are specifically designed for outdoor use. Unlike products used indoors, the presented material is able to withstand significant temperature fluctuations and exposure to ultraviolet radiation well.
In the process of making gables from corrugated board, thin metal sheets with grooves and ridges are used. They are covered with a layer of zinc or a polymer that protects the material from moisture and other destructive factors.
Note! The metal profile is an excellent option for arranging the facades of buildings. But if, in the case of roof finishing, the profiled sheets look really worthy, then this cannot be said about the pediments.
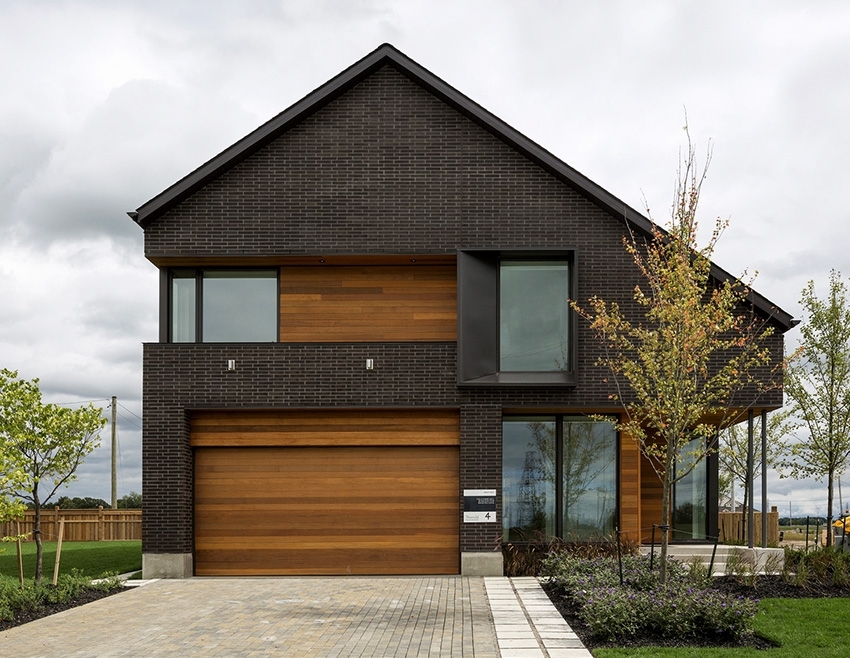
Modern options for plating the pediment include: plastic, profiled sheet, block house and lining
As for the block house finishing, plastic lamellas and metal profiled sheets can be replaced with natural wood. In particular, a wooden pediment will look great on buildings erected from rounded logs, beams or made in accordance with frame technology.
It should be borne in mind that wood does not tolerate moisture and direct ultraviolet rays. In this regard, you will have to take care of protecting such a finish. In this case, you will need to purchase varnish, paint, water-repellent impregnations or other similar substances.
In addition, the options presented, in comparison with siding gables, are characterized by a much shorter service life. This is due to the need for constant renewal of paint or varnish, which reduces the service life of the material. Thus, finishing with a block house can be given preference in the event that it is required by the chosen design option for the facade of the building.
How to sheathe a pediment with siding: detailed instructions
When deciding on the use of siding, the question inevitably arises of how to sew up the pediment using this technology. So, the guide to the organization of finishing involves the following steps:
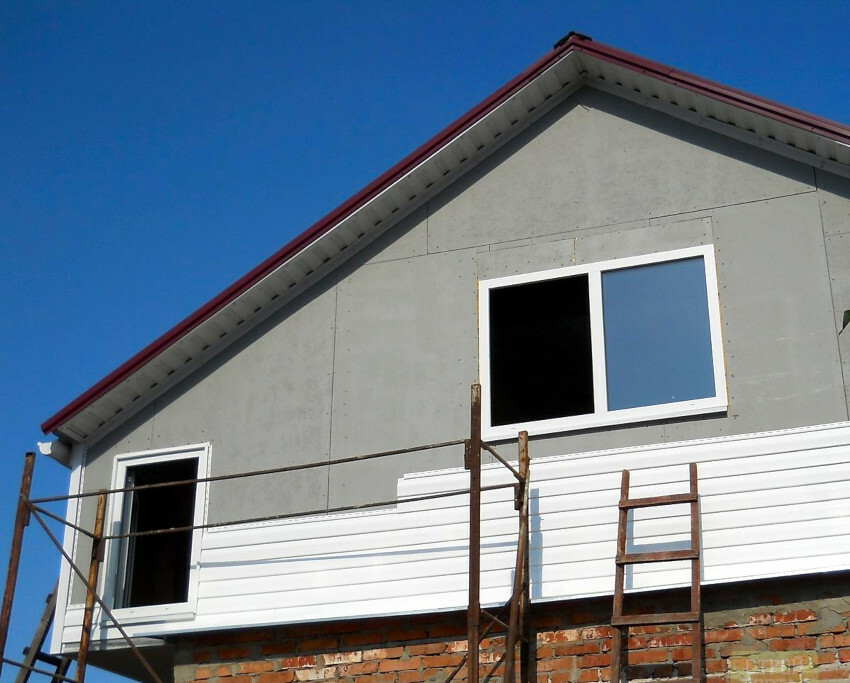
Before sheathing the pediment with siding, it is necessary to install the frame and insulate the structure
- Before sheathe the pediment, it is necessary to carry out preparations, which includes the installation of scaffolding, removal scraps of old polyethylene film, cutting off protruding polyurethane foam residues, as well as cleaning wooden boards from debris and dust.
- Surface waterproofing. It is carried out by attaching the film to a wooden plane using a construction stapler.
- Installation of a frame from a galvanized profile. Along the roof overhang and the lower part of the gable, guide profiles should be installed, which will serve as a support for the load-bearing ones.
- The casting bar is installed by fixing it on galvanized profiles using self-tapping screws with washers.
- Fastening metal slopes to the window opening. Wanting to equip windows on the gables, it is necessary to fasten the finished elements to the embedded profiles. To avoid moisture ingress on the siding, at the connection points, the profiles should not only be cut, but folded onto one another.
- Installation of a starting strip for siding. This element is fixed above the casting bar at a distance of 10 mm from it.
- Installing all the rest of the siding hardware. In this case, the fastening is carried out in the same way as in the case of the starting strip.
The final stage of the siding of the pediment is the cladding of the frame. To do this, you have to install the first strip in the guides that are formed by the fittings, and then fix it to the profile through special holes.
The beautiful pediment is the hallmark of any home. Guided by the basic rules and recommendations for its self-production, as well as inspired by photographs of ready-made solutions, you can give the structure originality and truly unique appearance.


