Content
- Features of paper-based vinyl wallpaper
- First step: preparing the walls
- The second step: we select the optimal set of tools
- Third step: sticking
- Pasting difficult areas
Due to its strength, durability and attractive appearance, able to fit into every interior, vinyl wallpapers are very popular. This wallpaper material has its own characteristics that must be taken into account in the process of gluing and operation. Step-by-step instructions and useful tips will help you understand to the smallest detail how to properly glue one of the varieties of vinyl wallpaper - on a paper basis.

Features of paper-based vinyl wallpaper
Vinyl wallpapers have a coating of polyvinyl chloride, applied to the base in the form of a film. The material has excellent resistance to various influences, so these canvases can last 10 years. They can be cleaned with a dry brush or a damp cloth.
Cloths with vinyl coating can have a base of paper or non-woven. The paper version is more popular due to its affordable price and excellent performance, almost the same as products with a non-woven backing. However, there are a number of features that you need to consider before buying a material.

- When working with a coating based on paper, glue is applied directly to the canvas, as with sticking ordinary paper wallpaper.
- When applying glue to it, the base paper stretches a little, but it is not necessary to attribute this to the disadvantages of this type of material. Due to this property, strips can be wrapped without cutting around large irregularities or protrusions.
- Vinyl wallpaper on a paper backing is not the best solution for rooms with high humidity, because after soaking with moisture and subsequent drying, the joints of the paintings may disperse over time.
- In the process of gluing, you need to act very carefully, since the paper layer impregnated with glue can break, and the top one can accidentally get dirty.

Important! A cloth oiled with glue cannot be left for long: it can be deformed.
First step: preparing the walls
Before sticking any wallpaper you need to spend preparatory work, sometimes tiring, but still necessary. The procedure is as follows:
- Remove old coatings. Sometimes the previous wallpaper is difficult to clean up to the end, but in the case of gluing wallpaper material with a paper base it is not as critical as for non-woven.
- If the wall has severe swings, level them with putties. Smaller defects will help to hide dense wallpaper with a relief pattern.
- Primer the walls. For this, the following compositional options are used:
- diluted wallpaper glue;
- a special mixture intended for surface treatment before gluing;
- universal primer.
USEFUL INFORMATION:Is it possible to glue liquid wallpaper on the ceiling: instructions

Note! A thorough wall primer is especially important for concrete and wood substrates, which tend to absorb glue strongly.
Before proceeding to the next stage, you must always wait for the primer to dry completely.
The second step: we select the optimal set of tools
To glue paper-based vinyl wallpapers, prepare the devices and materials from the following list:
- Rolls in the right amount.
- Suitable wallpaper glue.
- Capacity for dilution of the composition.
- Roller with fur coat + wide brush + narrow for applying glue to the wallpaper.
- Plastic spatula, wide and narrow pinch rollers (one for the main, second for the joints).
- Old newspapers or plastic wrap.
- A sharp knife with a retractable blade (construction or large clerical).
- Pencil, ruler, plumb line or level, tape measure for marking strips on the wall.
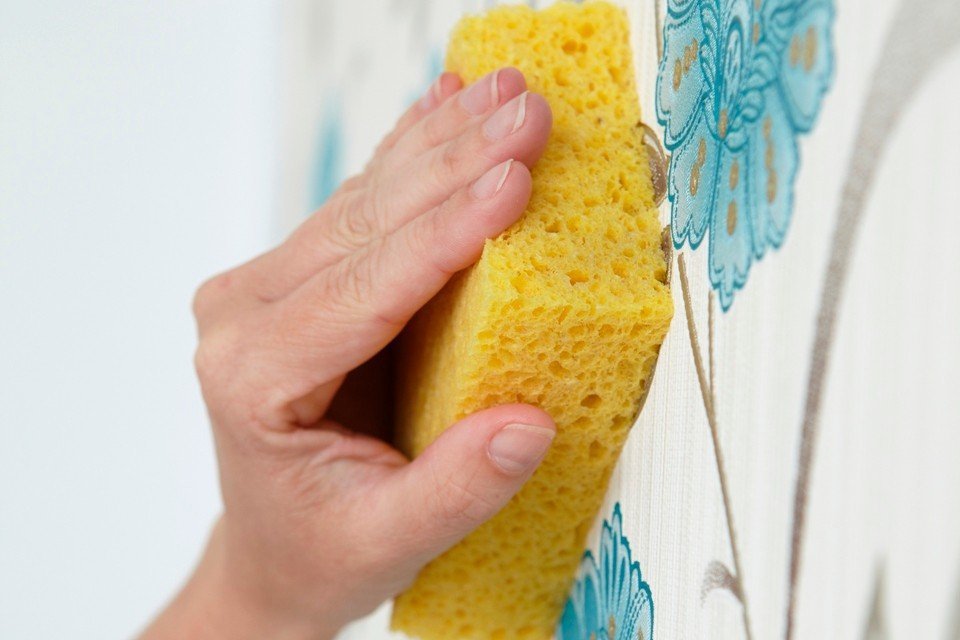
- Sponge or cloth to remove excess glue.

A few words about glue. For vinyl paintings on a paper substrate, you need to use not the usual composition for paper wallpaper, but a special, more durable, designed for vinyl. This is especially true for heavy varieties, such as wallpaper hot stamping. It is desirable that the composition contains an antifungal supplement. You can also use PVA, which provides excellent adhesion of the canvas with the wall. However, in this case, the wallpaper will stick “tightly” and it will be difficult to remove them in the future.
Third step: sticking
Work order:
- Using a level or plumb line, mark a vertical line on the wall that will serve as a guideline for aligning the first canvas.
USEFUL INFORMATION:How to glue ceiling skirting boards on the wallpaper and can it be done?

Tip. If the room has uneven floors, it is better to navigate not by level or plumb, but by any large vertical elements, such as a doorway or corner.
- Measure the first strip corresponding to the height of the wall, adding 10 cm of stock. If you select material without a pattern that does not need to be joined, you can cut the entire roll into strips at once. If you need to combine the pattern, you will have to pick up pieces as you move, applying the material unwound from the roll to the strip just cut.
Note! When sticking wallpaper on the ceiling, the procedure is similar, but it has its own subtleties. It is written in detail about them here.
- Spread the first sheet of material face down on the floor or on the table and apply glue liberally to it.

- Fold the canvas twice or three times so that the greased surface aligns and wait for the time indicated on the roll packaging.
Important! Try to apply glue with an equal layer on all cloths and maintain equal intervals time before gluing, so that the degree of stretching of the material is the same and the joints are even.
- Focusing on the drawn line, place a strip of material on the wall. It is most convenient to work with an assistant, especially if meter wallpapers are glued: while one is applying the top of the sheet, the second will support the bottom.

Important! Vinyl cloths with a paper backing can stretch when wet, and after drying, shrink again, therefore, when aligning the strip on the wall, handle it as carefully as possible, avoiding unnecessary stretching.
- With strong pressure, align the wallpaper from the center to the edges to expel all the air. If the material is smooth, use a plastic spatula. To avoid damaging the delicate foam pattern, complete this step with a large roller.

- Press the canvas carefully at the top of the ceiling and at the bottom of the floor so that the overlap cut line is clearly outlined.

- A clear line of wallpaper overlap

- Clear overlap line below
Tip: it is better to remove the floor skirting before starting work. If for some reason this was not done, you can insert the wallpaper in the gap between the baseboard and wall, trim the remaining piece of the lower edge and stick a narrow strip to overlap the seam and part baseboards.
- In addition, cover outgoing places.
- Roll the joints with a small roller.
USEFUL INFORMATION:How to glue vinyl wallpaper on a non-woven and paper basis on the ceiling

- Remove any exposed excess glue.

- Cut excess wallpaper from the baseboard and ceiling along the ruler with the sharpest possible tool, a blunt knife will crush and tear the canvas.

- Glue the following strips butt, not forgetting about combining the pattern.

Pasting difficult areas
In order for the sticking process to go without problems, you need to study the features of work in difficult places.
- Near window openings and doors you need to leave wallpaper for the allowance and depth of the niche. Make cuts on the canvas at the top and bottom, press it and bend it around the corner. Then trim carefully.

- Glue wallpaper near window openings

- Clipping by the window
- Do not glue an entire strip onto the corner, otherwise wrinkles will appear. Cut the wallpaper so that only 2 cm of canvas passes onto an adjacent wall. Stick the second piece to the other side of the corner with the same overlap. Using a ruler and a knife, cut through two layers of wallpaper formed on the corner. Remove excess coating.

- Around the switches and sockets, the web is not cut in advance. The strip is glued directly to the recess remaining from the removed outlet. After the glue dries, the holes are carefully cut with a knife.

Important! Outlets must be de-energized! In extreme cases, they can be sealed with insulating material.
In general, paper-based vinyl sticking technology is similar to working with plain paper material. Cloths are also smeared with glue, and only then are applied to the wall. All details are in the video below. But for vinyl wallpaper on a non-woven fabric, the order will be different, read about it in this article.

EXPERT SITE
Tsugunov Anton Valerevich
Master Station Wagon
- Since 2003, I have been engaged in the repair and decoration of premises.
- Over 100 completed objects.
- I appreciate the quality, more than the quantity!
Personal page >>>
Friends!
I offer you the service "Friend Builder"
As this site develops, subscribers and visitors are turning to me more and more often asking for help with advice on various issues of repair and decoration.
Questions are sometimes asked very complex and interesting. You can’t write an article for each situation, so I decided to advise you individually.
Thanks to you, friends, a new direction of my favorite work has been born - share your experience and benefit everyone who is undergoing repairs!
Get a one-time consultation from me >>>
Order full apartment repair support >>>


