Content
- Wall alignment methods
- Drywall the walls
- Wireframe method
- Frameless Method
- Drywall putty
- Raw wall alignment method
- Assessment of wall roughness
- Wall preparation
- Stucco leveling
- Putty leveling
- The cost of work
The walls of the room - this is the part on which the gaze stops at the entrance. They create the general interior of the room. The walls occupy most of the room, so their focus is on the improvement. One of the most popular options for their decoration is painting. But you need to understand that the paint is applied only on a perfectly flat surface, any defect on which will immediately strike the eye. In order not to get disappointed when performing finishing work, it is necessary to carry out alignment of walls for painting.

Wall alignment methods
There are two ways to prepare a wall for painting:
- Dry leveling involves the use of drywall.
- When wet leveling, dry building mixes diluted with water are used - plaster and putty.
Drywall the walls
The dry method allows you to get a perfectly flat surface for applying paint. You can align the walls with drywall in two ways:
- Using a wireframe.
- Using special glue.

Wireframe method
The frame is used on surfaces with significant irregularities. It is assembled from metal profiles or wooden blocks.
The base made of wood cannot be used in rooms with high humidity. In addition, the wood must be thoroughly dried. Otherwise, the bars may become deformed, which will lead to the formation of cracks on the drywall.
Wireframe method does not require careful preparation of the surface, the main thing is that it is completely dry.
[smartcontrol_youtube_shortcode key = "drywall installation" cnt = "4 ″ col =" 2 ″ shls = "true"]
At the first stage, guide profiles are fastened to the ceiling and floor, placing them parallel to each other. Between them at a distance of 40-60 cm establish additional guides. In this case, parallelism is maintained, and the width of the drywall sheet is taken into account. For fastening sheets using screws.

The cap of the fastener must be drowned a little deeper into the sheet, being careful not to damage the drywall.
USEFUL INFORMATION:How to prepare lime mortar for plaster
Frameless Method
This method is suitable for leveling walls only if the surface has slight differences and irregularities. It involves gluing sheets directly to the wall using special glue. Depending on the degree of unevenness, several methods are used:
- With differences and roughnesses up to 4 mm, gypsum plasterboard sheets are glued to the walls with plaster putty, applying it in longitudinal rows throughout the sheet.
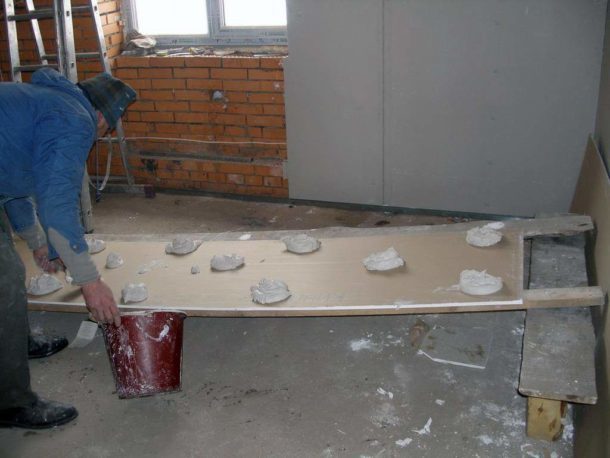
- For irregularities up to 2 cm, drywall glue is used. Apply glue in piles, maintaining a distance of 30–35 cm.
- Surface drops up to 4 cm require more complex work. Strips of drywall are attached to the wall with glue, and sheets are already glued to them.

When using the frameless method, dirt, dust and grease stains are removed from the surface. If there are wet areas, additional drying is carried out.
Important! Large ledges on the walls must be knocked down. This will greatly facilitate the leveling process and reduce material consumption.
If the surface absorbs moisture well, then it is coated with a primer. The primer also improves the adhesion of concrete walls.
[smartcontrol_youtube_shortcode key = "gluing drywall" cnt = "4 ″ col =" 2 ″ shls = "true"]
Alignment of walls with drywall frameless method carried out in the following order:
- Detection of differences and roughnesses using a building level or plumb.
- Choosing a method for gluing drywall sheets.
- Marking the surface to be leveled.
- Trying and cutting drywall with parallel cutting holes for communications.
Glue or putty is applied on the back of the sheet with a spatula. Sheets are glued, leaving a gap of at least 10 mm from the ceiling and floor.

Drywall putty
Before applying paint, drywall sheets must be puttied. Putty technology consists of several stages:
- The seams between the sheets are filled with a special "Fugen" putty.
- After drying, a fiberglass mesh is glued to the joints and corners, which will prevent cracking.
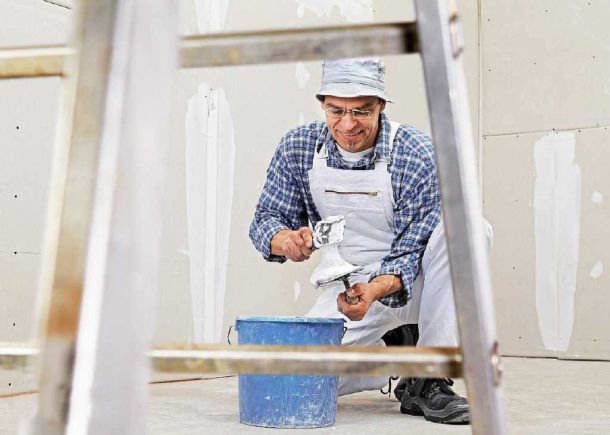
- Using a wide spatula, putty is applied and distributed over the reinforcing layer.
- Using a narrow spatula, grooves from the heads of the screws are filled with crosswise movements.
- Corner trim. At the same time, one side of the corner is puttyed, after its drying, the second side is puttyed. It is convenient to use special perforated corners-overlays.
- Puttying the entire surface of the drywall. The first layer of starting putty should dry well. After that, grout it. Then a second layer of putty is applied, which is again rubbed.
- The application of finishing putty and its subsequent grinding allow to achieve a perfectly even surface for painting.
USEFUL INFORMATION:How and how to paint the lining?

Raw wall alignment method
Using the raw surface leveling method is a more complex and time-consuming process. Aligning walls for painting involves several steps.
Assessment of wall roughness
To properly align the walls for painting, you need to find out the degree of unevenness of the wall. To do this, you will need a level, a plumb line, thread and nails. With their help, beacons are set, according to which irregularities and differences are determined. Depending on their size, the technology of leveling the walls for painting is selected:
- To smooth smooth concrete walls with differences up to 5 mm, only putty is needed.
- Differences up to 3 cm are better to plaster first, then putty.
- Swings larger than 3 cm are plastered using a reinforced mesh. For final alignment use putty.

Wall preparation
Before applying plaster or putty, the walls must be prepared for work, following the sequence:
- Remove the old coating.
- Disassemble all communications.
- Eliminate stains of dirt and grease.
- Apply a primer coat.
Stucco leveling
For plastering walls, beacons must be set up, which can be used as slats or profiles. You can align the walls with plaster with your own hands, following a clear plan:
- A solution is prepared from a dry building mixture.
- With a spatula or trowel, the plaster is thrown onto the wall between adjacent lighthouses.
- Using a long level, level the plaster from the bottom up, pressing the level against the beacons.
- The excess mixture is removed, and the resulting cavities are filled with a solution and smoothed with a spatula.
- After waiting a while, they carry out similar actions between other lighthouses.
- At the end of the work, the beacons are removed, filling the troughs and leveling them.
- The applied plaster should dry well, this will take about two weeks.

Putty leveling
USEFUL INFORMATION:Original solutions for walls for painting in the interior
Walls for painting or for wallpaper should be perfectly even, for this putty is put on the plastered surface, first starting, then finishing. In order not to buy two different mixtures, you can use the universal one instead.
- To do this, you need to prepare a spatula and a grater.
- Putty is recommended in small portions. Leveling is carried out in a circular motion with a spatula, choosing the desired angle of inclination.
Remember! If you tilt the spatula more toward the wall, you can get a thinner layer of coating.
- The evened putty is thoroughly dried.
[smartcontrol_youtube_shortcode key = "putty the walls for painting" cnt = "4 ″ col =" 2 ″ shls = "true"]
- At the final stage, the surface is ground with fine sandpaper or sandpaper.
If one layer of starting putty was not enough, after drying and priming the surface, one more is applied.
- The surface is primed and a thin layer of finishing putty is applied in the same way.
Before applying the paint, the surface is cleaned of dust and dirt. Then a primer layer is applied. This will increase the adhesion of materials, and putty will last much longer.

The cost of work
Alignment of surfaces for painting in comparison with alignment for wallpaper requires special thoroughness and accuracy, so if you are not confident in your abilities, you can entrust this part of the repair to specialists. Prices for services will be approximately as follows:
- In Moscow, alignment of the walls with stucco on lighthouses will cost from 300 rubles. per 1 m2, drywall using a frame - from 500 rubles. per 1 m2, glue - from 350 rubles. per 1 m2, putty - from 100 rubles. per 1 m2;
- in St. Petersburg, plastering walls on lighthouses costs from 280 rubles. per 1 m2, gypsum plasterboard facing on the frame - from 460 rubles. per 1 m2, without frame - from 320 rubles. per 1 m2, putty work - from 80 rubles. per 1 m2;
The prices for wall alignment vary greatly in regions, approaching the level of capital cities in large cities.
In order for the repair in the apartment to complete successfully, you need to know how to align the walls for painting or wallpaper correctly, what actions need to be performed and in what sequence.

EXPERT SITE
Tsugunov Anton Valerevich
Master Station Wagon
- Since 2003, I have been engaged in the repair and decoration of premises.
- Over 100 completed objects.
- I appreciate the quality, more than the quantity!
Personal page >>>
Friends!
I offer you the service "Friend Builder"
As this site develops, subscribers and visitors are turning to me more and more often asking for help with advice on various issues of repair and decoration.
Questions are sometimes asked very complex and interesting. You can’t write an article for each situation, so I decided to advise you individually.
Thanks to you, friends, a new direction of my favorite work has been born - share your experience and benefit everyone who is undergoing repairs!
Get a one-time consultation from me >>>
Order full apartment repair support >>>


