Content
- Preparation for floor insulation on the loggia
- The choice of material and floor design
- Logging floor loggia on logs
- Features of insulation foam
- Screed insulation
Warming the loggia in the apartment is a great chance to create your own winter garden or increase living space. You can turn it into a miniature gym, a cozy office or make a redevelopment by adding a few square meters to the area of the room. Insulation of the floor on the loggia is an integral part of creating a comfortable environment in this room. Let's find out how to do it right without wasting time, money and effort.

Preparation for floor insulation on the loggia
This stage is very important: the life of the floor depends on the quality of surface preparation, as well as the ease of work. Step-by-step instructions for preparing for floor insulation will look like this:
- The first step is the glazing of the loggia. The most suitable are double-glazed windows. Wooden frames with one glass can be put only if the loggia will not be heated and used throughout the year.
- Thorough cleaning of the room. No dust should remain on the loggia.
- Sealing cracks. Small cracks are filled with mounting foam or sealant, and large ones are filled with broken brick or crushed stone mixed in a cement mortar.
- Thinking over the location of sockets and lighting systems. Please note that the floors will rise at least a few centimeters.
- If due to the loggia there will be an increase in the area of the room or it will be used constantly, you need to consider heating.

Important! It is forbidden to carry radiators connected to central heating to the balcony or loggia. Permission for such an event can be obtained only in some regions of the country, but for this it will be necessary to prove that the loggia is insulated very high quality.
- If there is ceramic tile on the floor, it is necessary to remove it together with glue.
Thermal insulation of the floor should be carried out on a glazed loggia, protected from moisture. The floor must be completely dry.
The choice of material and floor design
Doing warming the floor of the loggia with your own hands begins with the question: What choose a heater?
USEFUL INFORMATION:How to lay piece parquet: do it yourself and turnkey cost of work
The following insulation materials are most popular:
- Styrofoam. The most popular material for thermal insulation, due to its low price and ease of use, is insulated with 50% of all balconies and loggias in the country. Its advantages include low thermal conductivity, excellent moisture resistance and low weight, and on the minuses - fragility.
- Penoplex. Extruded polystyrene foam, a “relative” of the foam, characterized by increased strength, durability, ease of installation and, consequently, higher cost, is presented in the following a photo.

- Mineral wool. It is considered one of the best heaters in terms of technical and operational characteristics. Durable, non-flammable, vapor-permeable material. The main drawback is the fear of moisture, due to which the mineral wool loses its properties, therefore, its use requires high-quality vapor and waterproofing.
- Expanded clay. Loose insulation with good thermal insulation properties and affordable cost. For high-quality insulation, a large layer is required - from 15 cm. The disadvantages include high hygroscopicity.
- Penofol (Isolon). Foamed polyethylene coated with foil (photo). To warm the balcony, its thickness will not be enough, but it is successfully used as a heat reflector and vapor barrier in combination with other insulation, such as mineral wool, making thermal insulation perfect.

You can insulate the floor on the loggia with your own hands in two ways:
- Insulation on the lags. A simple and quick method of arranging a floor with insulation; for its implementation, any of the above heaters can be used. The heat-insulating material is placed between the lags; the flooring from boards or plywood sheets is placed on top, as in the following photo.

- Laying insulation under the screed. When choosing this method, it is possible to insulate the floor on the loggia with expanded polystyrene (polystyrene foam, polystyrene foam) or kermzite. A screed is the best choice when installing a “warm floor” on a loggia, but you need to consider that you have to wait a long time for it to dry.

Important! Laying a heat insulator under the screed is possible when warming a loggia having a reliable overlap. In the case of a balcony, it is better to immediately choose the lag floor design, since the balcony slab may not support the weight of the screed.
Logging floor loggia on logs
USEFUL INFORMATION:Tile bathroom waterproofing: which is better?
Step-by-step instructions for choosing a lag design will be as follows:
- Leveling the floor. It is best to ensure that the floor on the loggia is on par with the flooring in the rooms. The insulation with the coating should not be higher than the level set by you. When marking, it is convenient to use a laser or water level.
- Laying a waterproofing layer. You can use roofing material or technical polyethylene, laid in 2 layers. They overlap the material, and at least 50 millimeters are made on the walls.
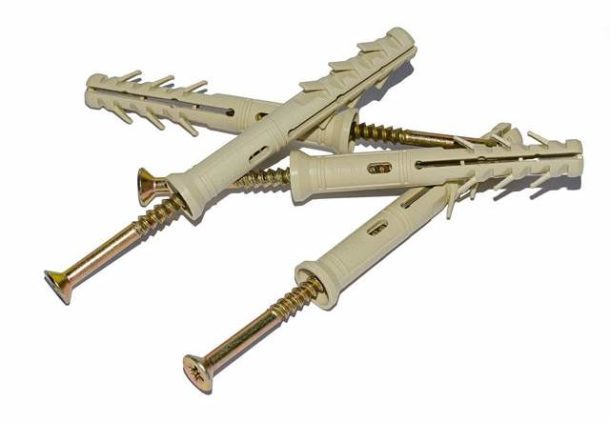
- Installation of wooden logs, which are pine beams of 50 × 50 mm. They are stacked with an interval of 30–40 cm, attached to concrete with dowels and self-tapping screws. The first element can be placed at a distance of 10-15 cm from the wall. Between the ends of the lag and the walls there should be a gap of 3 cm so that the bars, having absorbed moisture, do not bend and spoil the flooring.

Important! Each bar must be treated with an antiseptic.
- Laying insulation. It is necessary to insert slabs of mineral wool or polystyrene so that there are no gaps between the lags, as in the photo. If they do form, they must be filled with foam. Expanded clay is simply poured into the intervals of the crate, which should protrude at least 15 cm above the level of the subfloor.

It is strictly forbidden to tamp mineral wool: from this, thermal insulation properties are lost.
- Arrangement of vapor barrier. For this layer, you can use a film or foil polyethylene insulation.
- Flooring organization. You can use boards, but more often the flooring is made of plywood or OSB.
- Installation of the finish coating.

Features of insulation foam
Warming the floor on the loggia with the help of foam has its own characteristics. The fact is that, due to the strength of the material, it is not necessary to use lags when laying it under the flooring, plywood sheets can be laid directly on the foam. The stages of work will be as follows:
- A leveling screed is made on the prepared floor, which is necessary to prevent deformation of the insulation boards.
- Plates of foam after fitting in size are glued with special glue directly to the floor. It is convenient to use a type of insulation having a groove joint system. If it is not, then at the joints between the plates, as well as between them and the walls, you need to go through the mounting foam.
- To increase the efficiency of thermal insulation of the floor, it is possible to lay on top of the penofol (isolon) with the foil side out, gluing the joints with reinforced tape.
USEFUL INFORMATION:Waterproofing floors in the apartment under the screed
The process of warming in this way is demonstrated by the following photo.

Screed insulation
Warming the floor of the loggia with foam foam under the screed is an excellent solution for organizing a system of warm floors. Such insulation is done as follows:
- After removing the old coating, a thin leveling cement screed is made. Without a perfectly flat floor, foam sheets can be damaged.
- A film is laid for vapor and waterproofing, the joints are glued with tape.
- Foam sheets 40–60 mm thick are laid. Joints are sealed with foam or sealant.
- The second layer of vapor barrier is placed.
- Foil heat reflector is laid with the foil up.
- The “warm floor” system of the selected type is installed.
- Screed is poured. Its thickness during the arrangement of the heating system should be at least 7 cm, without it - at least 4 cm.

To fill the screed over the underfloor heating system, it is necessary to use a special mixture intended for these purposes. Conventional cement screed cracks when exposed to high temperatures.
Thermal insulation of the loggia floor with foam is done in a similar way, but in this case the screed is reinforced:
- After pouring through the beacons of the first layer 2–5 cm thick, a reinforcing mesh is installed.
- The final screed is made from a thickness of 4 cm.
Polyfoam for the floor should have a density of 35 kg per square. m
If we insulate the floor with expanded clay, before pouring the screed, the surface is leveled and a lattice of metal fittings is laid on it, as in the following photo.

If you want to warm your balcony or loggia, this guide will help you. After the completion of the insulation works, you only have to think over the design of the loggia: turn it into a cozy corner where you can retire, or expand the space of the living room or kitchen due to it.

EXPERT SITE
Tsugunov Anton Valerevich
Master Station Wagon
- Since 2003, I have been engaged in the repair and decoration of premises.
- Over 100 completed objects.
- I appreciate the quality, more than the quantity!
Personal page >>>
Friends!
I offer you the service "Friend Builder"
As this site develops, subscribers and visitors are turning to me more and more often asking for help with advice on various issues of repair and decoration.
Questions are sometimes asked very complex and interesting. You can’t write an article for each situation, so I decided to advise you individually.
Thanks to you, friends, a new direction of my favorite work has been born - share your experience and benefit everyone who is undergoing repairs!
Get a one-time consultation from me >>>
Order full apartment repair support >>>


