Content
- Advantages of leveling walls with stucco
- Wall plastering tool
- How to prepare a wall for plaster?
- Installation of lighthouses on the wall
- Plastering the wall
Capital repairs of the apartment or decorating new homes rarely does without a wall alignment procedure. A lot of materials are used in modern construction, and brick walls and partitions are quite common, although less frequently than several decades ago. The best option for their alignment is the application of plaster. How to implement this simple, but still requiring some knowledge process?

Advantages of leveling walls with stucco
Experts identify three ways to make the walls perfectly smooth:
- With the dry method, a flat surface is formed by sheets of drywall, which are mounted on a special frame.
- Plastering is inherent to the wet option of leveling the walls.
- The combination of dry and wet method. However, it is used quite rarely.
Wet method of leveling the walls is the most advantageous and therefore the most often used. With it, it is not necessary to often reduce the already modest dimensions of apartments by erecting a frame for drywall. Plaster can align the walls of any curvature, only the amount of expended material will differ. It is important to plaster the walls correctly in order to get not only an even, but also a durable coating.

Wall plastering tool
Tool, which will be needed in order to plaster the brick walls, can not be called rare or expensive. Many devices can be found in the arsenal of any apartment owner, and the missing items can be bought at the nearest hardware store.
- To clean the wall of the old coating you will need a steel brush, scraper and chisels.
- For reliable adhesion of the plaster on the wall, it is better to first make notches. You can use a chisel or a special hammer with a gear hammer. It is known to professionals under the name of Buchard.
- A brush or roller to wet the wall before applying the plaster.
- The trowel, or simply trowel in everyday life, serves to throw the mortar onto the wall and roughly level it.
- To obtain a perfectly smooth surface of the plaster, you also need to prepare a smoothing machine, a rule and a couple of half-tiles to align the angles.
- Roulette, a plumb line and a building level of at least a meter in length are used for marking and control.
USEFUL INFORMATION:How to make a bas-relief on the wall with your own hands: master class

How to prepare a wall for plaster?
For overhaul from the wall, you must first remove old coating. If you want to plaster a brick wall in a new building, this stage will be absent, but here The main thing is not to lose sight of another important point: fresh brickwork must be given time to shrinkage. If this is not done, then the coating on the wall will crack in the near future or even fall off due to the displacement of bricks during shrinkage.

- Old plaster is eliminated with a hammer, scraper and steel brush.
- Then they check for loose bricks in the masonry. If there are any, then if possible they should be removed from the wall and re-fixed with cement mortar.
- The solution fills chips and deep cracks.
- The joints of the brickwork will play the role of notches to improve adhesion, so they should be cleaned to a depth of about 1 cm.

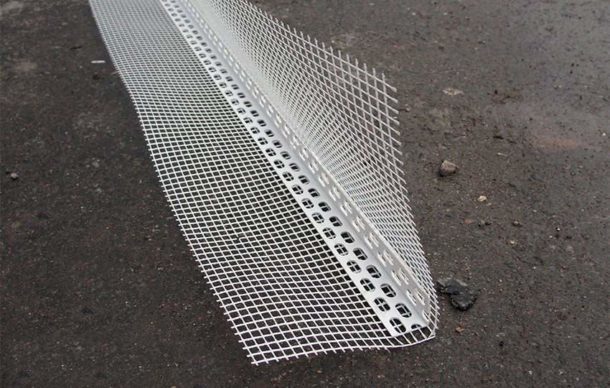
For better adhesion of the plaster to the wall surface, the latter is recommended to be treated with a special primer. You can make it yourself, taking PVA glue as a basis. With a large thickness of the plaster layer, it is advisable to fix a galvanized metal grid on the wall. Its fastening is also desirable if plastering of external surfaces is carried out.
Installation of lighthouses on the wall
It is possible to plaster a brick wall without the use of guides or beacons. In this case, the solution is applied in two layers and leveled “by eye”. But this method does not guarantee quality without proper skills and dexterity, so it’s better install beacons, the more so since it is not at all difficult to properly complete this procedure.
USEFUL INFORMATION:Mold in the bathroom: getting rid of the scourge at home
Lighthouses can be fixed with dowels or recessed into the applied solution. Invariably one: all guides must be installed strictly vertically and be in the same plane. Usually the first beacon is installed at a distance of 0.5 m from the corner or adjacent wall. The distance between it and subsequent beacons depends on the length of the rule. It must move along the plaster along at least two guides.

Plastering the wall
The solution is applied to a previously wetted wall surface. This will increase the drying time of the plaster and prevent its cracking. Plaster mix Spread with a trowel or trowel. It is convenient to use the falcon. This fixture is a square made of wood or metal with a handle. A solution is applied to it, which is much more convenient to type and throw on the wall, without bending each time to the floor.
- The solution should be poured with fairly strong and sweeping movements. Usually the first layer is not leveled. Its thickness is approximately 50 mm.
- If it is required to apply plaster with a layer of rather large thickness, it is recommended to do this in several stages. Each subsequent layer thick 20-30 mm is applied only after the final drying of the previous one. For a better grip on the wall, a fresh layer of plaster can be drawn with a bar full of nails. These scratches will increase adhesion subsequent layer.
- After applying the last layer, the solution should enter beyond the surface of the guides. It is leveled by the rule, moving it from the bottom up in zigzag movements. Excess solution is removed.
- Most likely, small voids (sinks) will be found in the formed surface, which must be filled with a solution and leveled with grouts and smoothing. To control the evenness of the surface once again pass the rule on the beacons from the bottom up.
USEFUL INFORMATION:The use of decorative plaster in the interior

The most difficult moment is the removal of the corners and the joints of the walls and ceiling. Their processing is carried out a day after plastering the walls.
- To derive external corners, it is convenient to use a wooden lath, which is attached to an adjacent wall and removed after the solution dries.
- The internal corners are displayed with the help of half-tiles. You can also use the rule, cutting off its edge at an acute angle for convenience.
- When aligning the walls under the ceiling, the rule is placed parallel to the lighthouses.

You can only start finishing the wall after the plaster is completely dry.
Thus, it is not at all difficult to properly plaster a wall or brick wall with your own hands. A wall aligned in this way will serve as a reliable basis for creating a unique interior for your apartment.

EXPERT SITE
Tsugunov Anton Valerevich
Master Station Wagon
- Since 2003, I have been engaged in the repair and decoration of premises.
- Over 100 completed objects.
- I appreciate the quality, more than the quantity!
Personal page >>>
Friends!
I offer you the service "Friend Builder"
As this site develops, subscribers and visitors are turning to me more and more often asking for help with advice on various issues of repair and decoration.
Questions are sometimes asked very complex and interesting. You can’t write an article for each situation, so I decided to advise you individually.
Thanks to you, friends, a new direction of my favorite work has been born - share your experience and benefit everyone who is undergoing repairs!
Get a one-time consultation from me >>>
Order full apartment repair support >>>