Rocking chair with his hands: 2 simple assembly instructions
Table of contents
-
1 What are rocking chairs
- 1.1 Instruction 1: Build a wooden chair on runners
- 1.2 Instruction 2: Assembling a metal chair Pendulum
- 2 To summarize

If you want to relax in comfort, do yourself a rocking chair, it's so easy
What could be nicer than to swing at your leisure in a comfortable chair? Unfortunately, not everyone has such furniture. But I'll tell you how to make a rocking chair with his hands from the available materials. I propose two simple instructions, from which you can choose the appropriate option.
What are rocking chairs
| illustrations | Variety and description |
 |
Chair on runners. This traditional construction, where the seat is mounted on curved guide - runners.
|
 |
Chair Pendulum. This is a more complicated construction, in which the fixed base and a seat connected independently. This chair is stable and safe, and it does not spoil the floor. |
Instruction 1: Build a wooden chair on runners
| illustrations | Description of action |
 |
The size and configuration of the chair. On the proposed scheme I outlined the dimensions of rocking chairs. However, I advise you to adjust the size in accordance with its constitution, to make their own hands kreslokachalku as comfortable as possible. |
 |
Select radius skids.
|
 |
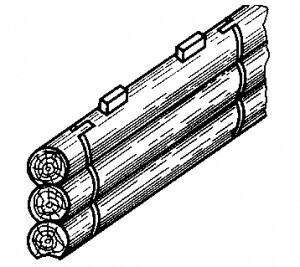
We set the benchmark. Insert the plywood strip in the gash on the rail. In our case the strip has a length of 1.2 m and the distance from the rail to the greatest slat point bending was 15 cm. We are putting a design to draw out a workbench and the radius center marking up on the curved strip. Circled by a radius on the bench lay stacks and fasten them with screws to the table. On stacks fasten the strip of plywood. |
 |
expose constraints. To slats do not slip on the surface of the table, spread the bars of the same height. Bars fix screws on the table. |
 |
Sticking runners.
Workpiece leaving at rest for 2-3 days, while the carpenter's glue is completely dry. |
 |
we combine skids.
|
 |
We produce reinforcing elements. If you install a seat on wooden runners, they can crack. Therefore, the board cut of amplifiers - the same runners, but less long. At this stage we do a router slots for connecting to an amplifier with locking pins runners. |
 |
Glue runners to amplifiers.
|
 |
Making the side rails.
|
 |
Glue the side stand.
|
 |
connecting the base.
|
 |
Putting seat.
If desired, the slats are placed with a gap to perform after weaving willow twigs. |
 |
We collect all the details. Seat through the adhesive and thorns with Bobkov butted props. At the same stage cut and install armrests. Subsequently, the chair can be covered with varnish. |
Instruction 2: Assembling a metal chair Pendulum
| illustrations | Description of action |
 |
Harvested materials and tools. Materials required:
The tool will need a Bulgarian with a cutting disc for metal, welding machine, clamps and measuring tools. In order to work with pipes needed profilegib. |
 |
Drawing product drawing in full size. As shown in the photo, we draw on a level floor sidewall chair. To simplify the task, you can lay on a side chair and a circle with a back seat. The dimensions do not give specifically, since it is necessary to use the size of the seat on which you sit comfortably. The less curved parts will be in the design of a product, the easier it will be to collect it. |
 |
Making the housing for bearings.
If you weld on the puck, make sure that the central hole in which the diameter of the rod was less harvested. |
 |
Putting the side of the seat and backrest. Make the drawing on the arch profile and weld two identical sidewall. We put details on drawing and check the correct assembly. |
 |
Prepare sidewall base. Arches on benders profile, as shown in the photo. Thus we do the same 4 parts. By the way, the curved part was used for decorative effect, and if there is no bending tool, the sidewall can be cooked in the form of a trapezoid. |
 |
Putting seat.
|
 |
Sheathing seat frame. Cut pieces of steel strip, similar in length and have jumpers welds in the seat frame, as shown in the photo. The interval between the welded pieces of steel strip select at his discretion, but this distance should not exceed 5 cm. |
 |
Weld the bottom support. Previously prepared pieces of curved weld profile on the 2 pieces together.
|
 |
Welded movable hangers. Bearing Units, together with installed rods welds at the bottom of the chair and the top of the curved side walls. Bearing assemblies on the chair and on the sidewalls join pieces of equal length rod. welding quality when connecting the suspensions must be very high, since it is these details have to load from the weight of the seat and the person sitting in it. |
 |
Footrest. In principle, it is possible to do without supports, but keep your feet on weight uncomfortable. Therefore, the profile pieces and the steel strip is collected and welded stand considering the length of your legs. At the end of the assembly can be welded hook or loop to lock the chair in a fixed position, if you will need to seat not swayed. |
To summarize
Now you know how to make wooden and metal chair with his hands. Additional information can be found by watching the video in this article. If you have questions, you can ask in the comments.