Water supply of private homes: the design and creation of an autonomous system
Table of contents
- 1 Centralized and autonomous systems
-
2 water sources
- 2.1 How to dig a well
- 2.2 How to drill a hole
-
3 Connecting the pump equipment
- 3.1 Mount the sump pump
- 3.2 Set the pump in the well
-
4 Laying of water supply
- 4.1 How to perform a pipework
- 4.2 How to provide hot water
- 5 conclusion
Design the water supply of private houses and to mount an effective complex system of its own, but it is real. The article provides guidelines for arrangement of water supply, connecting pumps and pipe laying. Also here you will find useful tips on the selection of materials and equipment for these tasks.
Centralized and autonomous systems
Private home water system can be either centralized or autonomous. Both options have their own peculiarities.
To provide home water need to do a lot of work: from the selection and arrangement of the source to the piping
In a centralized system:
- to supply. The water comes from a water main, or energized by the pump station or from the water tower.
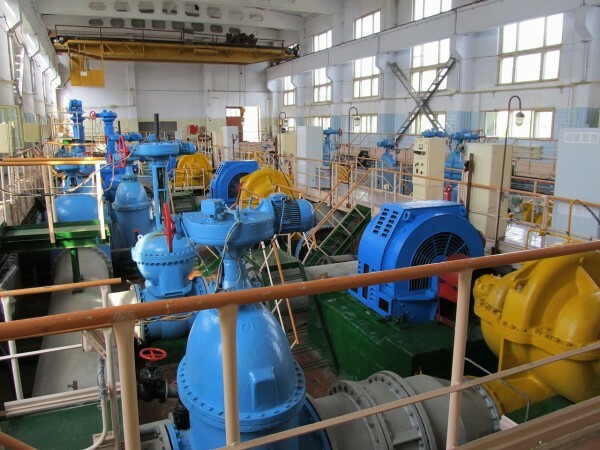
Pump station - the central element of the distribution system
- System pressure. The pressure in the pipes is provided automatically, ie we do not need to install additional pumps.
- Dependence on foreign circumstances. System is obtained totally dependent on external factors: the breakage or disconnection of the central pump house or impulse line remains without water. Possible - for a long time.
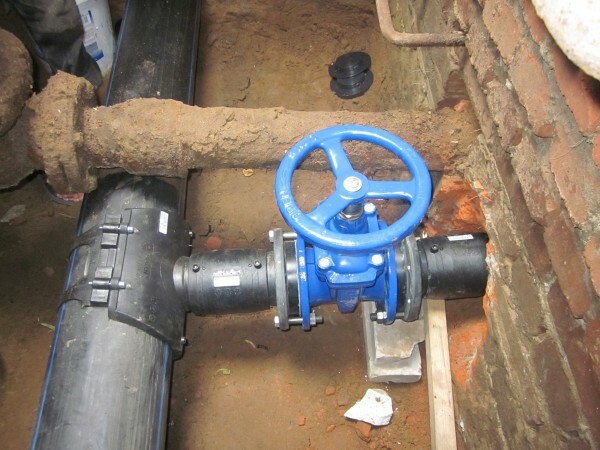
Withdrawal from the water main
- water treatment. Water when entering the central water supply system is cleaned - mechanical removal of particulate impurities demineralization decontamination.
The quality of this treatment is very different, because in most cases, require additional cleaning.
In a standalone system:
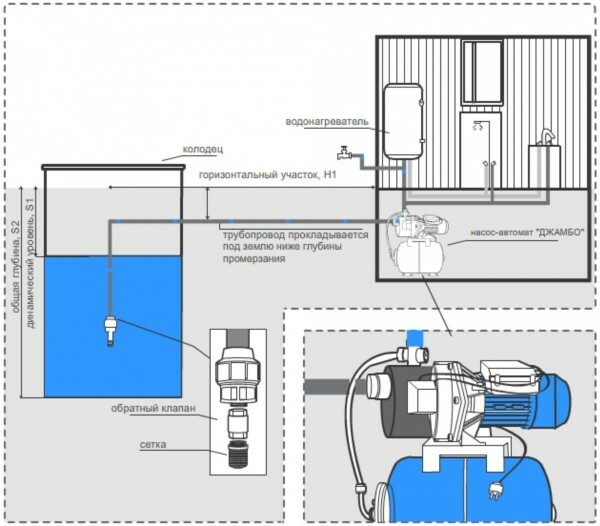
Autonomous water supply scheme based on the well
- to supply. It acts as the source well or well (depends on the location of the aquifer).
- The pressure in the system and dependent on external factors. water transportation system is provided by the pumping equipment, which we need to install and maintain on their own. This makes the water dependent on the presence of the mains voltage, so it is desirable to have a backup system power supply operating from the generator.
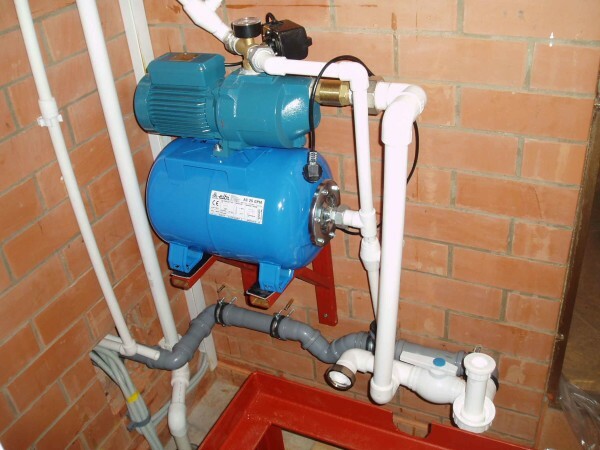
Pumping station in a private house
- water treatment. It is necessary to take care of cleaning up: sometimes the original quality of the water does not allow to use it for drinking and cooking.
Differences exist in the financial plan. When using a centralized system, we have to purchase only tubes and valves, but we will have to pay a monthly water supply services. For the use of an autonomous system does not need to pay, but have to buy quite expensive pumping equipment and splurge on the well / borehole arrangement. As a result, pay off stand-alone system for at least a few years.
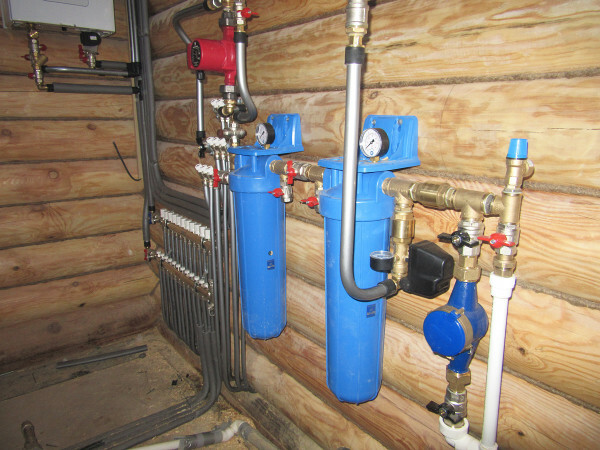
Mounting a stand-alone house with his own hands the water supply system, you need to purchase and properly install a large number of equipment
What kind of system for water for private homes will be optimal?
- If possible, it is easier to connect to the centralized water supply system. Even if the monthly payment costs will be much lower;
- if not possible, we will have to make a stand-alone system. Labor, time and costs will be higher in the order. But, having worked one time, we can provide the house with water for several decades.
water sources
How to dig a well
So, for example, water source, we need to equip yourself. The simplest solution is to dig a well. This solution is justified if the aquifer is located within the area of 4 - 15 meters and has a sufficient capacity.
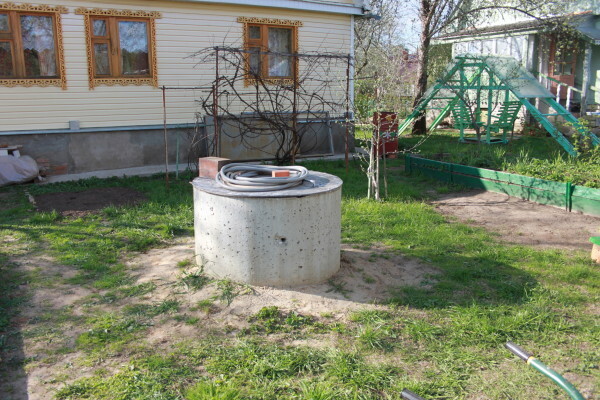
Well - the easiest source of water
The advantages of the well:
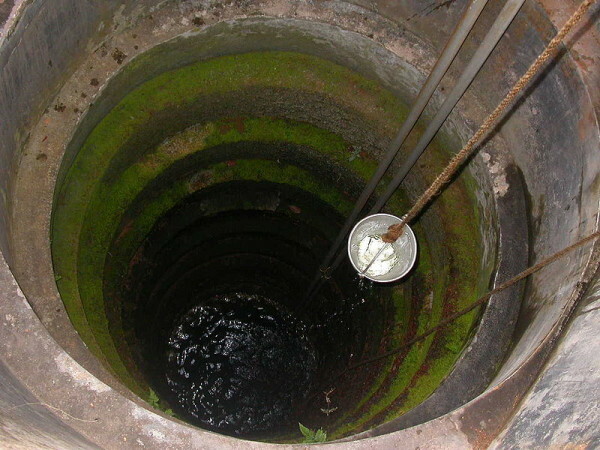
When disconnecting the power water can be lifted manually
- relatively low labor costs;
- possibility of manual lifting water during a power outage;
- low cost of pumping equipment;
- service life - 50 years or more.
well Disadvantages:
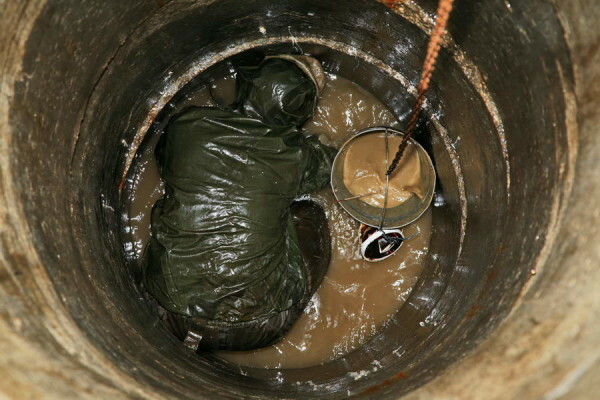
One of the drawbacks of the well - the need for regular cleaning
- the well can penetrate the ground water with soil particles and sludge. This leads to a reduction in water quality;
- to avoid silting, wells need to be cleaned regularly;
- water level depends on the time of year, so that in the heat of shallow sources can dry up.
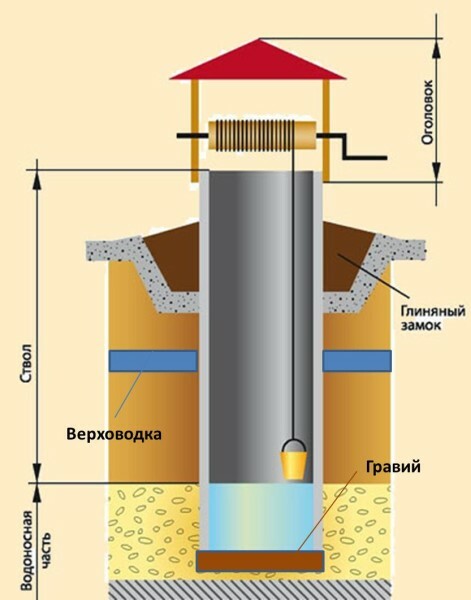
well scheme
Instructions on digging wells and the arrangement is as follows:
 |
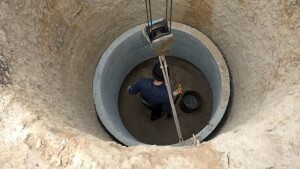
Excavation. The chosen location plot the layout under the well itself and under the ground around the perimeter. Then, dig a pit depth of about 2 - 2.5 m. |
 |
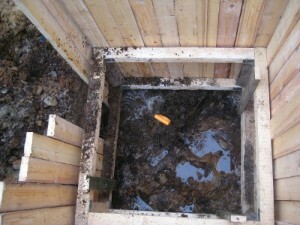
Installation log or rings. The excavated trench crowns omit either the first wooden frame, or the first concrete ring, which will strengthen the well wall. Gradually deepened bottom of the pit beneath the base or carcass concrete ring, omitting all of them below. As lowering products are increasing from the top structure, or by adding new setting crowns following rings. Once the design depth is reached, sealing the joints between the rings. |
 |
Construction of the aquifer. When we reach the layer containing a large amount of water, it will be necessary to further delve approximately 1 - 1.5 m. For wet soil sample using a box of tightly fitted boards, which are installed in the lower part excavation. Primer is chosen from the box and goes upstairs with buckets. |
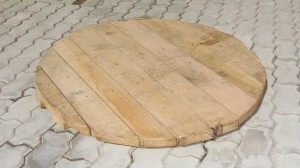 |
filter arrangement. At the bottom of the pit filled in layers washed coarse sand, gravel and crushed stone or gravel. These materials will provide water drainage and trapping of clay and silt particles. On top of the drainage layer should be laid with a shield of aspen planks, downed with slight gaps. The presence of such a shield also improves water quality. |
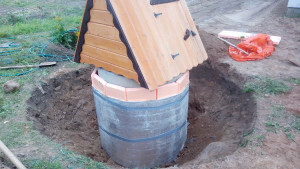 |
Surface work. By the well perimeter dig a pit diameter of about 2 m and a depth of 60 cm. At the bottom of the pit laid layer clays, which thoroughly ramming - this "clay lock" protects the well from the inverse filtering spilled water. On top of a clay castle arrange reel of slabs or concrete screed. On top of the screed can be laid paving slabs or asphalt pad. |
The upper part of the well is made in different ways:
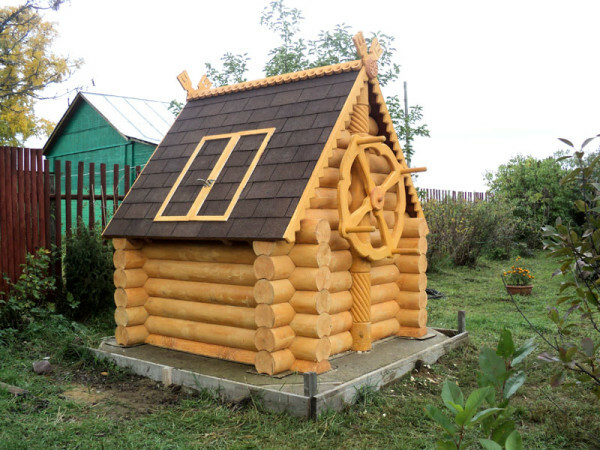
Decorative design with collar - one of the design options the top of the well
- You can install a decorative house with a roof, securing it the gate for manual lifting water;
- possible to arrange the latent caisson (pit) or surface for a house of the pump station.
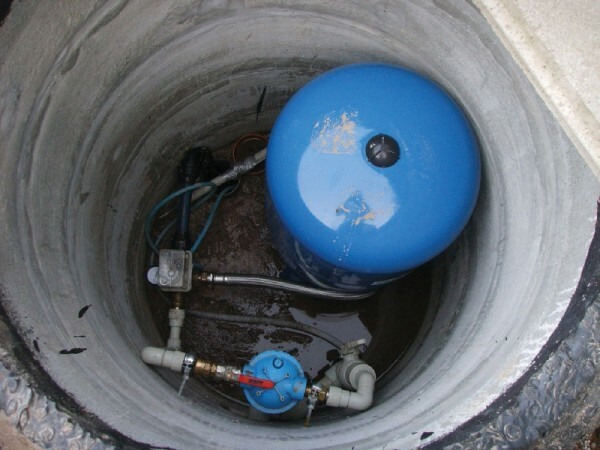
Underground caisson for installation
Option with a decorative house is suitable not only for doors, but also to install a submersible pump. But pump surface should preferably be in a separate structure (underground caisson ground booth). You can also install a pumping station in the house - then to the end walls of the well will be enough to lay a pipe or hose.
How to drill a hole
Water from a well at home as possible.
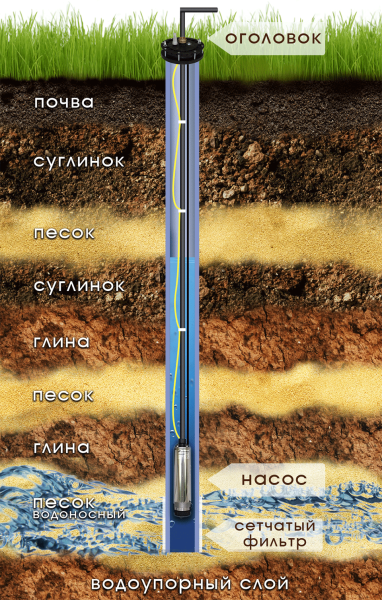
Scheme aquifer wells
The advantages of the well:
- stable volume of water with a relatively small seasonal fluctuations;
- high water quality;
- no need for regular maintenance.
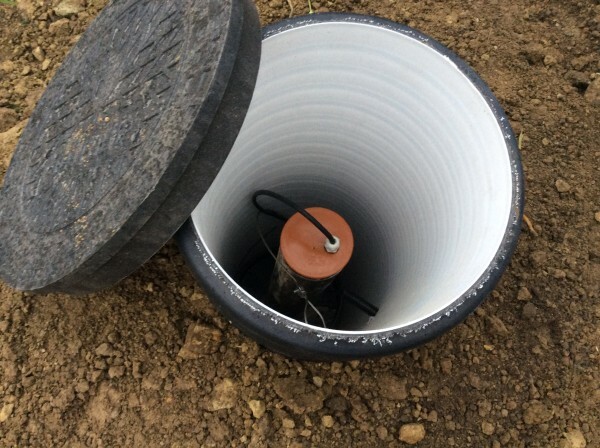
On the basis of the well is going to a compact and efficient system
well Disadvantages:
- expensive and complex drilling, almost always - with the use of professional equipment;
- smaller than that of the well life cycle (from "on the sand" wells);
- the need for costly submersible pumps.
Water in a private home usually carried out on the basis of two types of wells:
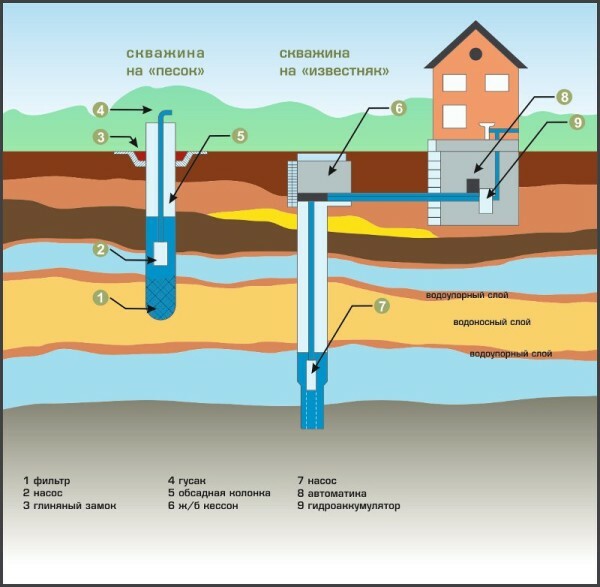
main types of wells scheme
- Well "in the sand." Depth from 15 to 40-50 m, period - from 8 to 20 years. This hole can be drilled manually finding aquifer empirically. To lift and water supply require the installation of pumping equipment. Water may contain sand and clay particles, therefore it requires additional cleaning.
- Artesian well. The depth can be up to 150 meters, the service life - up to 50 years with proper development and operation. The rise of water is carried out by its own pressure, pumps are mainly used for transportation. Drilled solely by machine with a mandatory registration and passport well.
Typically, drilling to achieve the desired water levels are professionals. However, if the water pot is shallow, it is possible to perform the work and yourself:
 |
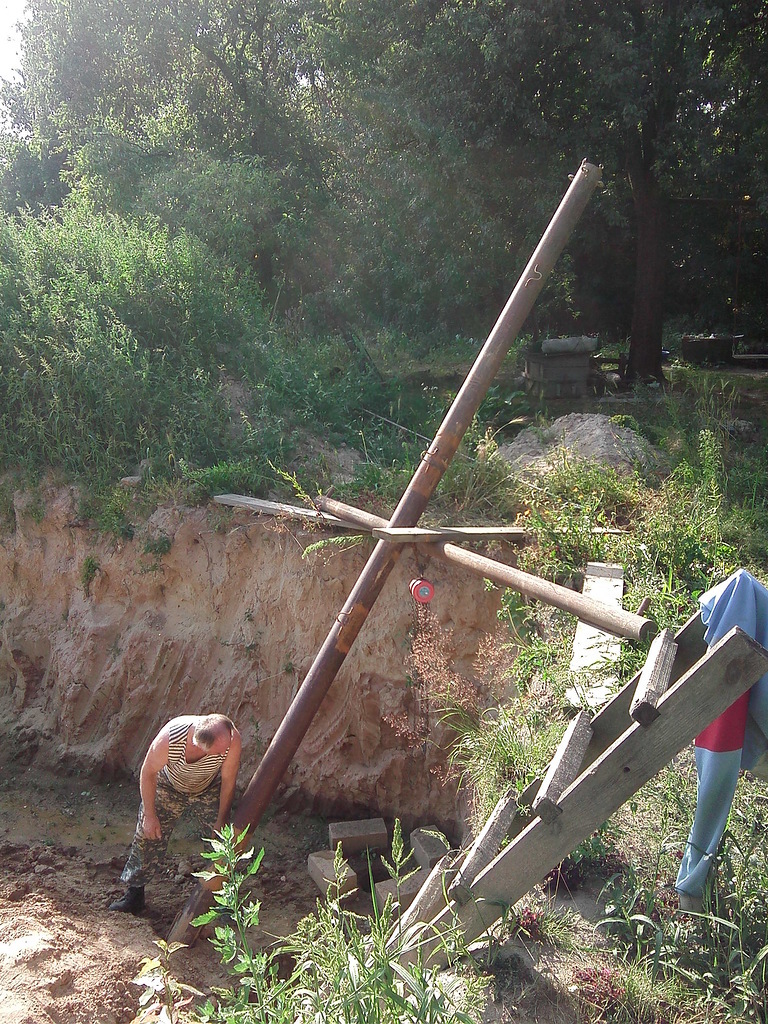
Preliminary work. The chosen location dig a pit for the installation of the caisson or assembly wells tip. Set the tripod, which will draw the guide rails. |
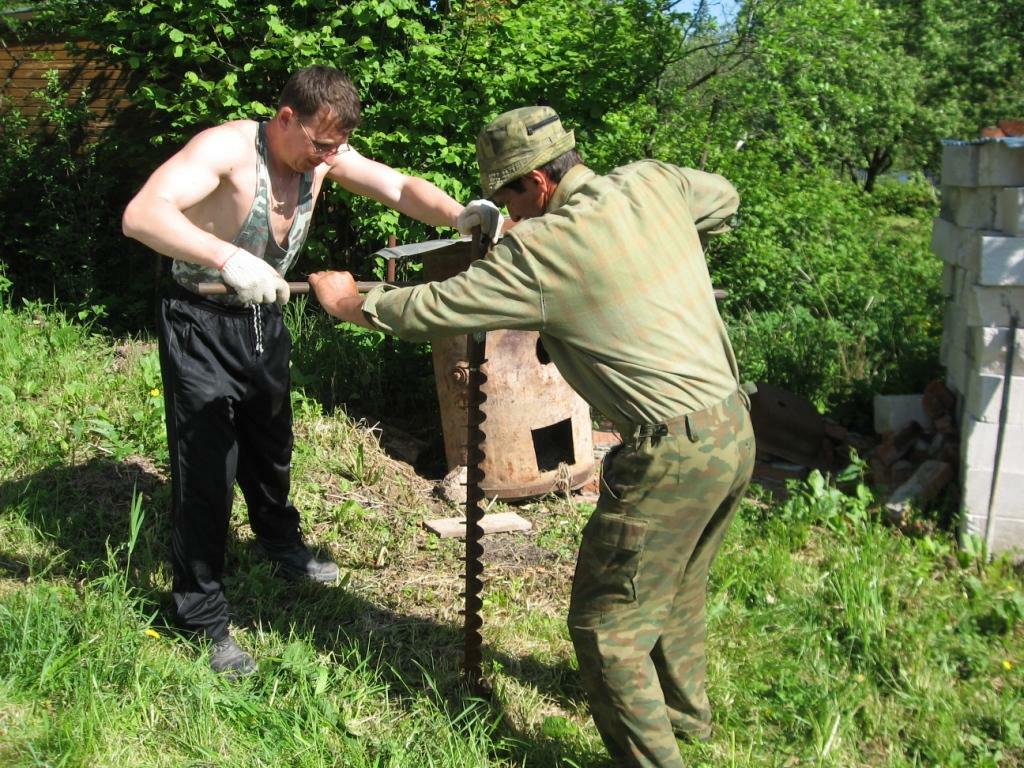 |
Auger drilling. Using the auger, deepening borehole otgrebaya excavated material from the throat. Periodically, extract the tool, cleaning the blades from sticking material. In manual drilling work can be facilitated by extending the handle of the drill "shoulders" of the steel pipe of length 1.5 - 2 m. |
 |
Installation obsady. As set penetration hole plastic or metal casing (diameter should allow free movement of the drill). Between a casing parts connect either threaded or welded. |
 |
Completion of the work. Drilling continues until the passage of the aquifer. After reaching the designed depth expanding lower portion of the well and wash it with a submersible pump for removing sand, silt and clay particles. In the lower part Equips gravel pack or set a special filter tube with mesh walls. |
Properly drilled and well furnished is able to provide an uninterrupted supply of water for your home water supply.
Connecting the pump equipment
Mount the sump pump
To deliver water from a well or borehole to the points of consumption, it is necessary to mount the pump equipment. Description will start with the assembly process of manhole pumps.
these types of pumps can be used for the well:
- Subsurface pump (submersible). The pump unit is placed in the water in a suspended state (on a wire or nylon cord). With surface pump hose connected to the water supply and power cable.
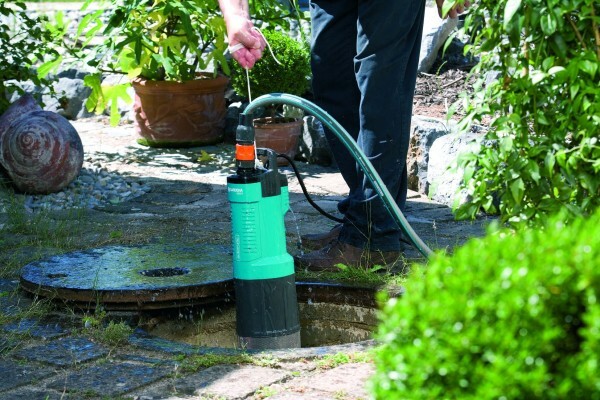
Submersible pump for well
- Surface pump or pumping station. Needless pumping equipment is located on the surface (in the pit, caisson or in-house). On the aquifer depth omitted hose filter, which is usually mounted on the check valve. The presence of the check valve prevents the movement of water back into the well by gravity and facilitates pumping with the pump switched off.
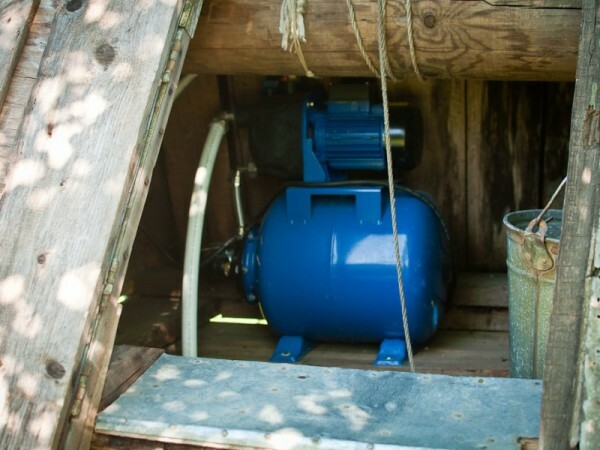
Surface pump can be installed in the usual pit
As a rule, submersible sump pump are mainly used for household needs. water system of private home ownership is almost always on the basis of constructing a pump station.
The main elements of the unit:
Design and operation of the pumping station
- centrifugal pump with an automatic on / off system;
- accumulator - the tank is divided into several sections membrane. The presence of the tank allows you to maintain a constant pressure in the system by gradually filling with water;
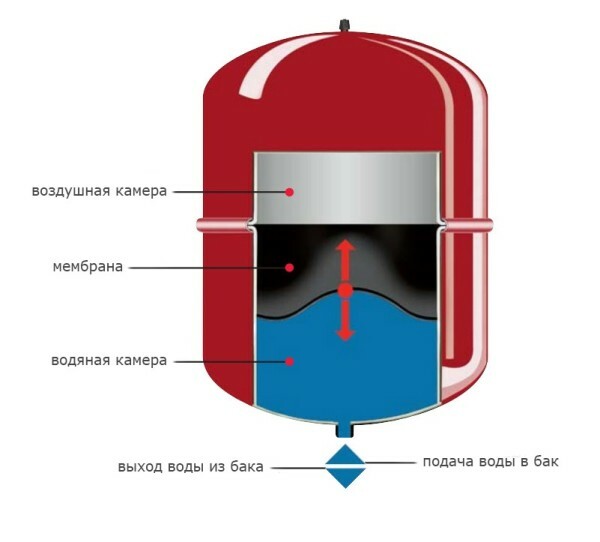
Scheme membrane tank device
Other advantages include the compensation tank hammer and power savings due to less frequent switching pumping automation. The greater the volume of the accumulator, the lower the wear on equipment.
- pressure switches, switching automation control;
- Instrumentation.
The system is going this way:
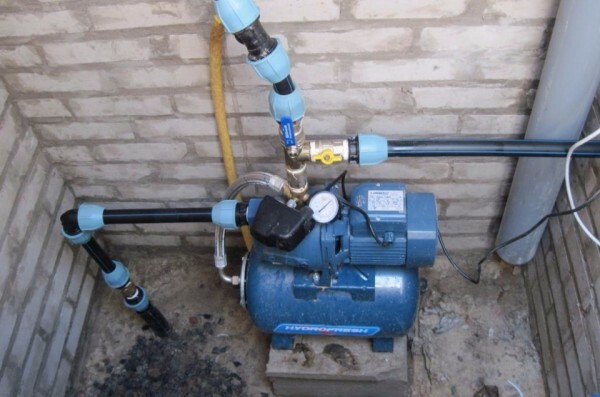
The unit is mounted on a podium made of bricks
- Mounted pump station. As the base used concrete or brick podium. Under the device puts a rubber mat to compensate for vibrations.
- By the pump is connected the water supply hose from the well. In place of connection you can install a simple strainer for pre-cleaning.
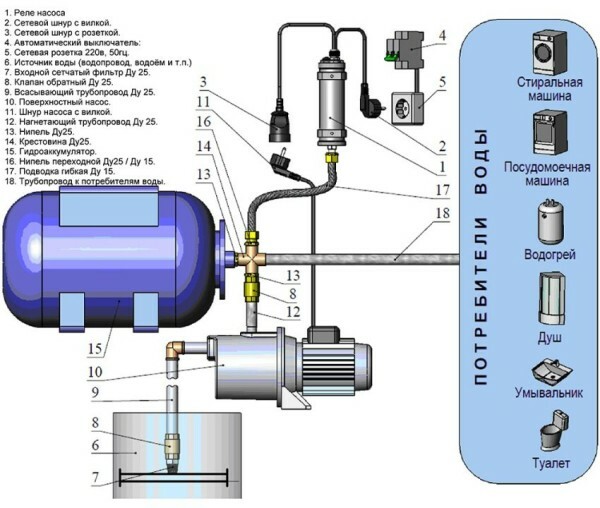
Wiring pumping station
- Outputting is performed joining pipe. In the future, based on it, we will do the wiring in the house.
- It is used to set automation. For this process through a hole in the pump is filled with about 2 l of water and the inclusion machine. The system is adjusted so that the automatic shut-off occurred at a pressure of about 2.5 -3 bar, and start - 1.5 - 1.8 bar.
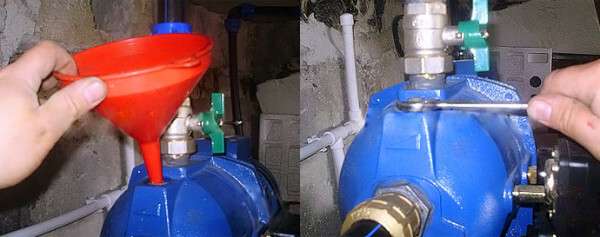
Filling and adjusting the pressure switch
Set the pump in the well
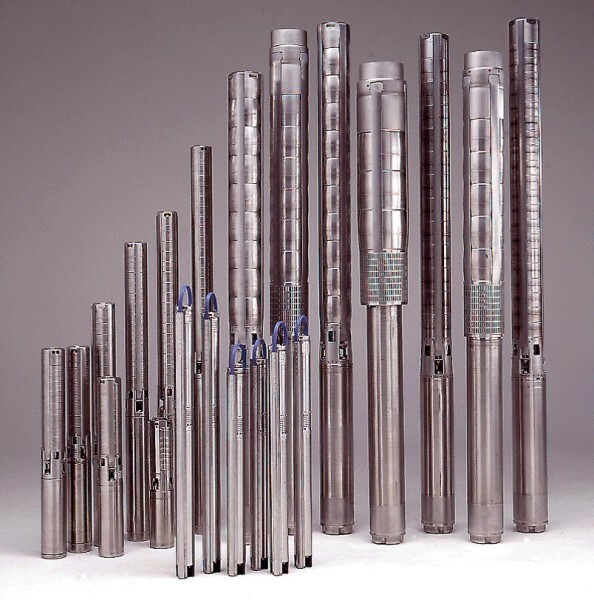
Pumps for wells
If the source of water - well, in favor submersible pump as the main equipment. For such devices is characterized by a combination of high capacity with a relatively small diameter, because they are quite expensive.
The pump is connected with a hose and power cable, and then lowered into the well on a rope:
|
Determination of the depth. The level of the water surface is determined from the passport, possibly controlling it by means of a weight on a cord. We expect the level of immersion of the pump so that the suction part was at least 1 m below the minimum dynamic level and at a distance of 1 to 3 m from the bottom. At boreholes optimum level is considered 2/3 of the depth of the aquifer - approximately at the level of the lower edge of the casing. | |
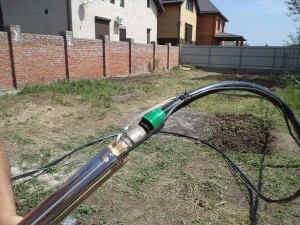 |
Preparing to install. In accordance with the received length was measured out hose and cable, which are interconnected by plastic clips every 3-4 meters. Fasten the cable with the hose to the pump. |
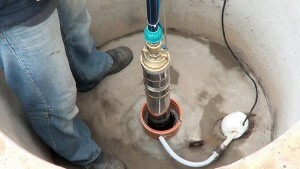 |
Installation of the suspension system. Steel cable or nylon cord (need least fivefold margin strength) to fix the pump housing. Omit the equipment in the well. When a small mounting depth fasten a rope or cord on the suspension of the folded several times a rubber band. This damper will damp vibration. |
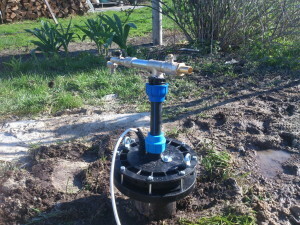 |
Installation tip. Above the well head casing fastened. By the eyebolt at the bottom of the cap tip tie a rope or cord suspension. The hose and the power cable lead tip through the central hole and then tighten the bolts, sealing structure. |
Laying of water supply
How to perform a pipework
Water houses may be based on any source, but the efficiency of the system depends on how well we lay a pipe. For cottage commonly used products from plastic, polypropylene or polyethylene, which are connected either by means of fittings or welding.
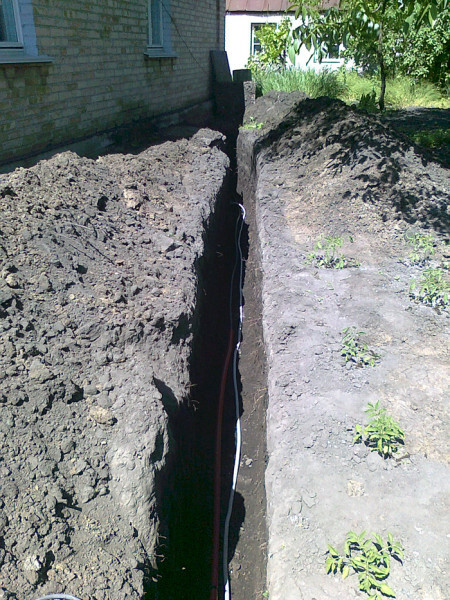
Trench with pipes
Overall algorithm laying pipe includes such steps:
- Mounting of the feed pipe. From home to the head part of the pit hole or caisson with pumping equipment digging the trench. The depth of the trench should be between 1.5 to 2 m, thereby preventing freezing of the water pipe in winter.
Additional measures to protect against freezing is the thermal insulation of pipes using polystyrene or polyurethane casings, as well as active heating cable laying.
- entry clearance into the room. The foundation or plinth make hole into which the insert metal sleeve diameter greater than the pipe diameter. Through the sleeve, which will provide protection against deformation during drawdown buildings, factories pipe into the room. Carefully insulate the hole.
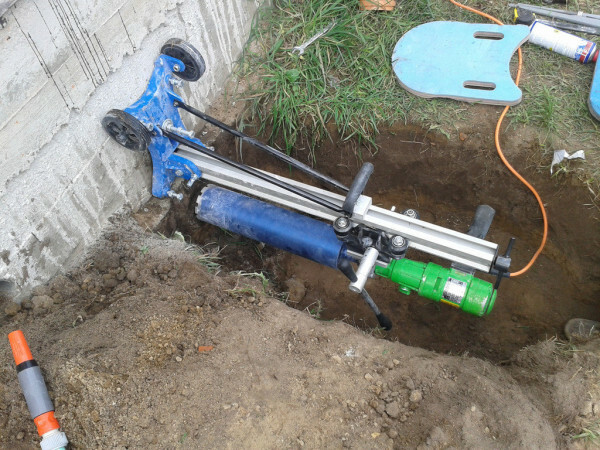
Drilling holes in the foundation
- Preparation for the installation of plumbing. On the walls we put markings for laying pipes. When assembling the open anchoring surfaces on the carrier brackets, which are fixed on the pipe. If you plan to concealed installation being done within the walls of the groove, using the wall chaser or a hammer with a nozzle-bit. Grooves are also set in pipe brackets.
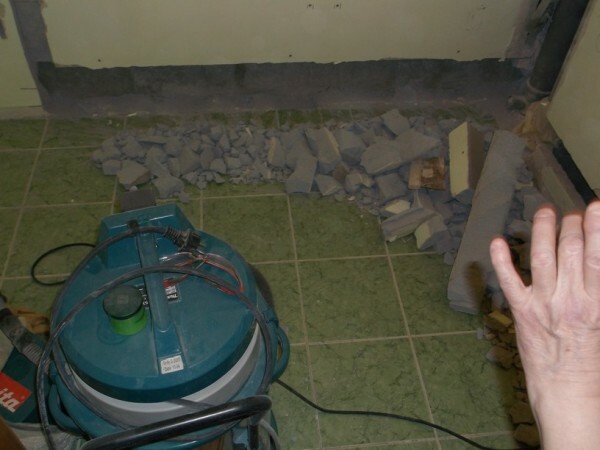
Photos cutting grooves for hidden laying
- Supply Pipe. At the entrance to the house set the ball valve, joined by a collector. To connect the collector with his own hands the pipe water supply system, which is divided into several circuits. This mounting design allows you to optimize the pressure at the opening of the tap pressure on other sites will not fall.
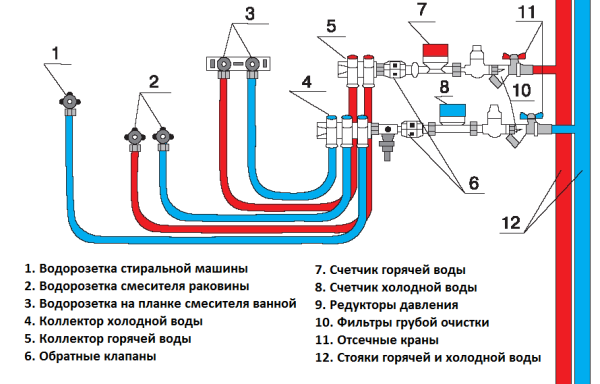
Scheme collector wirings
- Building the system. Plastic pipes are connected with each other using a press-fitting. Polyethylene and polypropylene products assemble welding method using a special soldering iron to connect. Anchoring the tube on the brackets (open or cutting grooves). Connect the shut-off valves, sanitary ware, taps and other point of consumption.
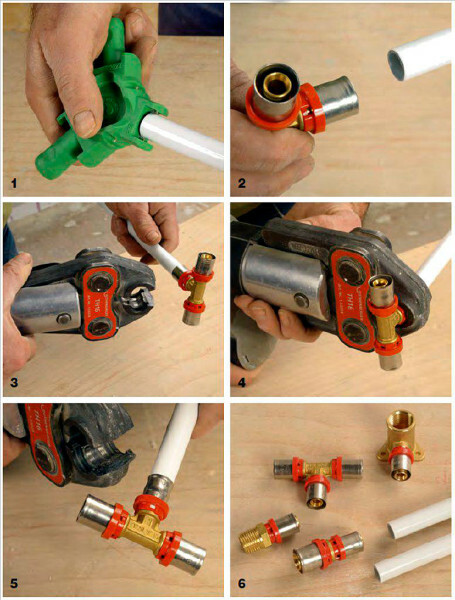
The circuit assembly using a press-fitting
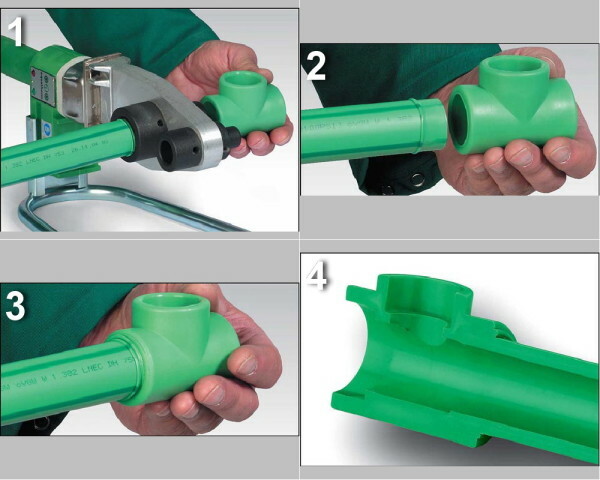
Scheme soldering polypropylene tubes
Before incorporation Stroebe and finishing work is desirable to test the system. During the test run check the quality of connection pipes, the work automation and regulating operation of the pump, pumping water from a well or borehole.
How to provide hot water
In order to ensure the proper level of comfort, it is worth thinking about the device hot water system.
So we can wash, wash the dishes and take a shower with hot water, you can use a variety of devices:
- Water heaters - gas or solid fuel. It may be either single-circuit (for heating water only), and double-circuit (hot water + heating). To use the system of the collector is given a separate cold water pipe is connected to the boiler and the boiler is already being separate hot wiring.
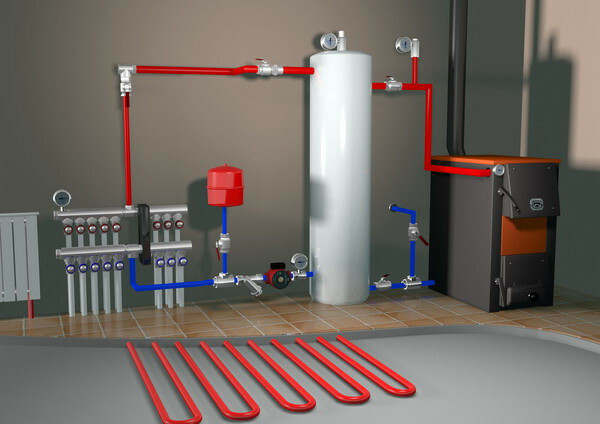
heating and hot water supply on the basis of solid fuel boilers
- water heaters. Such a heater is a tank 50 to 100+ liters, inside which the heater is located. Water enters the reservoir is heated to the desired temperature, after which the heater is switched on only to maintain the desired degree of heating. As the use of the reservoir is replenished.
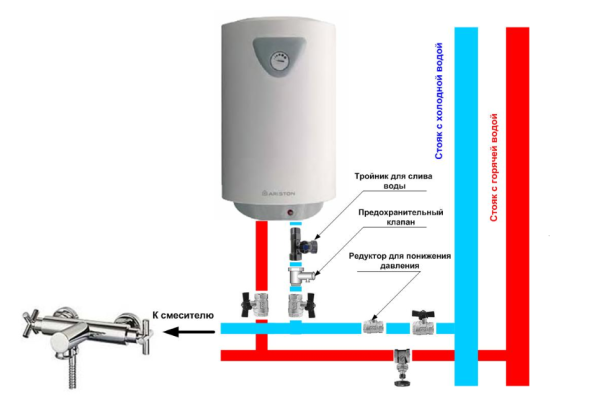
Scheme Fitting water heater
- Instantaneous water heaters. They used either in the little cottages without shower cubicles or in larger cottages on individual sections of pipe layout. Instantaneous heater mounted on the tube with cold water immediately before the point of consumption. Heating occurs with the passage of liquid through the device body with an electric or inductive element.
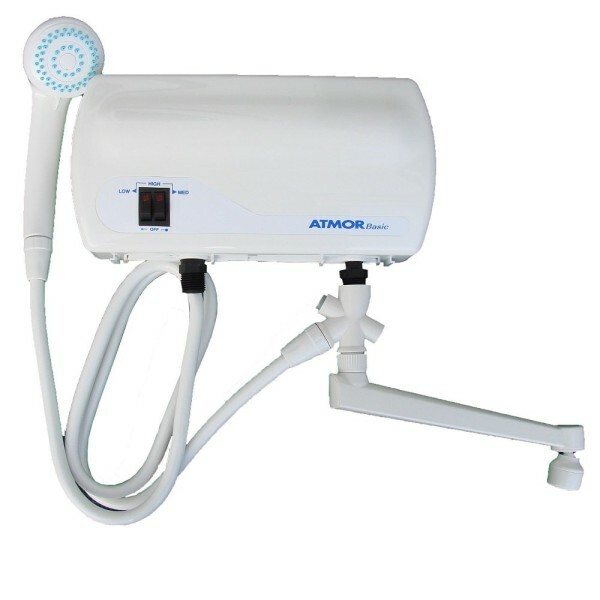
Fluid heater
As a rule, in the house, which is used throughout the year, installed water heating boiler. Savings and flow are suitable for summer houses, as well as for buildings in which hot water was mounted after the addition was installed heating system.
conclusion
Water supply of private homes can be implemented by one of the schemes given above. For this purpose we examine the described algorithms and instructions, as well as view the video in this article. Answers to any questions regarding the installation of water, you can get in the comments.


