Lightning 4 basic elements of lightning protection systems
Table of contents
-
1 system elements
- 1.1 Part 1. Lightning
- 1.2 Part 2. line tokootvedeniya
- 1.3 Part 3. ground loop
- 1.4 Part 4. voltage limiter
-
2 Installation and operation of the system
- 2.1 Installing molnieotvodyaschih circuits
- 2.2 installation of earthing
- 3 conclusion
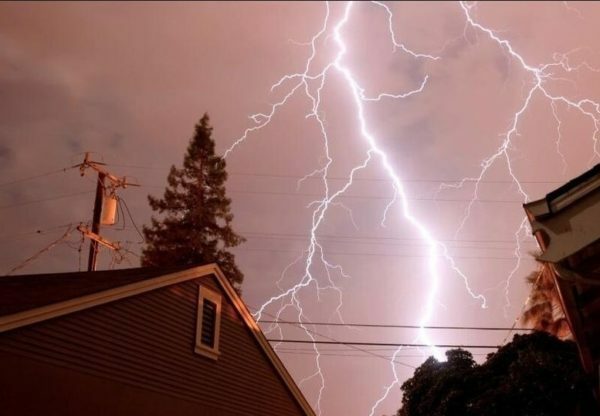
Avoid lightning strikes practically impossible, but to minimize its effects - can be!
Lightning at home with their own hands should be carried out strictly according to the rules - the only way to ensure an adequate level of security. Fortunately, the design does not diverter is complex, and the rules of protective circuit device also really understand.
We analyze the design of the basic elements of the system can protect the house from lightning. In addition, for self installation of lightning protection, you can take advantage of the algorithm setting the receiving circuit and grounding lines, which I will describe.
system elements
Part 1. Lightning
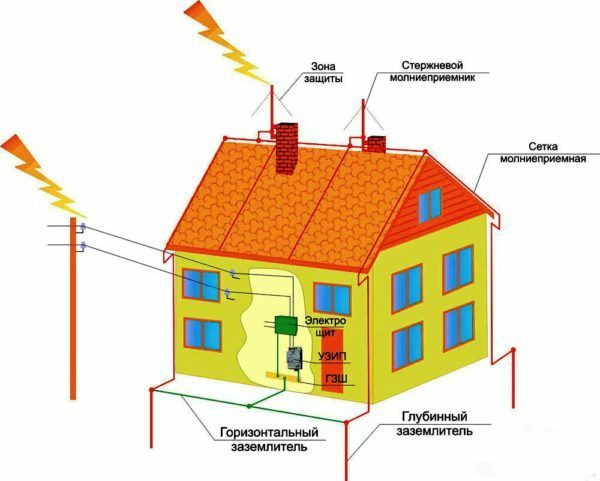
The general scheme of protection against lightning
Effects of a lightning strike can be themselves serious, because to ignore this natural phenomenon is impossible in any case. To protect against fires and failure of electrical appliances need to take care of the creation of an effective lightning protection system. Such a system is, of course, will not affect the storms in your area - but to minimize their consequences can.
Lightning protection of buildings are usually constructed on a fairly simple principle. Lightning discharge is collected by current collector line and goes into the ground. For minimizing the impact on the electrical network meets the inner lightning protection system, a device for surge protection (SPD). All elements of this system will be discussed in the article.
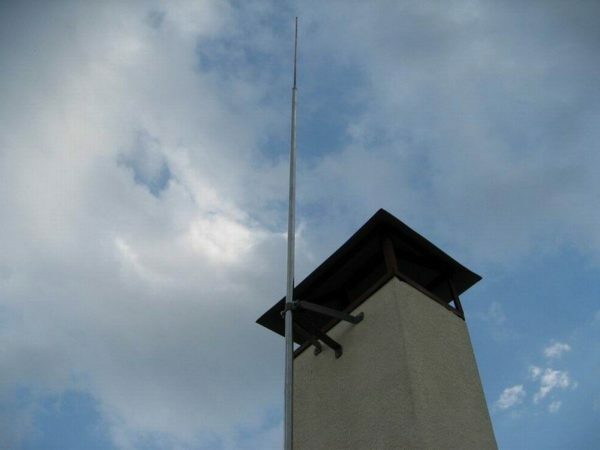
Metal lightning arrester - the first element in contact with the discharge
Lightning - a "first line of defense." It is set as high as possible - so that an imaginary dome descends at an angle of 45 ° to the ground, cover the entire building. Make this part from metal, but a pipe and a brick, and a wooden mast may be used as additional support.
The main types of air terminals:
| Illustration | device type |
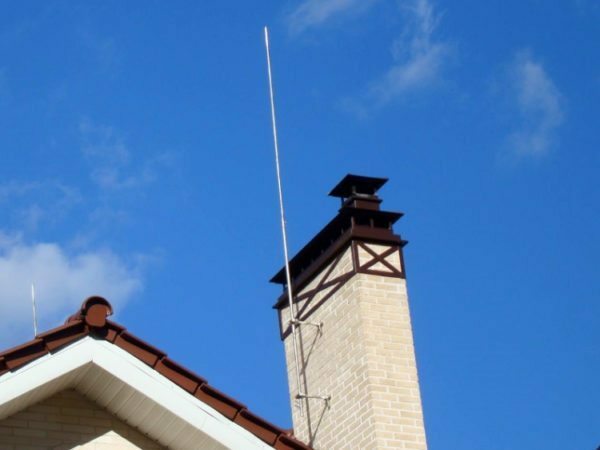 |
Rod. The easiest to manufacture, and therefore the most common variant. It made of a metal rod with a diameter of 12 mm or more, or from a metal tube. Optimum device mounting height - from 1.5 to 2 m with respect to the highest point of the roof. Is secured either by itself or on a supporting mast. |
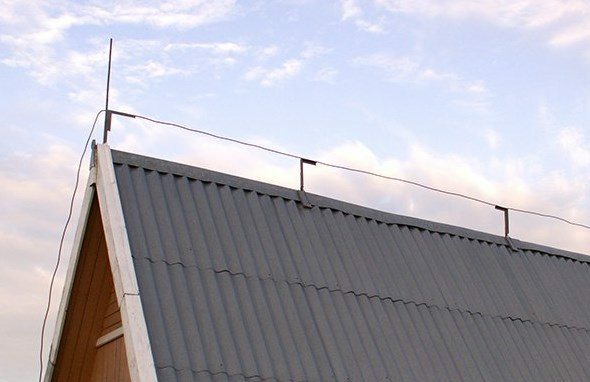 |
Rope. As the receiving member acts as a cable stretched between the supports on the roof. The supports are set on skates and the edges of the roof. For fastening molniepriemnyh cables can be used as metal components, and the support of dielectric materials. The minimum distance from the cable to the roof of the incombustible material - 10 cm. If the roof is made of wood, the structure is raised to 1-1.5 m from the ridge line. |
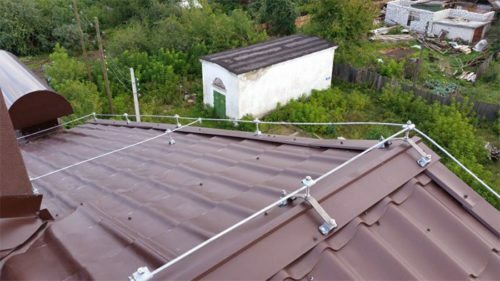 |
Reticulate. In fact, it improved tether design. In addition to the receiving element on the ridge Current taps are attached and on the slopes. The entire network is closed on one ground loop. |
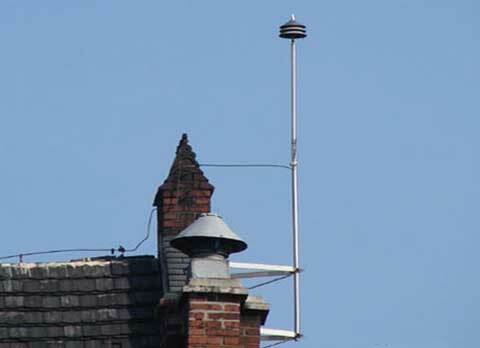 |
Active. It is set not less than 1 meter above the highest point of the roof. When the air ionizes that enables capturing lightning currents in a radius of 100 m. After collecting discharge operates as a conventional lightning rod. Key disadvantages of active systems - dependence on energy supply and high price. |
After the installation of any lightning conductor need necessarily to check its resistance. This value is in any case should not exceed 10 ohms.
Part 2. line tokootvedeniya
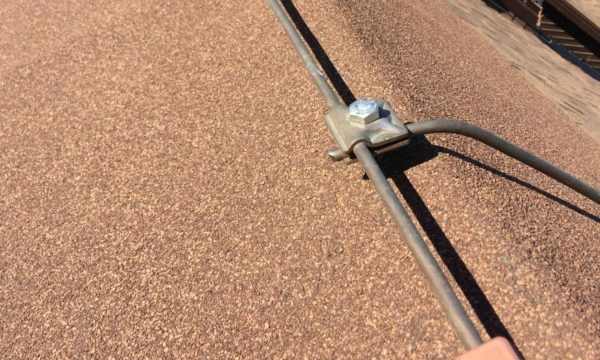
Compound with molniepriemnym execute via cable. clamping sleeve
The next element of the lightning protection system - collector line. By and large, it will fit almost any wire connecting the air terminal to the grounding circuit. But to ensure the desired level of reliability design must meet certain requirements:
- Conductor. For laying lines used wire diameter of at least 6 mm. The minimum sectional area of the wire depends on the material: for copper is 16 mm2, for aluminum 25 mm2 and 50 mm2 of steel.
- Compound with lightning arrester. It is best to hold and provides a clamping sleeve contact of galvanized steel screw. You can also use the bolt connection and welding.
- Making turns. When laying the collector wires on the slope or wall, as well as rounding obstacles all the turns you need to make out in the form of smooth arcs. This minimizes the risk of sparks.
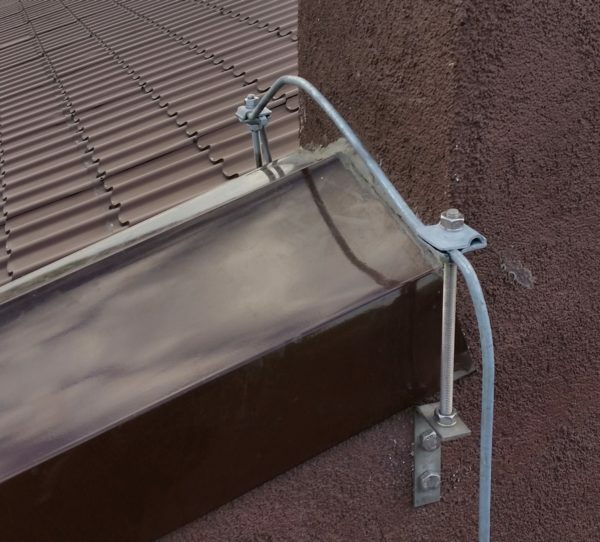
All slopes is desirable to make the brackets on the remote - so you can avoid wrinkles and folds
- Fixation on vertical surfaces. The handler must not hang freely - it is fixed either to the wall or to the drainpipe. It uses simple staples or special fasteners that included lightning protection equipment.
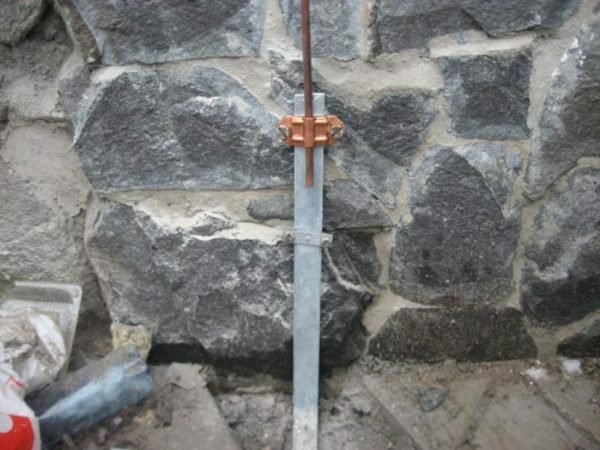
Line tokootvedeniya sure to connect the grounding circuit - as in this photo
Part 3. ground loop
The last element of protection against lightning - grounding. This circuit zaglublonny into the ground and providing a dispersion / absorption discharge system.
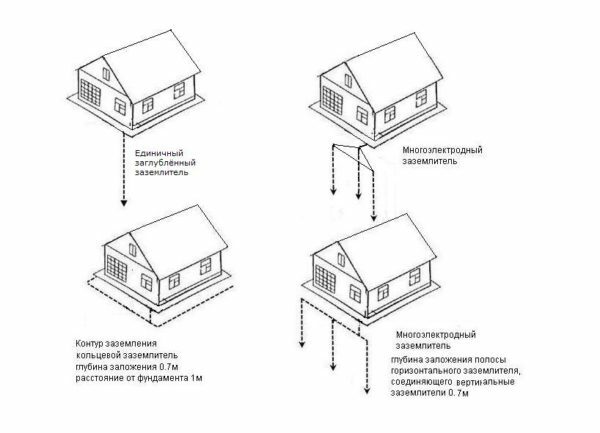
Variants of ground loops
General requirements for the grounding system:
- Choosing the installation site. Contour settling at a distance of not less than 5 meters from residential buildings, walkways, paddocks for pets and so on. D. The soil at the installation site should be moist - for more efficient tokootvedeniya.
- The depth of the tab. The main circuit is desirable to have at least 50-80 cm above the soil surface.
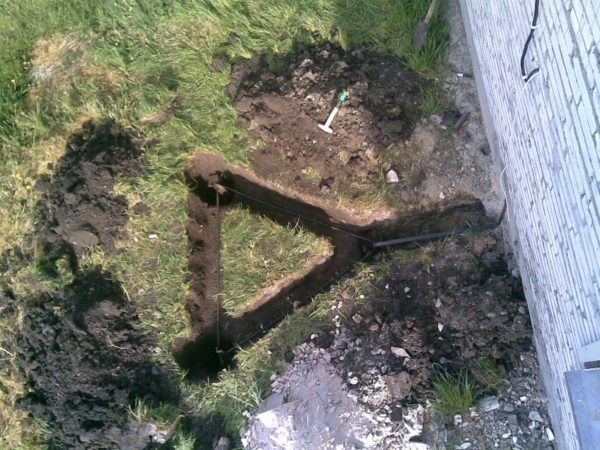
The optimum configuration for grounding loop - a triangle with a side of 1.5 m as in this photo
- Configuration. Grounding often done in the form of a triangle with a side of 1,5-3 m. In the corners of a triangle primer further hammered steel or corners of the 40x40 mm tubes with a wall at least 3.5 mm. The depth of the pile - up to 3 meters.
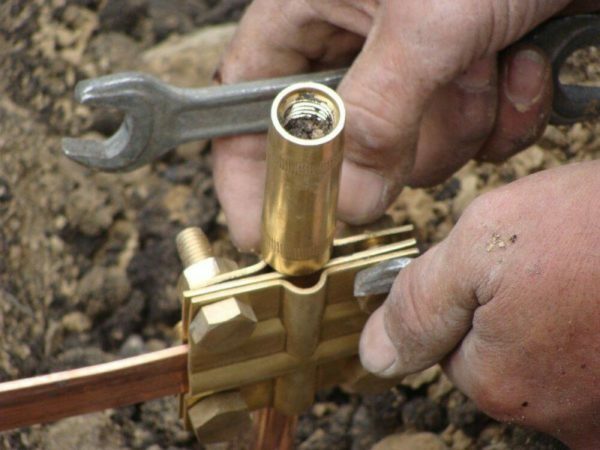
Zaglublonnye metal pins or tubes necessarily connected into a single system crossbars
- Compound. The metal strip is attached to the circuit and displayed on the surface. For docking with air terminal use a current collector line coupling or bolted connection.
Part 4. voltage limiter
In addition to the outer part of the lightning protection system, there is also internal. This set of elements, which provide surge protection. In other words, such a device absorbs excess voltage arising from lightning, and "resets" them in the ground system.
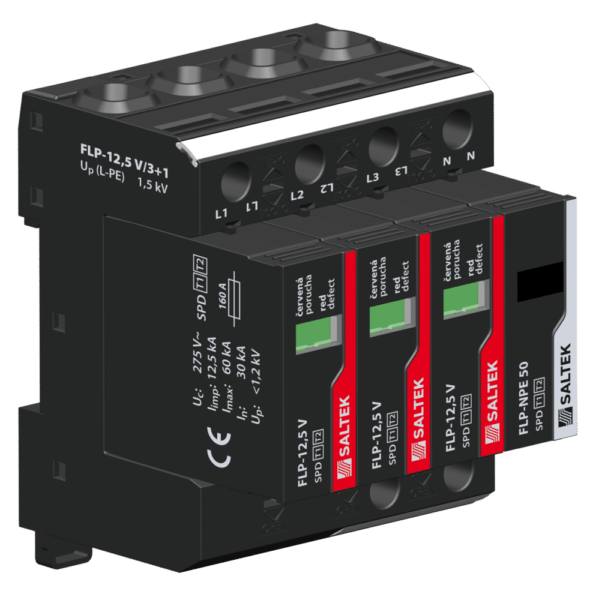
It looks like a block SPD provides protection against overvoltage
Previously used to protect long-spark, and gas arresters. they were replaced today are more compact, easier to use, and most importantly - more reliable guides.
Features of the limiter:
- The instrument is based varistor - an element whose resistance decreases with increasing current. Varistor elements (making them from a mixture of oxides of zinc, bismuth and other metals) is freely passed overcurrents without sparks.
- Varistors produced in the form of modular inserts. Thus, in case of failure, you can simply replace the insert without performing the re-connection limiter.
Dimensions of inserts match their bandwidth, so that the improper part by replacing just will not go down into the slot.
- When subthreshold values stops just skip the current surplus. If the voltage is too high, and there is a risk of fire, the protection device is activated fuse surge, and the circuit is opened.
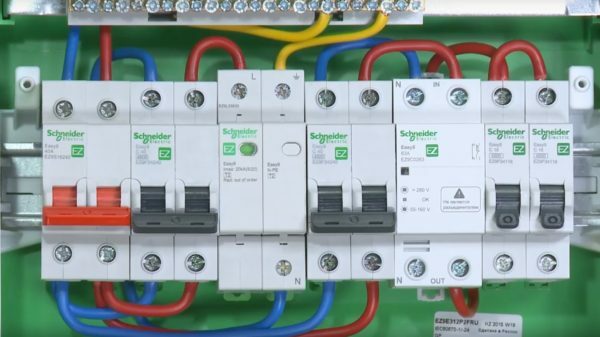
Breakers embedded in a junction box with automatic shut-off devices: a mounting option is optimal in most cases
For private homes constraints often mounted on a two-stage scheme:
- At the inlet usalivaetsya device, designed for a higher voltage (optimum - group C, 4 kV).
- After it is placed a second line (group limiter C, 2.5 kV).
- Less powerful lightning protection apparatus (Group D, 1,5 kV) is set only if the house is sensitive electronics.
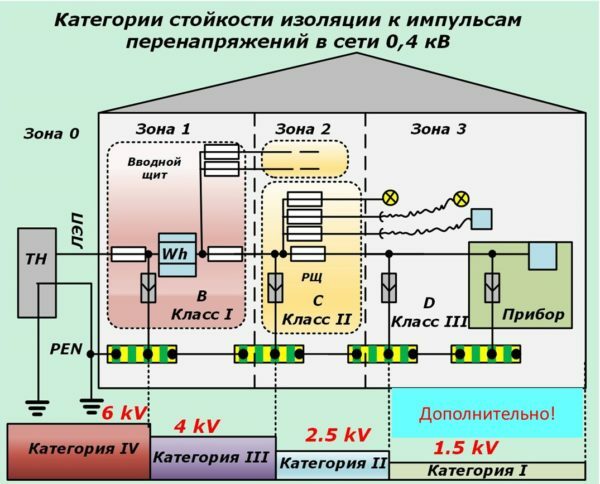
The scheme of combining different limiters in lightning protection system
Installation and operation of the system
Installing molnieotvodyaschih circuits
Lightning protection system of a private house can be assembled and with their own hands. For installation we either acquire a ready kit, or using improvised items.
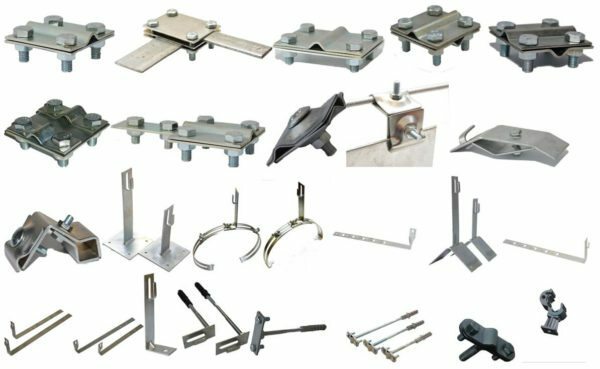
ready-made solutions can be used to facilitate the installation, but they are quite expensive
The main documents regulating the installation of lightning protection systems:
- CO 153-34.21.122-2003 "Instructions for lightning protection of buildings, structures and industrial communications."
- RD 34.21.122-87 "Instructions for lightning protection of buildings and structures."
The work begins with the installation molnieotvedeniya contours on the building itself:
| Illustration | stage work |
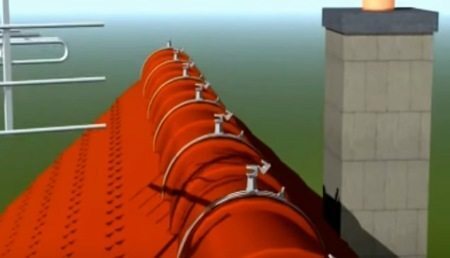 |
Installing the brackets on the roof ridge. Skates and ribs roof mount brackets for lightning rods. For fixing use the arc bases that encircle the ridge lath. Tighten the attachment so that the arms were motionless. When installed on a different material skates use screws that prisverlivaem brackets to the ridge beam. |
 |
Installing the brackets on the slopes. Where will take place the collector line, and the point of laying additional air terminals install the support brackets. It is safest to fix these details on the crate under the roofing material. Also allowed the installation of brackets on top of the roofing material with fixing screws on the crate or rafters. |
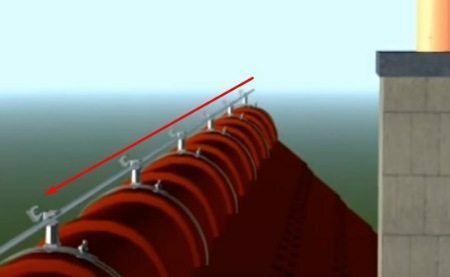 |
Installation of air terminal. Rope lightning arrester laid in bearing brackets skating, ramps and fins, whereupon it to stretch the reducing sagging. We fix the cable clamps. Surplus cable snapped. At the edges of the roof forming bends of approximately 0.5 m, which turn down upwards - this will increase the collection efficiency of discharge. |
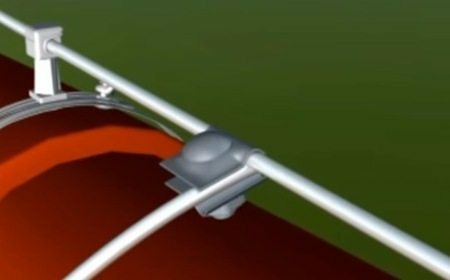 |
Joining current collector line. To connect the cable, Lightning collectors collector line. For this set at the clamping sleeve and the cable inserted therein a wire or a steel plate. Carefully tighten bolted, fix the collector conductor at the receiving part of the lightning rod. |
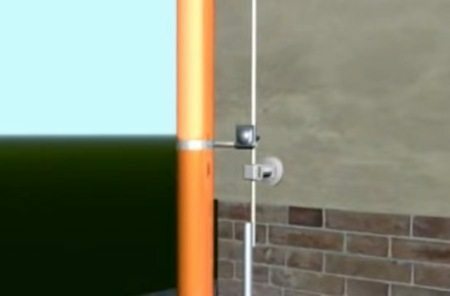 |
Installation of current collector lines on vertical surfaces On the wall mounting bracket to fix the anchors. The bracket is fixed to the collector line, dropping it to the ground level, or to the place of contact with the ground loop. You can also omit the collector drainpipe - in this case the line will be masked, but do not lose efficiency. |
installation of earthing

Ready kit of parts for assembling the ground
Effective lightning protection is impossible without good grounding circuit. If the ground has already been done, then the lightning conductor can be connected to it. But if there is no path or its quality is in doubt - it is better to be safe.
Grounding is mounted as follows:
| Illustration | stage work |
 |
Digging trenches. As previously applied markings dig a trench for laying a ground circuit. When the excavation should cut the sod and place separately - it will be easier to disguise the damaged portion of the soil after installation. |
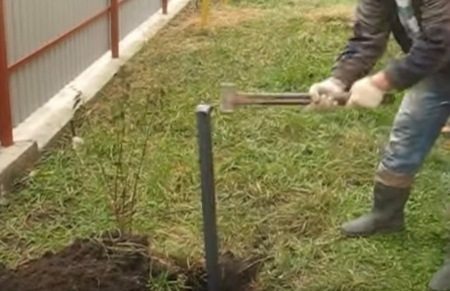 |
Plugging rods. In the corners of a triangle or a line in increments of no more than 1.5 m hammered ground rods. The length of the rod is desirable to take no less than 2.5 m - so ground would be more efficient. It's best to score a sledgehammer, initially standing on a shelf or on a ladder. |
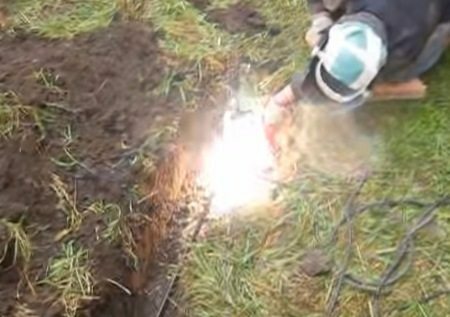 |
Welding the connecting plates. To the end walls of rods located near the bottom of the trench, connecting welds steel plates. Instead, you can use thick plate reinforcing rods or wire. |
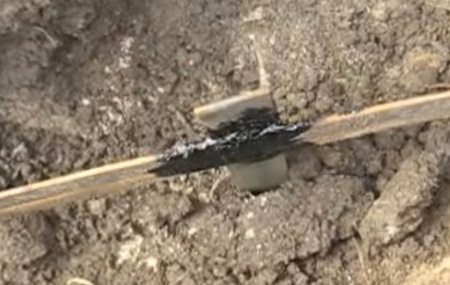 |
Corrosion protection. All welds we clean and treated with anti-corrosive composition (protective paint, a bitumen mastic, and so on. D.). If you do not, then just contact connection prorzhaveet broken in two or three years. |
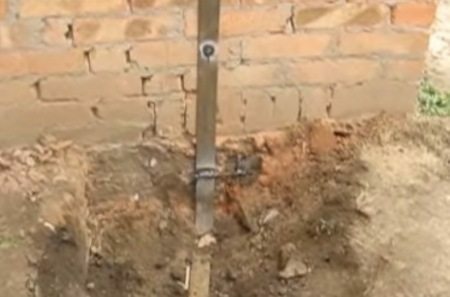 |
Outputting Mounting plate. To edge contour welds steel plate on which the plant building wall. End plate fix on the wall with the anchor. |
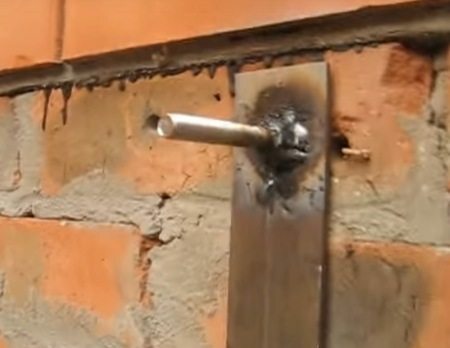 |
connection equipment. The upper edge of the plate welds outputting bolt. It we will use to connect to the lightning rod. |
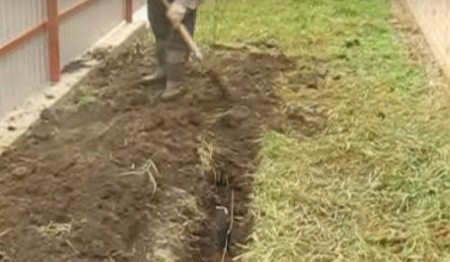 |
Completion of earthworks. The trench in which the contour of the ground, bury, carefully tamping the soil. Closing the top portion of the notched previously turf. Make the system work more efficiently, you can pour the ground water and fill with salt. Since the conductivity of the soil will increase. Due to the presence of salt effect will be maintained for a long time. |
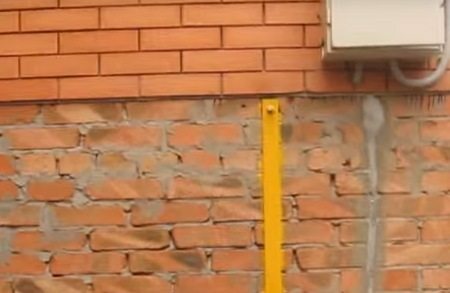 |
Preparing for use. The outer portion of the grounding loop protect against corrosion. This can be done using a plastic cable channel, but you can just paint the metal strip. To attach bolt collector line from the air terminal. |
In this installation of lightning protection system is completed.
In order to increase its effectiveness it is desirable to also set a surge protector. It is put in a shield from the outside, or in a special box inside the house. But the installation of the element is desirable trusted professional electrician.
conclusion
Effective Protector private home may well be equipped with their own: in the work you will be given the above tips, diagrams and video in this article. If some of the steps will cause questions, you can always get advice, ask experts and other users in the comments below.
