Repair small area of the kitchen (photo 33): the project and cost estimates, the replacement of windows, pipes and wiring, finish the walls, ceiling and floor
Table of contents
- 1 kitchen and estimate project
- 2 Replacement of windows, pipes and wiring
-
3 Finishing work
- 3.1 The walls and ceiling
- 3.2 Floor
- 4 Summing up
- 5 Photo Gallery
Many people are afraid to take on repair small square dishes, as it requires not only construction skills, but also an understanding in the choice of finishing materials and furniture. In this article you will learn about the sequence of work and some tricks that will facilitate your work.
One day he woke up in the morning and going to the kitchen, we understand that it's time to change something. In Khrushchev and communal these rooms are not very comfortable. They are small in size (from 4 to 6 m2) and inconvenient in its configuration (square or narrow and long).
 But it does not matter. If we decide to make repairs small kitchen with his hands, then you can change everything.
To begin, draw up a list of what must be replaced. Then we do the repair project. Finally, we calculate the approximate costs and draw up an estimate.
The cost estimate for the cost of materials required to add 15-20%.
Doing a kitchen renovation, try to replace all utilities, windows, old flooring, wallpaper and tile.
kitchen and estimate project
example project
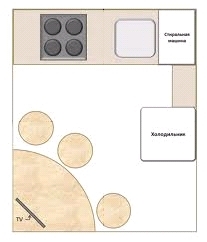
The main mistake of beginners is to start work without prior calculation. Therefore, on a sheet of paper draw a general view of our future kitchen and arranged the furniture. It is very convenient to carry out such work on the computer, there are special easy-to-use program.
New furniture is better to make under the order, because the standard models do not always fit the new layout, especially when it comes to the kitchen a small area.
Well laid out, where washer will be, furnace and appliances. Perform better in project scale, it will help to quickly navigate "on the ground".
When preparing estimates paper divide into three columns:
- Name of works or material.
- The amount of material.
- The cost of the work or material.
Now we fill them sequentially.
For example:
| Materials - work | Number of materials | approximate cost | real value |
| replacement windows | Work window | 100 USD | 250 USD |
Column "real value" fill after the acquisition of materials, it will help in the future to control the budget allotted for repairs.
Before starting a kitchen renovation in Khrushchev, it is necessary to determine the order of operations.
The main objective in the redevelopment premises is to increase free space. This can be achieved during the demolition of walls and combining two rooms (living room - kitchen) or by shifting walls and reducing the area of the other rooms (hallway or bathroom). These works are carried out in the first place.
Further work plan:
- replacement windows;
- communication and wiring;
- walls and ceiling;
- floor.
Replacement of windows, pipes and wiring
Replacement of windows - a serious matter, the slightest distortion or inaccuracy of installation reduces the chances of getting a warranty on the product. So we will not take risks and to invite experts. This should be done in advance, production time window from 5 to 14 days.
According to our project in the walls beat Stroebe and running wires. Then to connect the sockets and switches. Do not forget about the grounding - this is your safety! Replacement of gas and water pipes to provide better professionals. It is that part of the work in which it is not necessary to experiment. If you are confident in their abilities, then go ahead.
You will need a soldering iron pipe, connecting sleeve for sewer pipes and spare parts. It is better to use products proven companies that have proven themselves well and are in the market for a long time. After the installation work be sure to check the joints for the presence of stains.
Tip! If conditions permit, do not rush to put a new furnace and plumbing. When working on alignment of the walls and the ceiling is very much dust and debris that settle on objects.
Finishing work
The walls and ceiling
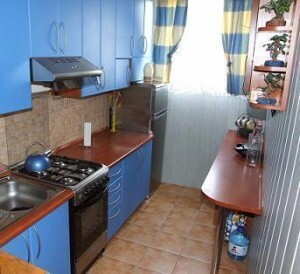
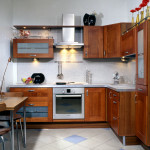
An example of a narrow kitchen design
Let's look at the materials that we can align the walls and ceiling.
Plasterboard. When using this material, keep in mind that for walls in the bathroom and the kitchen is used only water-resistant drywall.
Attach it to the wall or ceiling in two ways:
- In the adhesive or mortar.
- On a metal frame.
When finishing the walls and ceiling decoration plasterboard second method is lost from 5 to 8 cm. This place is a framework that is assembled from metal profiles. In the first case we lose 5-8 mm depending on the width of the plasterboard.
Setting a slab sizing seams reinforced tape and shpaklyuem wall. Once the plaster dries, cover the walls with primer. Now you can start finishing work - wallpapering, painting or tiling.
A more complex, but the original version - two-level ceilings with lighting. Cutting the sheet we need a template that can be made independently of the paper. Putting a template to cut out the drywall and panels.
Before mounting the ceiling sheets, memorable to cut holes for fittings. For this we use metal crowns with different diameters, which can be purchased in the store.
Putty or plaster. For work, we need the level, wide spatula and the solution. For a solution using special mixtures for internal works, such as "Ceresit", the price - from 1100 rubles. 25 kg. Before starting work, stuck on the surface of the reinforced mesh, which does not allow the application of the plaster on drywall and sprinkle crack.
Using a spatula solution was applied on the wall. If the area and depth of wall leveling plaster is big, we do it in stages, allowing the previous layer to dry. We check the evenness of the walls of the level.
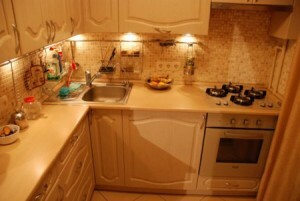
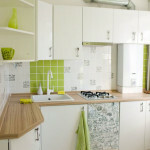
An example of a square of kitchen design
This method is very well suited, if we do the repair narrow kitchen, as much does not change the area of the premises. After drying the treated surface with sandpaper, and coated with a primer. The walls and ceiling are ready for further finishing.
- Plastic panels. Ceiling surface alignment is required, fasten the metal profiles (required by the level).
- On a frame fasten the plastic corners on the perimeter into which the panels are inserted. Openings for lighting panels are cut before installation. The convenience of this material is the ease of installation and ease of maintenance.
- For decorative walls and ceiling of the kitchen, you can use paint, wallpaper or tile. The materials we choose moisture-proof, resistant to abrasion and temperature changes. For working wall (along the wash and oven) choose a ceramic tile.
- Optionally upload a wall completely, if it will be half closed furniture, enough 2-4 series. The size and color of the tile depends on the owner's wishes.
- For laying tiles using special glue or prepare the solution themselves. We need cement, sand, water and lime (construction) adhesive. A solution knead medium consistency. With a spatula apply the mixture on the back of the tile and press it firmly to the wall.
- Laying start with the bottom row, gradually rising up. The distance between the tiles should be about 2-4 mm on all sides, for its determination using spacers crosses.
- After drying tile adhesive seams are sealed special grout whose color must match tiles.
Floor
Disassemble the old coating and leveling the floor in the room, after having laid a waterproof and vapor film.
We expose beacons. To do this, we take a metal sections and set them on the floor of the level at the height of the fill. If the height is large, make up the bricks. Making a solution of a mixture of sand and cement or self-leveling grouts for acquiring gender. Fill it and look forward to complete drying.
In the warmer months it will take 3-5 days. After drying can proceed to laying of the flooring: tiles, laminate, linoleum or parquet.
Tip! When choosing materials, pay attention to their technical characteristics: water resistance, low temperature resistance, mechanical stress and the estimated useful life. Ask the seller if the substrate is required.
Summing up
We hope our article has been helpful to you. In order to more accurately understand the technological and practical issues on our website provides detailed photo and video instruction, in which you will find useful information on the question.
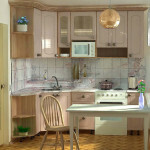
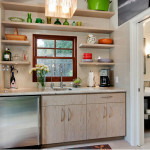
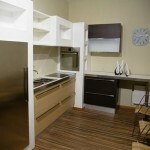
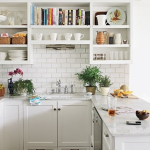
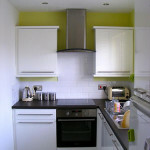
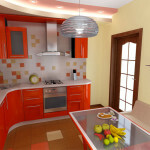
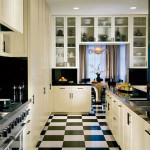
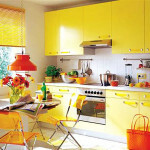
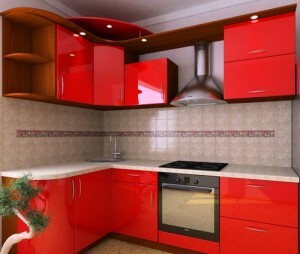
Photo Gallery