Profile for drywall: base frame false walls
Table of contents
-
1 The range of profile systems
- 1.1 Basic elements lathing
- 1.2 Additional elements crates
-
2 The use of metal parts for mounting partitions
- 2.1 Tools for processing profile
- 2.2 Putting the base of gypsum false wall
- 3 Summing up
The modern design is very popular part of the dummy walls sheathed gypsum plasterboard. For the erection of the framework of the walls (vertical racks and crates under the skin) is used for special profiles for plasterboard walls.
Selection of an appropriate profile is very important, which is why our article devoted entirely to technology to work with this element of drywall constructions.
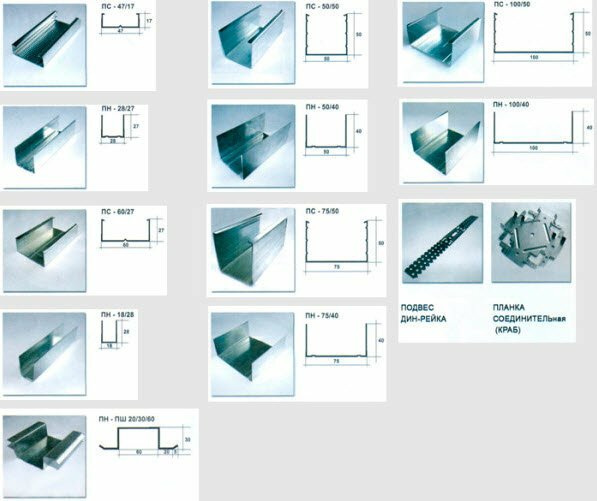
Nomenclature profiles for GCR
The range of profile systems
Basic elements lathing
Frame and sheathing for walls with GCR-mounted lining of metal panels special form. The raw material for the production of these parts are galvanized strip steel, by cold rolling that is attached to a particular configuration. metal thickness and configuration of the panel frame itself depends on the product type.
All profiles for drywall are divided into basic and advanced. The main concern:
Guides (PN) - are set on the floor and on the ceiling, in rare cases, also mounted on the wall. The main function - to ensure a reliable connection with partitions bearing elements premises, because to ignore the qualitative selection guide profile should not be. (cm. also Article Soundproofing drywall partitions - Myths and Reality)
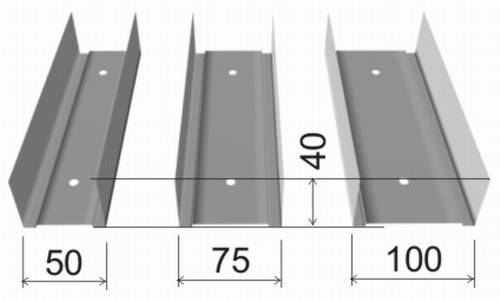
Mo in different sizes
The most popular sizes PN include:
- 50x40 mm;
- 65h40 mm;
- 75h40 mm;
- 100h40 mm.
Panels produced in a length of 3 m, often provided with special fastening holes every 200-4000 mm.
Rack (MS) - are established in the guide at an angle of 900, forming a rack unit. Provide vertical rigidity of the partition and its resistance to deformation.
The most popular sizes:
- 5oh50 mm;
- 65h50 mm;
- 75h50 mm;
- 100x50 mm.
And the rack and the guide elements can be made from different thickness metal (0.38 to 0.45 mm). The larger dimensions of the profile, the thickness of the metal used and the higher the mechanical properties of the product.
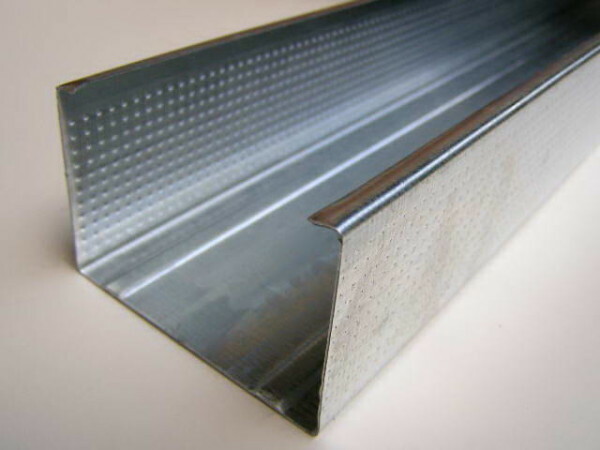
Configuration PS 50x50
Note!
As a rule, in the lines of metal structures from a single rack profiles are produced by 0.5-1 mm narrower than the corresponding guides them.
This allows the formation rack assembly without deformation guides.
Some models of this series are available with special technological holes intended for the construction of communications inside the walls (in the photo). It is very convenient, since the use of such holes reduces the risk of damage to the insulating sheath of the cable. (cm. also the article Installation of drywall partitions - the technology that changed our perception)
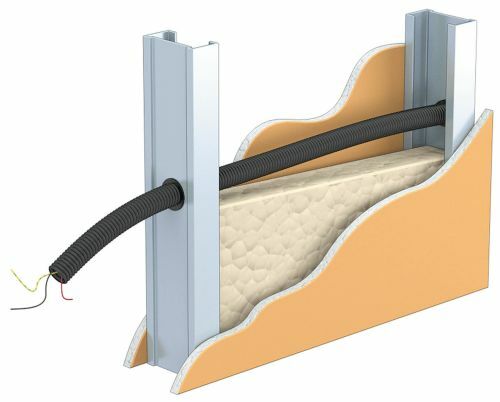
Wire in technological hole
Additional elements crates
Furthermore rack and the guide parts for the erection of the frame do without various additional elements.
These include:
- Ceiling sections (PP). Most often, these parts are used to build planes suspended ceilings, but in the construction of interior PP giprochnyh partitions used to form the arch parts of doorways, as well as for the vertical connections racks.
- Corner elements overheads - represent perforated corners of a thin galvanized metal. Used for finishing joints plasterboard plates under 900 to protect against damage from putty, and further finishing operation. The most frequently used in the regeneration of the doorways in the walls.
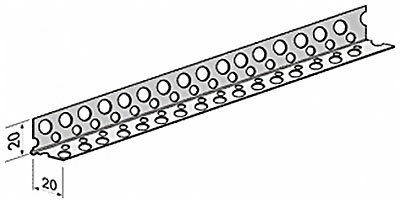
Perforated angle plate
In addition to profiles and other metal elements may be required for the manufacture of walls with his own hands. They can be made independently of the metal strips or scraps frame, but it is best to purchase these items from the same manufacturer as the profiles themselves. So we can be confident that their geometry and mechanical properties correspond to each other.
For a more complete set include:
- Plate hangers. They are used for fixing the carcass on the walls, as well as to fix them to the ceiling. Partition profile for drywall rarely require the use of suspensions, but still in some cases, this versatile piece can be useful.
- Connectors. Used when the need to connect and securely attach the two panels. Though, the price of such connectors is low, many masters prefer to do without them, stykuya metal parts directly. Still, to improve the strength of the frame is better to use special components.
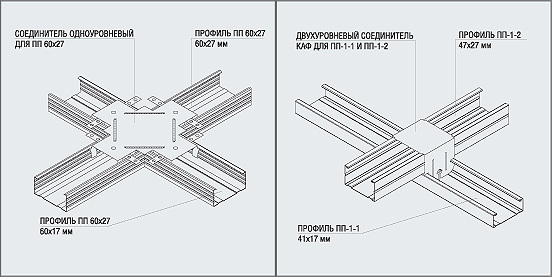
Using connectors
All these details allow to make the base of partitions between rooms, to make it strong enough and reliable. Next we will talk about how you want to use septal profile for drywall.
The use of metal parts for mounting partitions
Tools for processing profile
The main advantage possessed by almost any partition profile for drywall - is its adaptability and ease of installation.
To work with metal panels we will need:
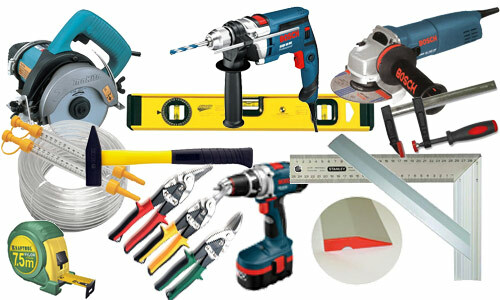
Set of tools
- I saw on metal - the most convenient tool for fitting the panels under the necessary us the size. It is best suited for this purpose cut-off saws with blades or saber model.
Note!
Using "grinder" with the grinding disc is undesirable since the high heating zone of the element It loses its anti-corrosion characteristics, while high humidity crate can start rust.
- Scissors for work on metal. They are used mostly for cuts skirting profile when forming rack unit, as well as in bending the arch parts.
- Hole punch - a great alternative to drills, because drilling thin metal profile is quite inconvenient. Punches are used for making holes in the walls of the metallic elements.
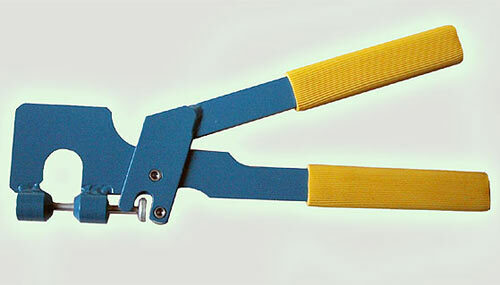
Skrepprofil
- Pliers (skrepprofil) - are used to connect portions of the chassis without the use of screws and other fasteners. According to the principle of operation this tool is similar to the punch, but after hitting the two parts are connected by the principle of rivets.
- Drill or a hammer. It is used to secure the frame parts on the walls, ceiling and floor. In rooms with concrete foundations specialists recommend the use of drills and drills with pobeditovymi tips.
- Screwdriver - tool work which will occupy 80% of your time. It is used to connect all parts of the carcass to each other using special screws (3,9h25 mm).
In addition, we definitely need hand tools (hammers, screwdrivers), as well as Roulette, measuring cord and level. (cm. See also article plasterboard wall with door: Features installation)
Putting the base of gypsum false wall
Thus, the materials and tools we are ready, it's time to get to work.
Here is a guide that describes the main steps of the process of erection of the box false wall:
- From Mon chosen width panels using metal saw cut the part of the desired length. Do not forget that in the floor of the frame will be a gap in the doorway.
Mounting the lower guide
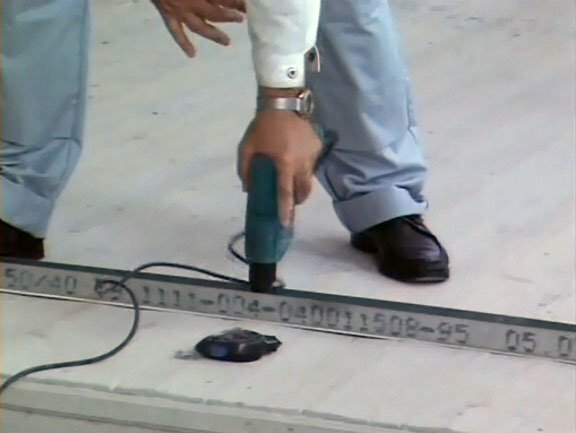
- Stacked on the floor panel, using a perforator Do the mounting holes with a spacing of 40-60 cm. The hole insert sleeve anchors, fasten panels to the floor by tightening the locking screws screwdriver.
- We perform the same operation with the ceiling part.
- Rack profiles, cut to the height of the room, inserted into the guide.
- Putting rack nodes via screws (4 screws on each compound) or skrepprofilya. The detailed process is the compound shown in the video.
- Forming parts of the rack frame future walls, installing two panels at the edges of the door opening.
- In the upper part of the door side plates connect the horizontal crosspiece (PS shorter interval).
Tip!
To the doorway was tougher in the vertical part of the frame set mortgages of timber.
- Using technological holes, put the wires, leaving free portions of the cable for connection of sockets and switches.
At this all works with metal profile for false walls are finished. It remains to sheathe gypsum plasterboard structure erected, zashpatlevat joints between panels and attachment points, which field to start finishing.

Ready frame
Summing up
We hope that in this article you will find the answers to questions, which profile is needed for plasterboard partitions and how this profile to collect a reliable framework for the false wall. If you study all the recommendations, with the work on the construction of partitions you will cope!


