How to fix the polyurethane moldings: technology available to everyone
Table of contents
-
1 Description workflow
- 1.1 Preparation and acquisition of material
- 1.2 Installation of skirting boards
- 1.3 Installation of a plinth on the ceiling
- 2 Output

The main advantage of the plinth made of polyurethane - easy installation
You do not know how to fix the polyurethane moldings in the apartment on the floor and the ceiling? Let's find out if this is a complex matter and is it worth paying the money for it hired master. I myself quite quickly deal with all the nuances and ready to tell and show all the details. I share experiences and give step by step instructions.

If the installation is correct, then after installing the skirting it looks perfect
Description workflow
Initially, we will examine what materials and tools needed for the job. Then I'll tell you about the features of mounting plinth on the floor and the ceiling.

Plinth polyurethane impervious to moisture, therefore they can be used in environments with high humidity
Preparation and acquisition of material
The process of preparing the same and for floor and ceiling skirtings. First you need to carry out measurements and calculations:
- A tape measure the length of all walls. The results are marked on a piece of paper, then the length of the walls is added to each room. If mounting the corner pieces are used, the mark, as the angles in the room and what they (external or internal);

The more complex configuration of the room, the more carefully conducted measurements
- Calculated the amount of the plinth. The standard length of 2 meters of products, so the length of all walls should be divided by 2, and add at least one bar in reserve, since pruning will inevitably generate waste. For rooms with a complicated configuration and a large number of angles is better to take even two extra plinth.
Purchase of materials:
| Illustration | Description stage |
 |
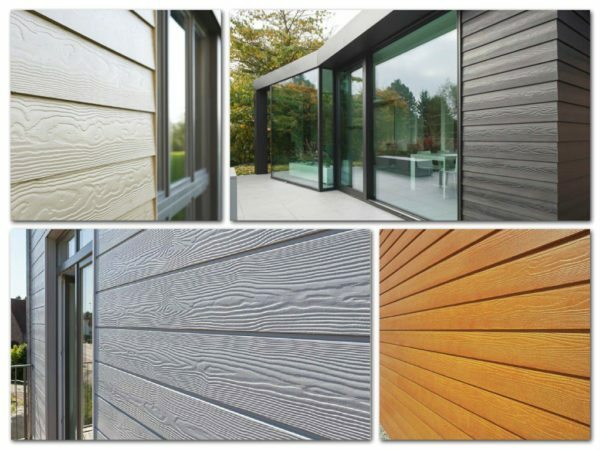
Selected fillet. Polyurethane moldings to the floor and the ceiling is white and colored. The price of the second above. |
 |
Liquid Nails. They are used to secure the floor. I recommend water-based, so as not to damage the polyurethane. On the packaging of such options there is always marked with a "solvent-free". |
 |
acrylic sealant. With the help of the slit are sealed between wall and skirting. Also, this composition is ideal for smoothing joints. |
 |
Water paint. It is used for staining the floor. Better to choose washable options to moldings of polyurethane then it was easy to clean. If you need a specific color, you can buy yourself zakolerovat pigment and paint before using. |
Before installing the baseboard must be at least day soak in the room in which the work will be carried out. Then the temperature and humidity are stabilized polyurethane, and he will not after installing the "play".
For work you need the following tools:
- Miter box and handsaw. Most often miter box is sold complete with a saw, if not, then separately purchase a hacksaw with fine teeth;

With miter box you will easily and quickly slaughter perfect corners on baseboard
- Pistol for applying adhesive. It is suitable for liquid nails, and sealant. The design is not important, as long as the product has been reliable.

The gun should be durable, because when applying the glue on it are high loads
- The fine-grained sandpaper. To work suit with sandpaper grit P240 or less. Need for grinding and smoothing the ends on the baseboard joints.

Sandpaper can quickly and accurately align the surface of the polyurethane
- Measuring tape and pencil;

These two items are used when installing skirting most of all
- Spatula and brush. Spatula required for surface leveling when applied sealant and remove the excess. Brush used when coloring the surface.

To work with the skirting board are perfect small car spatulas, they are comfortable and are inexpensive
Installation of skirting boards
Let us examine how to strengthen the floor Polyurethane skirting:
| Illustration | Description stage |
 |
prepare the ground. The floor and walls are cleaned of dust and debris. If the wall or the floor there are nodules of the solution, they need to knock down, to fit with the elements as tightly as possible. |
 |
The first element is put to a wall and is marked.
|
 |
Marked up following the trough. Understand one simple rule, all angled plinth is necessary to cut the pair subsequently to check for proper operation. |
 |
Produces sharp plinth. For this member is inserted into the miter box in position and accurately sawn. After cutting the end part is aligned with sandpaper to perfect smoothness. |
 |
checked junction. The cut and puts the elements are joined. If all is well, you can continue to work if issues are found they should be removed. The photo shows that in this case the connection is perfect. |
 |
Glue is applied. Cappings floor Polyurethane has tabs at the top and bottom. It is they strip is applied adhesive composition, just keep a gun along the element, squeezing glue. |
 |
Glue is applied to the junction. It is important to securely fasten the joints, so carefully distribute the composition across the butting surface. |
 |
The first element is glued. Installation of polyurethane moldings always starts from the corner. It is necessary to accurately set the first fillet, good press it to the surface and hold for 20-30 seconds. |
 |
Glued element on the other side of the corner. It is very important to do this immediately after securing the first fillet, so you can adjust the position of parts when needed. Pay special attention to the corner, it should fit the plinth as tightly as possible. |
 |
Are sealed all the cracks and joints. A few hours after the plinth mounting can begin to fill cracks and joints acrylic sealant. The composition is distributed evenly on all sides. |
 |
Excess sealant removed spatula. At the same time the surface is leveled and the composition fills the void. |
 |
Sutures are treated with a damp sponge. While acrylic sealant is still fresh, the surface is very easily erased. To conduct this part of the work needed immediately after leveling trowel. After drying the composition inspect the surface, fine defects are removed with sandpaper when necessary. |
 |
On the wall and the floor along the baseboards masking tape is stuck. It will protect the surface from paint hit. |
 |
Plinth painted. How to prepare the paint will prompt instructions on the package. Application composition is most often done in two layers. The second is only applied after drying the first. |
 |
After the paint has dried tape is removed. Skirting fixed, stained and can be used without restrictions. |
If you tint the paint yourself, prepare all the necessary amount of the composition at a time. Twice to get the same shade is almost impossible.
Installation of a plinth on the ceiling
We look at how their own hands stick polyurethane moldings on the ceiling:
| Illustration | Description stage |
 |
prepared surface. The angle between the wall and the ceiling must be clean and smooth. All nodules putty removed. If the surface has significant irregularities, then it is better to putty. |
 |
held marking. You can make the mark not only on the baseboard in place of his kickoffs, but also on the wall. Such guidance will help to position the fillet at its bonding. |
 |
elements stabbed. Skirting Ceiling polyurethane cut easily. The main thing not to apply pressure on the saw, so as not to deform the material. After cutting all the ends neatly processed sandpaper. |
 |
Fillets are tried at the place of installation. Before you glue the items it is necessary to check the connection. If there are any problems, the ends of the reformats. |
 |
On the upper and lower glue is applied. It is important to distribute the composition across the adjacent surface to fix the item securely. Do not forget to put on the composition and end connections to fasten the fillet together. |
 |
The first element is glued.
|
 |
The joints are aligned with a spatula. In this case, we do a lot of staff, and he spoke at the seam. If you do not apply the adhesive with a surplus, the abutment is filled with an acrylic sealer, then carefully remove any excess putty knife. Pay attention to the corner joints. |
 |
Joints rubbing with a damp sponge. Work is carried out immediately after leveling with a spatula when the sealant is not yet frozen. Do not press too hard on the sponge, so as not to remove the excess sealant and do not open seam. |
 |
plinth painted if necessary. If you fit the white color, it is possible and to keep the item. They look neat without painting. |
Output
After reading the review, any person will be able to fix the polyurethane moldings on the floor or ceiling. Videos in this article will help to better understand the subject, and if you have questions - ask in the comments.