The false ceiling of plasterboard - all you need to know to carry out the work yourself
Table of contents
-
1 Stages workflow
- 1.1 Step 1 - Preparation of materials and tools
- 1.2 Step 2 - marking the position of wall profile and its mounting
- 1.3 Stage 3 - the carcass structure
- 1.4 Step 4 - fixing plasterboard
- 1.5 Step 5 - sealing of joints
- 1.6 Step 6 - plaster and staining
- 2 Output
Want to make a false ceiling plasterboard on its own, but I doubt that will cope with the work? Then this article is just what you need. It all works are described in great detail, so that anyone can understand them. You just have to repeat these steps and you will achieve excellent results.
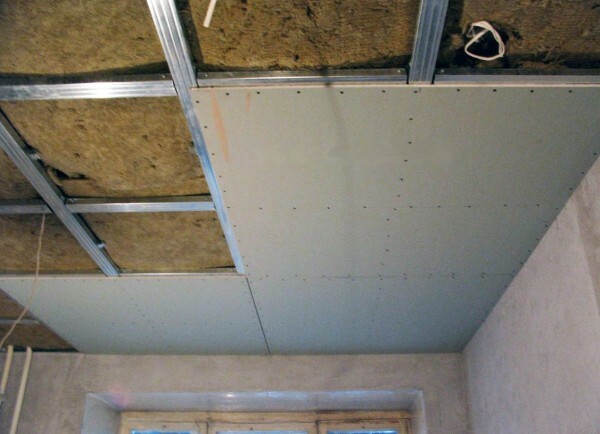
In the photo: with the help of drywall, you can transform any ceiling in a few days
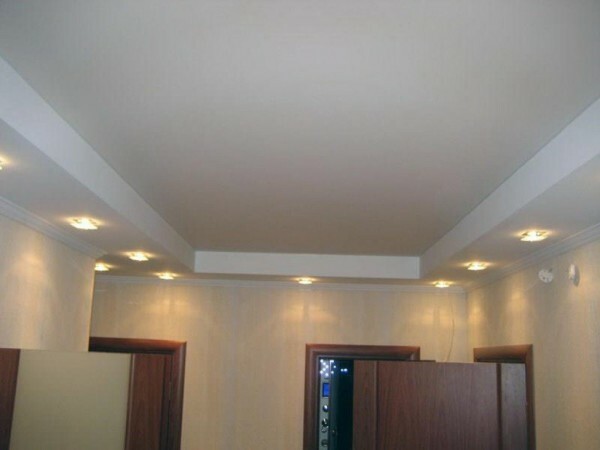
After completion of the work your ceiling will look great
Stages workflow
To carry out the installation of the false ceiling of plasterboard with their hands, you need to know and strictly adhere to a specific sequence of actions.
Technology perfected over the years and includes the following steps:
- Preparation of materials and tools;
- Marking the position of guide and their attachment;
- The construction of the frame;
- Fastening drywall to the frame;
- Sealing of joints on the surface;
- Caulking and painting the ceiling.
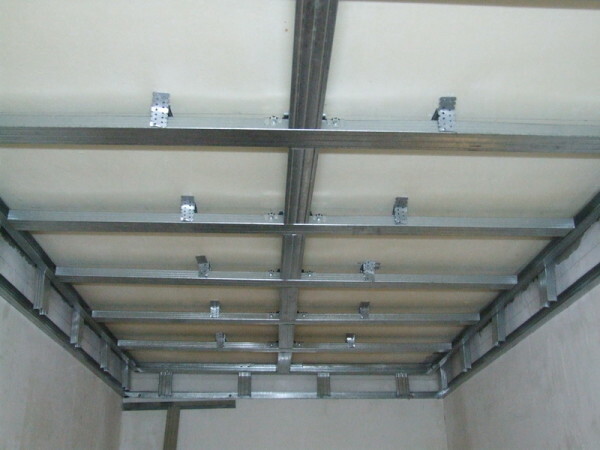
Durable frame - a prerequisite of smooth and reliable ceiling
Step 1 - Preparation of materials and tools
It is part of the preparatory work, where you have to collect all the necessary. Even before the acquisition of all required you should measure the space in which the work will be carried out, it will accurately calculate the necessary amount of material.

Drywall can be of different types, choose the best
To begin with we shall understand, what elements going suspended plasterboard ceiling.
| Material | Recommendations for choosing a |
| gypsum plasterboard | The most commonly used variant ceiling 9.5mm thick. But it is possible to use the wall elements and 12 mm thick, their price is higher, but the surface and to obtain reliable. For rooms with high humidity is better to use water-resistant variant, it is easily distinguished by the green protective paper layer. The required amount is calculated on a finished surface area |
| The guide elements | The number of the guide profile is calculated based on the length of the wall on the perimeter of the room. The elements have a length of 3 meters. Select embodiments made from a metal of not less than 0.5 mm |
| The basic profile | The number of supporting profiles is calculated as follows: the width of the room in meters is divided by 0.4 (this is the arrangement pitch of the elements). They must also be made of metal not less than 0.5 mm |
| Fasteners Drywall | These include direct hangers, connectors, profiles, and hardware products. From the hardware needed dowel-nails, screws, bedbugs and screws for metal for mounting plasterboard |
| insulation | If you need to insulate and soundproof surface, under the framework laid mineral wool |
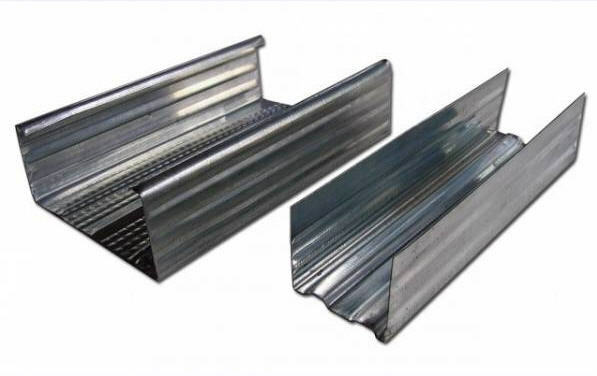
The guide profile and ceiling - the main components of the frame
If you want to provide the best sound insulation design, then under trim profile, and is enclosed hangers special acoustic tape. It dampens vibrations extending in design and thereby reduces the noise level is half of the room.

Special tape prevents vibration of the concrete walls transferred to the ceiling structure
Now we understand, using what materials the ceiling surface is leveled:
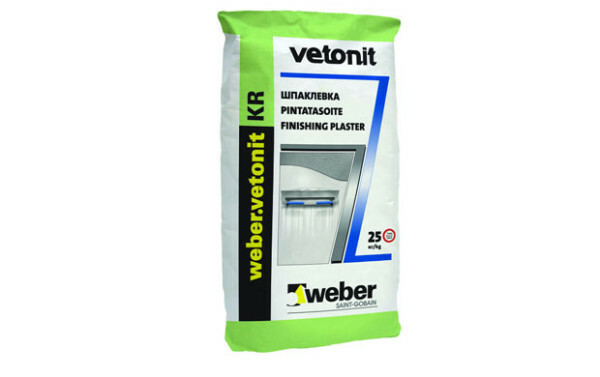
Plastered "Vetonit" - the perfect solution for leveling the ceiling
| Material | Tips for Choosing |
| Caulking | Choose a composition that has a high plasticity, it lies well to the surface and easily erased. All these requirements are met by the products of the company "Vetonit." I use it and it has never disappointed as |
| Composition for sealing | To strengthen the joints need to use high-strength formulations. The most popular solution - "Knauf Fugen". This mixture was based on gypsum, which has high strength and resistance to cracking |
| Primer | To strengthen the surface, it is necessary to process a special deep penetration of the composition. The most popular options are based on acrylic |
| Grid-serpyanka | Needed to strengthen the joints. The most commonly used variant of a width of 45 mm with a self-adhesive layer |
| Paint | Used for finishing of the surface. Use any composition suitable for application to the surface of the putty |

Serpyanka strengthens sheet compound
Now let's deal with a tool that allows the installation of suspended ceilings made of plasterboard with their hands:
- Perforator for drilling dowel-nails;
- Laser or water level marking plane. Normal level for the design of control. Tape measure and pencil for measuring and marking;

The water level allows very precise mark plane
- Metal shears for cutting profiles. Fit and simple manual version;
- Screwdriver with nozzles PH 2 for tightening screws;

When installing drywall will have to tighten a lot of screws, screwdriver, can not do without
- Cutting the drywall can be a conventional construction with a knife;
- Capacity and drill with a mixer need for compounding;
- Putties used for applying a narrow (10 cm) wide (30 cm) spatulas;

Spatula - the primary tool for plastering the ceiling plasterboard
- For surface smoothing trowel used and sandpaper or mesh with P150 grit or less;
- Primer and paint applied with a roller, connections and remote sites handled brush.
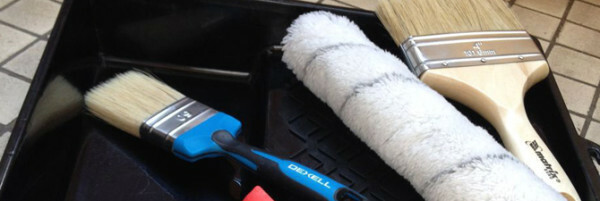
For the convenience of purchase and a special bath for the roller
Step 2 - marking the position of wall profile and its mounting
This is the first part of the work, where the following steps are performed:
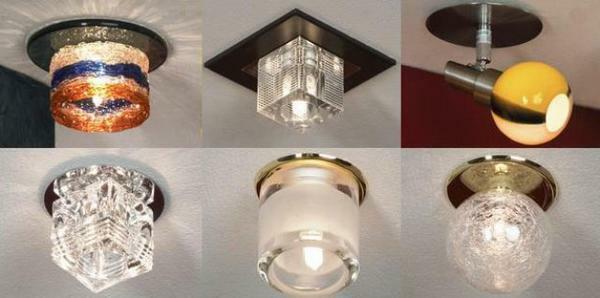
- It is determined by the lowest point of the ceiling. The level of the suspended structure must be 50 mm below this portion. If you put in the ceiling recessed luminaires, the indentation will not be less than 80 mm, otherwise the equipment simply did not fit;
- Then you make the layout of the room's perimeter. If you are using the water level, it is necessary to make a mark in one corner, and then, leaving the other end of the other corners, hold the entire room layout. After the lines are drawn between the points. If you have a laser level, everything becomes simpler: you just draw a line on the label;
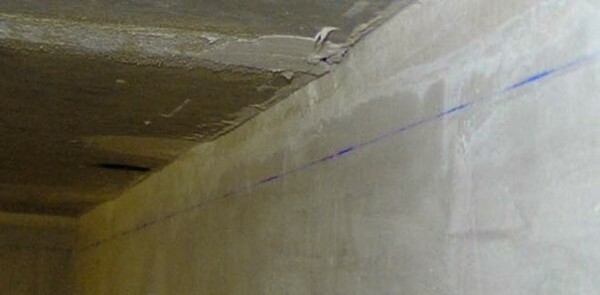
The line should be clearly visible on it you will be guided during operation

If you have a laser level, you just need to draw a line of light marker
- Next, the profile is cut into pieces of the desired size, is applied by line and marked places fastening elements. If 10 cm from the edge of the hole do not, you need to drill and mark the location for drilling on the wall. Drilling hammer is made with a drill diameter of 6 mm. Not to check the depth of the hole paste to drill tape or electrical tape as a guide;
- If you strengthen the profile through the acoustic tape, be sure to affix it to the installation guide members. Self-adhesive side is pressed to the bottom of the profile and evenly glued along the entire length. Do not forget to cut a hole in the ground anchors location;

The tape is attached directly to the profile installation
- It puts to the surface profile, after which the dowels are inserted into the holes. Screws just hammered hammer. In this fixing is completed.
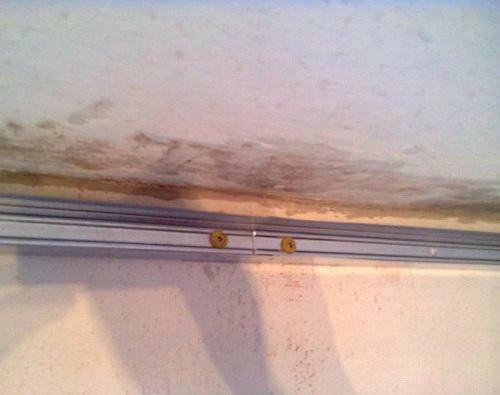
Screws are slaughtered, and the profile is securely
Stage 3 - the carcass structure
Mounting frame consists of the following:

The scheme of work is not difficult, if you look at it
- First, you need to hold the line every 40 cm. This will be the location of landmarks ceiling profiles. That is, the center to center of each element should be 40 centimeters;
- By marking the ceiling mounted holders, they are perpendicular to the line at a distance of 50 cm from each other. Securing better stagger to each successive number was not in line with the previous one, but with an offset. Under the suspensions can be glued sealing tape, if you used it on wall-mounted rails;

Suspensions fixed lines in the middle
- If the room is less than three meters in length, the excess part of the hanger is cut with scissors. If the length is longer, it is necessary to increase the rack to the desired size. Please note that the capacity is done using special connectors. They allow you to maintain an ideal geometry of struts and provide them with secure attachment;
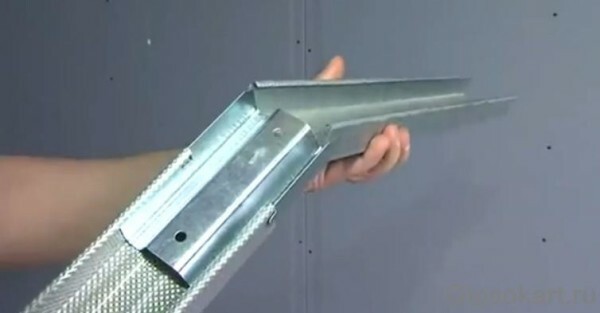
Connector allows you to perfectly combine the two elements
- Profile carefully inserted into the guide elements and is located in the middle line. Then you need to fasten both sides of the structure with screws through-bugs. In each joint member is screwed by two, make better use of fasteners with a sharp tip;
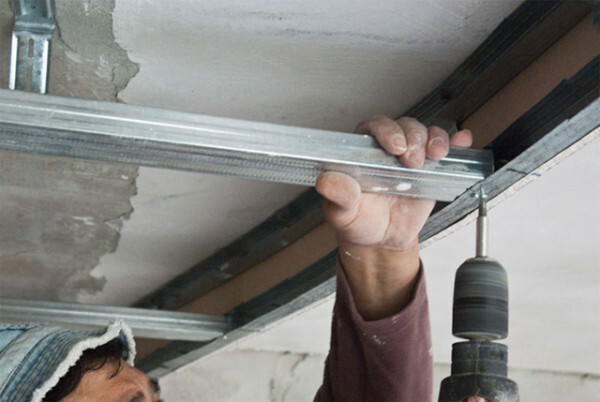
It is important to secure a good profile in its location
- Suspensions podgibayutsya to the profile, and then you need to check the position of the element with the level. If all goes well, then you can begin to mount. It's all easy: the two sides is screwed on the screws on the appropriate hole. Extra tips simply folded to the side, stop you they will not;

Suspension allows us to give the stiffness profile
- The jumpers are set, if the frame is made in increments of 60 cm. They are placed in 50 cm and fixed with a crab, so called cross profile connector. The work is simple: cut elements of the desired size and self-tapping screws are screwed to the crab;
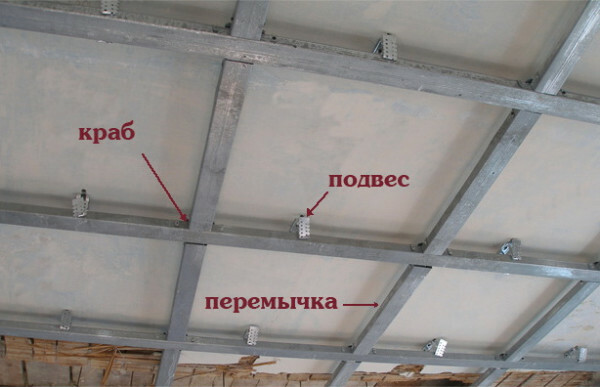
Here is the version with crosspieces
If you want to isolate the surface, under the framework laid mineral wool. To fix it is not necessary, and so it would be great to stay.
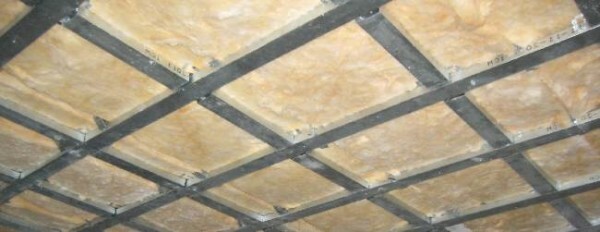
Insulation fills the cavity above the frame
Step 4 - fixing plasterboard
At this stage, the installation of the ceiling you need to carry out the following work:
- From lateral ends of the sheet is cut chamfer. Better to do it in advance than to carry out work on the ceiling. Work carried out with a knife, the end is cut at an angle of 45 degrees at a distance of not more than 5 mm;
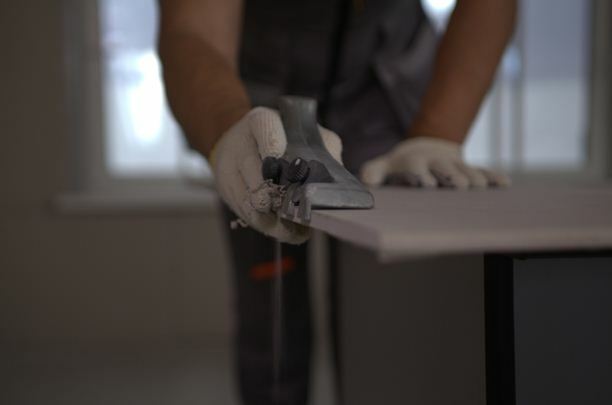
Specialists use for chamfering special adaptation
- Mounting starts from any corner of the room. Work is performed three, two hold the sheet, and one of its screws prihvatyvaet 3,5h25 mm. Most deal with the installation does not succeed, so be sure to attract mates. In order not to stand and hold the material at arm's length can be used to knock down or squeegee-like structure of slats;
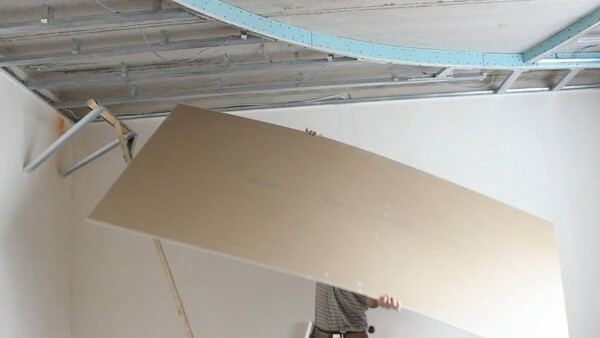
Specialists can work without assistants, but you'd better not to practice such extreme
- Fixing is performed every 15 cm along the edges of the sheets and 20 cm in the middle. Offset from the edges must be at least 15 mm, so as not to crush the material. The spot joining plasterboard sheets leave a gap of 2-3 mm and the same distance must be in the junction to the walls;

Initially, you can tighten the fasteners after one, tighten after fixing the remaining
Remember that the screw must be correctly positioned on the surface. The cap should be recessed at 1-2 mm and not protrude above the surface and do not push the sheet. Scheme correct positioning fixture is shown below.
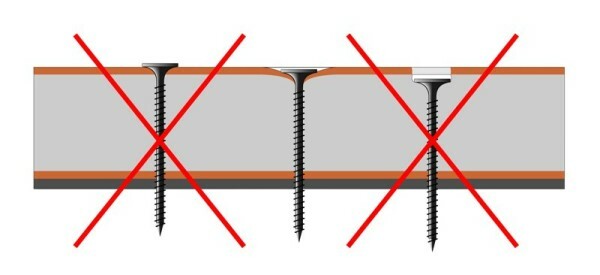
Proper mounting facilitate subsequent finishing
- Thus, the entire surface is sheathed. Here we must pay attention to the correct positioning of screws abutting sheets. It is better if they are not located opposite each other and offset. Sample proper installation shown in the scheme below.

That's how the screws should be placed at the joints of sheets
Step 5 - sealing of joints
Collect suspended ceilings made of plasterboard with their hands - even half the battle. You need to properly decorate them to the surface is perfectly flat and is not cracked in a year or two. Connection elements - this is the most problematic areas in which cracks are formed more often.
To avoid this, it is necessary to strengthen their quality:
- First of all you need to clean all the joints from dust. Just grind them with a dry cloth or brush walk;
- Then processed primer compound. The composition is applied at a distance of 7-8 cm on both sides of the seam. Particular attention to the ends of the sheets, try to apply the primer so that it fell into the compound;
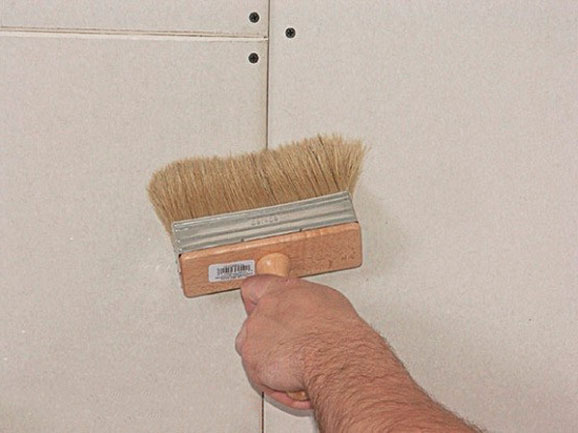
Joints carefully primed
- After drying the soil at the seams glued ribbon-serpyanka. Everything is simple: the material is gradually unwound and pressed against the surface. It is important that the grid was pasted over the entire area and never stuck. You can cut it with scissors or a knife to tear the material is not necessary;

Mesh pasted all seams
- Preparing a solution for joints "Knauf Fugen", many do not need it, as it is grasped in half an hour. Weight is applied to the joints and pressed with a spatula to fill all voids. Excess of gently removed with a spatula, mass should completely cover the mesh-serpyanku;

The seams are sealed so that the groove on the sides of the sheets are completely filled composition
- Cap screws, too, are sealed in small strokes. After work should not be seen any joints or fasteners;

Here is the result of work
- After drying, the composition of the need to wipe the surface with a larger grater to remove the nodules and bumps. The special quality of it is not necessary here, it is important to remove all visible flaws;
- At least the ground surface over the entire area. It helps to strengthen the already applied composition and balance the absorption of the surface over the entire area.

The soil surface strengthens and makes its structure uniform
Step 6 - plaster and staining
Now we look at how to align the ceiling of plasterboard with their hands.
Instructions for the operation is as follows:
- First and foremost is preparing putty composition. For this purpose, the tank is filled with water and poured the desired amount of dry mixture (proportions always indicated on the packaging). It is important to mix quality components to obtain a homogeneous mass with the consistency of thick cream;
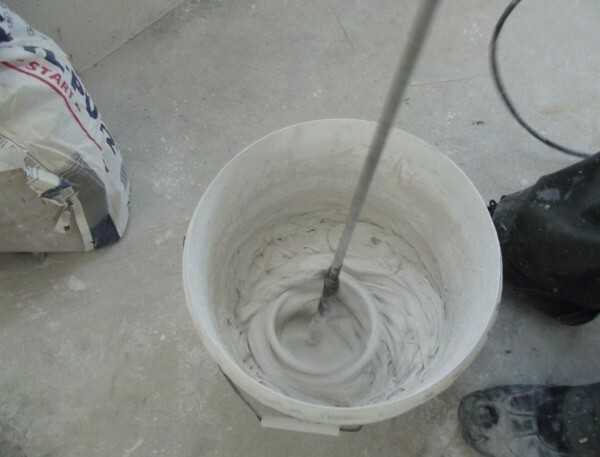
It is best to interfere with plaster drill with paddle-mixer
- Application is carried out from any angle. The composition is distributed along the blade broad spatula and gently distributed over the surface. The tool is held at an angle of 15 degrees to the surface and is conducted with moderate pressure. On the nodules do not pay attention, they are then eliminated. The main part of a thin layer spread across the ceiling;

Putty evenly stretched across the ceiling
- After drying the first layer need to walk on the surface with a spatula and cut nodules when available. Your task - to remove all visible flaws, so that they do not interfere with the final surface leveling;
- The second layer is applied very carefully, try to align the surface as good as possible. Keep trowel sweeping movements. If somewhere formed nodules - do not worry, they can be easily removed. It is important to align the general level of the ceiling, so that on the surface there was no pits and scratches on the edge of the spatula;
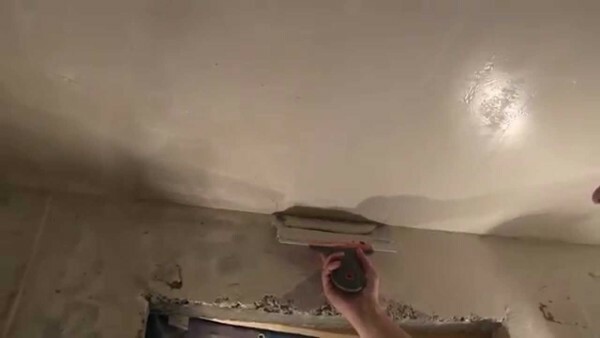
The second layer can eliminate all the defects of the first
- After drying surface (and it takes approximately 24 hours) it is possible to start polishing. The work is dirty, so make provision of a respirator and goggles. On grater placed sandpaper and begins processing the surface section by section. Rub the need to moderate pressure spiral motion;

Resurfacing helps to eliminate all the defects of putty
- plane Checking is performed using light bulb or a flashlight. Directional light immediately shows all the flaws, and you can easily withdraw a perfectly flat surface, even if doing this work for the first time;

Lamp allows you to control the quality of the ceiling grinding
- If the place were flawed, then the problem areas need podshpaklevat, after which they zashlifovyvayut float. After this, the surface can be considered fully prepared;
- The ceiling is cleaned from dust with a brush or vacuum cleaner, then produced a primer. The composition is applied by roller to the entire surface, it will strengthen the finishing layer and to improve adhesion of the paint;
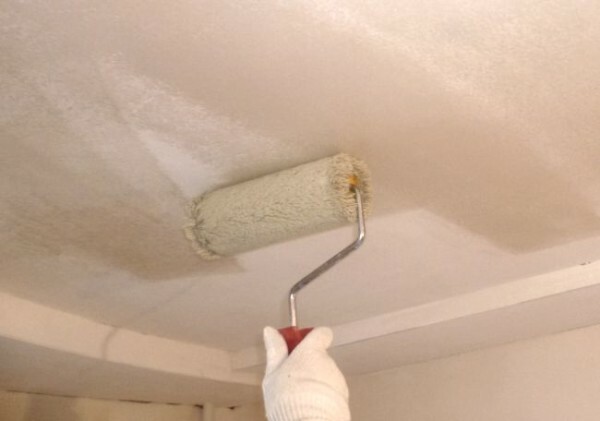
The soil makes the surface much stronger
- Staining is performed after complete drying of the soil. Depending on the color may need the application of 2-3 layers of composition for uniform color.
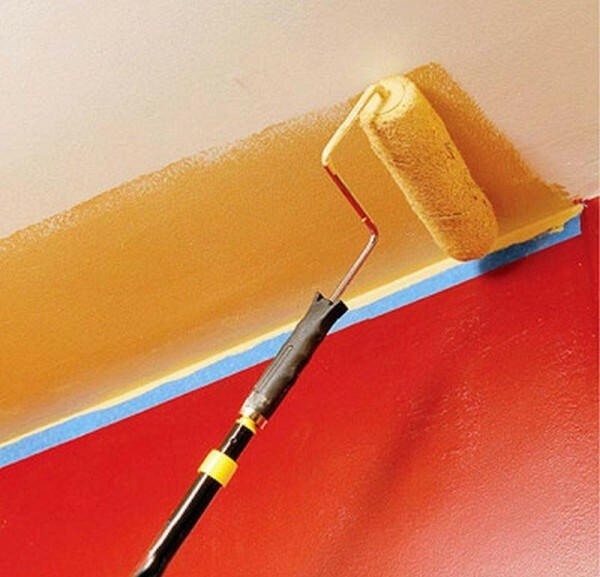
In order not to stain the walls, you can stick the masking tape around the perimeter
The finished design will serve for decades, only need to periodically refresh the paint layer. Some refer to this type of design ceilings of plasterboard, although the right to call them suspended. Stretch versions - is construction of the fabric.
Output
I am sure that after reading the article you make a false ceiling of plasterboard easily. Videos in this article clearly show some important points workflow so that you better understand it. If you have questions - ask them in the comments under review.
