How to glue the tiles on the drywall in the bathroom (57 photos). Choosing tile adhesive. Primer. Scheme stacking. The requirements for the FCL
Table of contents
-
1 Training
- 1.1 The choice of tiles
- 1.2 The choice of adhesive
- 1.3 Primer
- 2 The sequence of work
- 3 Requirements for plasterboard
- 4 conclusion
- 5 Photo Gallery
Drywall has become the most popular building material for interior applications. It is used for the erection of walls, partitions, ceilings, furniture. Also popular method for alignment of walls via their pasting GCR material is so versatile that it can be used even in bathrooms.
Today we want to tell you how to lay tile in the bathroom on the sheetrock.

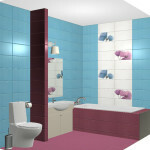
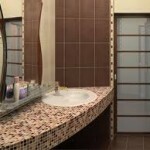
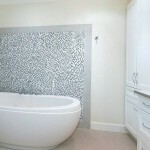
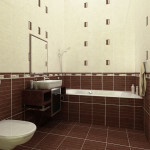
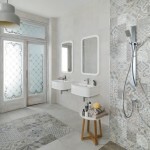
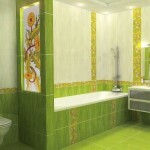
Drywall - an excellent base for laying tiles
Training

Proper preparation - a necessary condition for a successful installation.
The choice of tiles

Choose only high-quality tile-known manufacturers.
Choose a tile is not as easy as it seems. Substandard or counterfeit tile can create an enormous number of problems that negate all the advantages of the foundations of the GCR. (Cm. also the paper tile design in the bathroom: Options).
Therefore it is advisable to take note of the following points:
- Absolutely smooth tile does not happen, however, the degree of roughness - a good test for the detection of low-quality material. Attach two tiles underside to each other and see how tightly they are adjacent. If tile swing or the gap between them is easy to see - it's poor quality goods.
- Pay attention to the pattern, a good tile has a clear and high-quality image. If the front face is blurred, has many small flaws, the lines do not coincide with the dock - do not take a tile.
- Corners should be perfectly straight. Apply the tiles to each other apart and see how correct its shape.
- Wrong or back side is also important, this must be clearly visible pattern and manufacturer brand. If they are viewed with difficulty, most likely before you counterfeit goods.
- The hardness of the tile is quite difficult to determine at a glance, you can only listen to what is the sound of the material at a mild stroke. Normal tiles should sound muffled. Perekalennaya usually has a brilliant inside out and uneven color lying on the front side, a tile should not buy.
Tip!
When calculating the tile is better to not be lazy and count the piece, not by the meter.
This is especially true when buying expensive tile, the more that the bathroom is not so great that such a calculation is seriously complicates the work.
The choice of adhesive

The adhesive quality of life of the coating depends.
Before you put the tiles on the drywall in the bathroom, it is important to choose the right glue. (Cm. also the article Can I hang wallpaper on drywall: the pros and cons).
We consider three options for the combination of drywall and ceramics:
- Glues based on cement. The cement is not used for working with plaster, but since gypsum is covered with paper, the material is quite acceptable. The price of such an adhesive is low, it holds quite well.
- Flexible tile adhesive. Almost all master tilers release this option among others.
- "Liquid Nails". It is very durable, but expensive way of fixing the tiles. Typically used for repairs when you need to paste one or more tiles departed. Bath should be used moistureproof brand.
Primer

Plasterboard is grounded without fail.
Before you glue the tiles on the bathroom drywall, causing at least two coats of primer.
Tip!
The choice of primers in a large modern building supermarkets are simply stunning. We recommend Mira 4120, Tifengrund Knauf.
The sequence of work

Training is not less important than the actual laying.
Step 1: preparation
Before laying the tiles on the drywall in the bathroom need to carefully prepare the surface. To do this, using a smooth trowel is necessary putty all the joints between the sheets GCR.
For operation using a special putty for joints, for example, KnaufFugenfuller. Also for strength joints may be coated with a reinforcing tape (serpyanku).
The scheme of packing
Also laying tile on drywall in the bathroom requires correct selection of styling schemes. To this end, the length of a number is divided by the width of the tiles in view of the gaps. If the remainder is greater than half the width of one tile, laying must begin with an angle which is on display. Then clipped the edge will be hidden in a less conspicuous corner.
If the balance is less than half of a whole tile laying begin from the center and clipped tile falls on the corners, but it looks symmetrical.
Step 2: Preparation of adhesive

Glue is kneaded in a plastic container using a drill.
If the tile in the bathroom plasterboard is glued on with a dry mixture, it is necessary to prepare properly. To do this in a clean plastic container is poured into water 1/4 volume, water was added and the mixture was stirred with a mixer. Kneading should be at a low speed, otherwise the mixture will be quickly set.
Tip!
As practice shows, it is better to prepare a quantity of adhesive, which is necessary for laying a maximum of 2 meters. Newcomers better to cook for no more than one meter.
The consistency of the glue should resemble thick cream.
Step 3: stacking the first row

It is important to constantly monitor the surface irregularities on the subject.
At the height of the second row are fixed on the wall rail, as shown in the photo. The spirit level expose rail horizontally.
At the bar we laid the first tile and move in horizontal and vertical directions. The distance between the tiles is adjustable crosses.
Important!
The space between the tiles and must be filled with adhesive.
In this manner the entire cover tile wall, remove the rail and with the bottom row.
Tip!
Tiles should be laid in several steps, not more than 5 rows in one go.
Take a break of 45-60 minutes, it allows you to remove the tension in the warp sheets.
Step 4: grouting

Proper grout - a pledge of a durable coating.
After laying give the glue a little grab and embroidered tile seams. To do this, use a wooden or metal unravel. Seams should remind the groove that we will fill grout. (Cm. also the article Filler drywall under the wallpaper: how to apply).
After grouting wait for hours for the adhesive to completely polymerized. Take a rubber trowel and fill the grouting joint space. For this grout is applied diagonally downward at an angle of 45 °.
Alignment of plasterboard walls in the bathroom under the tile makes it possible to achieve a sufficiently smooth surface, which significantly saves grout. Bathroom better use of epoxies. Also, after working joints can be treated with silicone or water glass.
Requirements for plasterboard

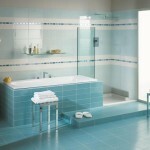
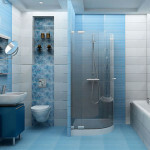
It is better to use a special drywall for damp rooms.
For wet rooms is better to use moisture-proof brand drywall - gypsum plasterboard. This material does not change shape under high humidity, does not swell and does not require special mounting conditions. Drywall for tiling in the bathroom should be just such a brand.
Laying tiles on the drywall in the bathroom with their hands implies an amateur job, which is unlikely to cope with the deformation of the conventional GCR when wet, so it is important to choose the right cast.
conclusion
Now you know how to fit tiles in the drywall in the bathroom. In order to more accurately understand the technological and practical issues on our website provides detailed photo and video instruction, in which you will find the necessary information on the question. Good luck!
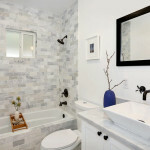
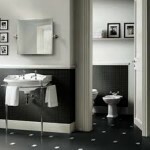
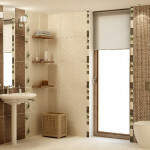
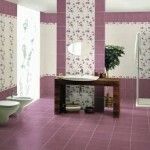
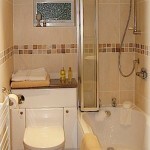
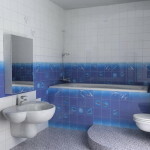
Photo Gallery


 http://www.elitceram.ru/index.php? cat = 78