Cottage toilet - the most simple version of the building structure
Table of contents
-
1 How to organize the work
- 1.1 How to choose
- 1.2 Materials and tools
- 1.3 Digging a cesspit
- 1.4 The construction of the house
- 2 The construction of the toilet-powders
- 3 Output
If you decide to make a cottage suite with his hands, then this article is for you. We will look at everything you need to know: the correct choice of place to the sump unit and construction of wooden construction. You just need to follow the recommendations of the review, to get the job done easily.
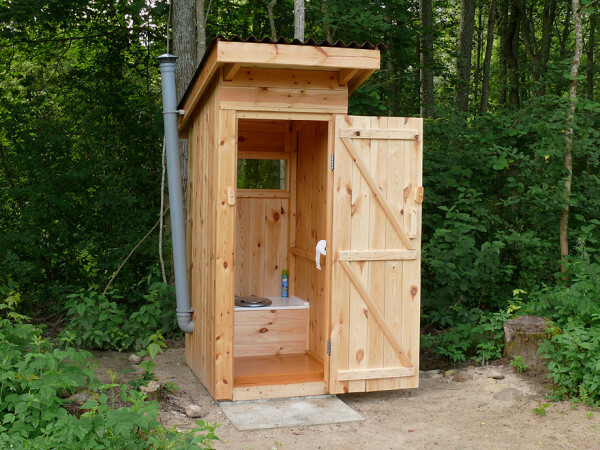
Photo: Wooden toilet - the most simple solution for garden
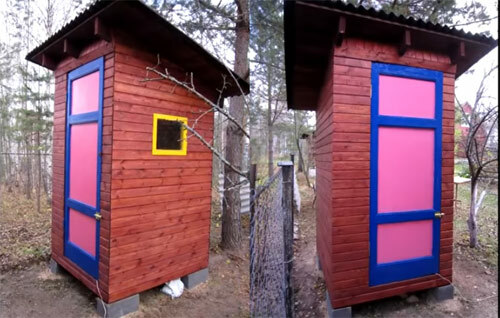
Staining can make the structure more attractive
How to organize the work
To make the holiday a toilet, it is not necessary to be a builder or carpenter. The structure is simple, so its construction to the forces of any person. But there are a number of nuances, the violation of which can lead to many problems, so the first thing you need to deal with the installation regulations. Only then can you start to work.
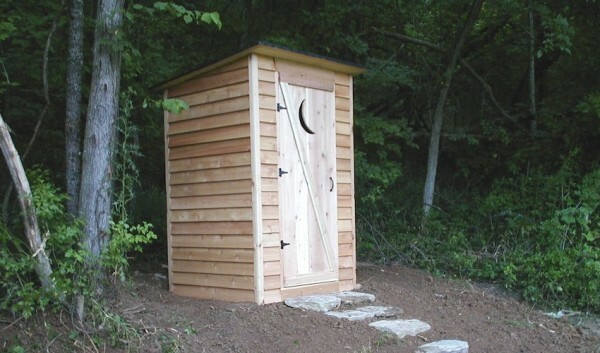
Usually, the toilet is located in the far corner of the site
How to choose
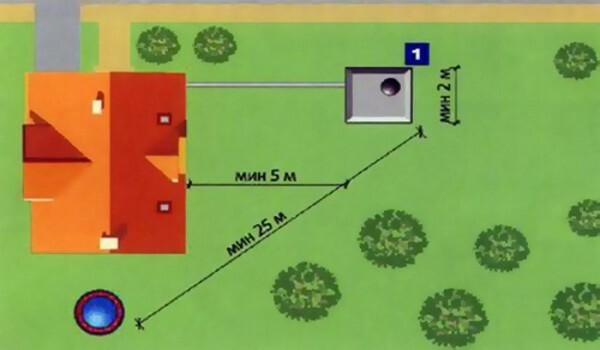
This simple scheme reflects the main requirements for design layout
The first step is to select the correct location of suburban toilets.
There are several rules that must be kept in mind when determining the place of construction:
- The distance from the toilet to a source of drinking water must be at least 25 meters. Ideally, the further there is a well, the better. You can not put the structure close, especially if you have a ground water are located near the surface;
- From the house construction is better to have at least 5 m. This is due to sanitary standards, as well as the fact that the close proximity of odors will penetrate into the house, especially in the summer, when the windows open. It is also desirable to take into account the prevailing wind direction in your area to possibly put a toilet on the leeward side;
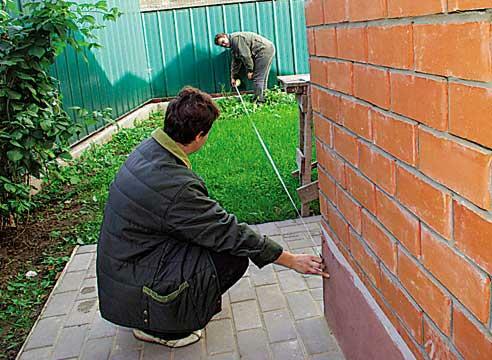
All distances are carefully measured
- You should also observe the indentation from the fence, a minimum distance of 1 meter If you put the structure back to back, the neighbors may apply to you to court and you have to carry the structure.;
- When deciding where to put the toilet, do not forget to take into account the level of the site. It is necessary to put the building so that it is not located at the highest point. But in the valley produce construction is undesirable, especially if you have a spring in the area standing water.
If you have a private septic tank, be sure to provide a place for the entrance assenizatorskaya car. And that often turn the situation that the car simply can not drive.
Materials and tools
To build a brick pit latrines, need a simple set of materials. All the necessary components are presented in a table for clarity.
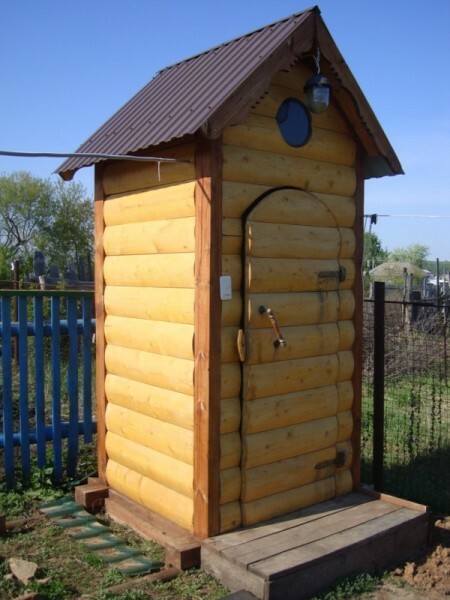
Block house looks attractive, but also is more expensive boards
| Material | Recommendations for choosing a |
| wood block | From it will be built design framework. Better to take the options section of 40x40 mm and more, to ensure durability and reliability. The most commonly used pine, its price is low, and the reliability is sufficient for our work |
| Board | For cladding board construction is used and a thickness of 32 millimeters. If desired, the outside sheathing surface unit can house or imitation lumber. But you can do a cheap board, especially if you want to carry out the process with minimal cost |
| roofing | For these purposes may be used slate, metal, flexible roofing or any other suitable material. Some use the usual roofing material, which is fastened to the deck of the board or oriented strand board |
| Material for a cesspool | Just dig a hole and leave it so highly undesirable: over time, the walls can settle and your toilet will fall or fail. For pits can use tires from trucks or tractors, it is possible to spread the walls of the brick, and you can do it from the concrete rings (sold special sewer options for reducing diameter) |
| ventilation pipe | It is best to use for this purpose an ordinary sewer pipe of 110 mm diameter. Its amount depends on the construction height |
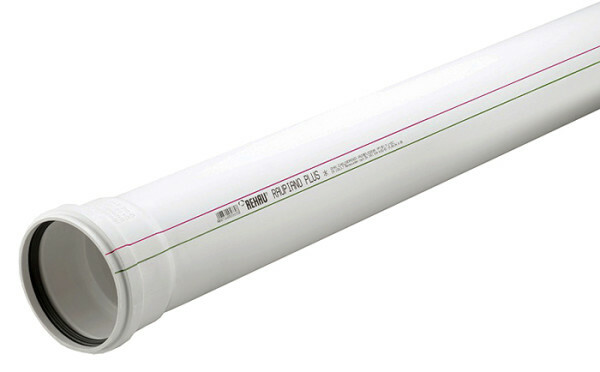
This pipe is ideal for ventilation
As for tools, you need a set of:
- Hacksaw or electric tool for cutting wood. You can do a manual option, it is much cheaper;
- Shovel for digging a cesspool;
- If you laid bricks that need a trowel and capacity for solution;
- Collect construct may or by means of nails (needed hammer) or screws (screwdriver is needed). I prefer the second option because of its reliability;
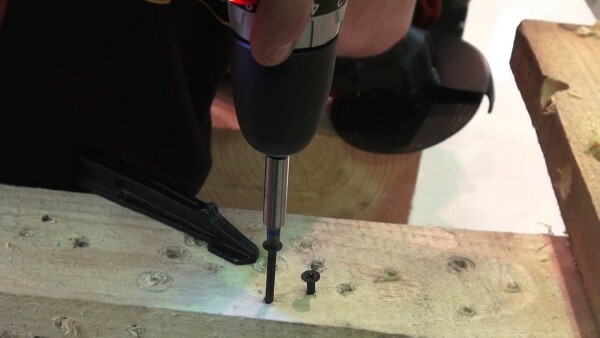
Screwdriver allows you to quickly and efficiently connect wooden elements
- Tape measure, pencil, square and level will help to carry out precise measurements and collect a flat design.
Digging a cesspit
This part of the work, for all its simplicity takes a lot of energy, so it is best to dig a hole is not himself, and with 1-2 assistants to alternately rest.
The workflow consists of the following:
- Is determined by the configuration of the future pit. If you use the wheel or the ring, it is necessary to deepen the round form. If the walls will be laid out in brick, it is possible to make a square version with a side of 100-120 cm. It is important to determine the order of some type will pit if the groundwater close to the surface, it is best to make it a closed type to waste does not fall into the soil;
- Partitioning the surface and begin work. The upper layer of fertile soil is better to remove separately to use it in the garden. Then the ground is selected and either taken out or breaks down evenly, to raise the level of the site, or even out of the pit at the site;
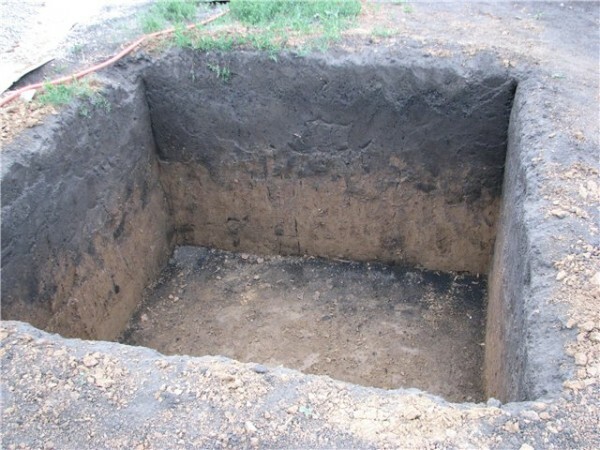
Pit digging is strictly size
- The depth is typically about 2 meters. No more needs to be done. Once the pit is ready, it is necessary to align the bottom and fix the wall, if necessary;
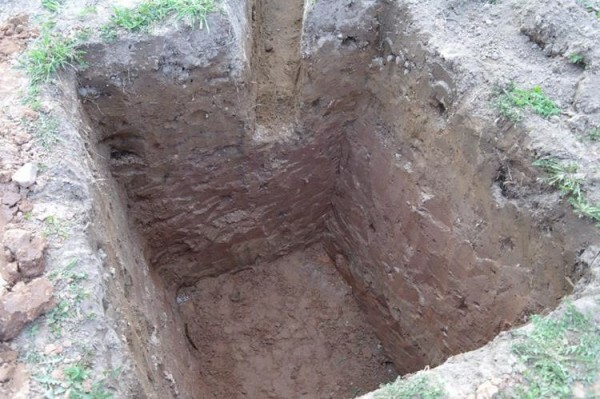
To the wall did not fail, the work is best done in the dry season
- If the walls are laid of brick, it is better to make them square. Print the circle is much more complicated, but put straight sides easier. No need to perfect the quality of masonry, most importantly - securely mount elements on the solution and make the wall more or less flat. At the bottom of the hole can be left to drain;
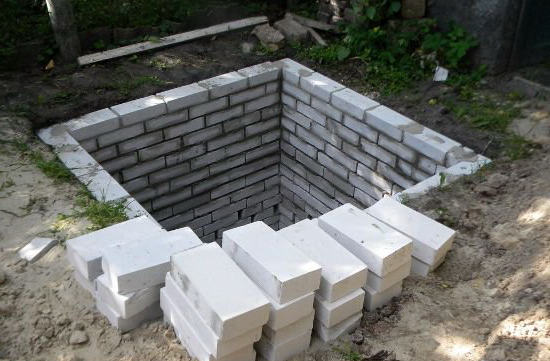
Of bricks easier to make a square hole
- Laying tires made even easier. They carefully placed on top of each other and are aligned. In addition, they do not need to be fixed. The upper element can be slit, so that later you can insert a hose to pump sump;

Tires - cheap solution for open cesspools
- If you use concrete ring, then it is better to set via a lift. The most commonly used two rings depth just obtained two meters;
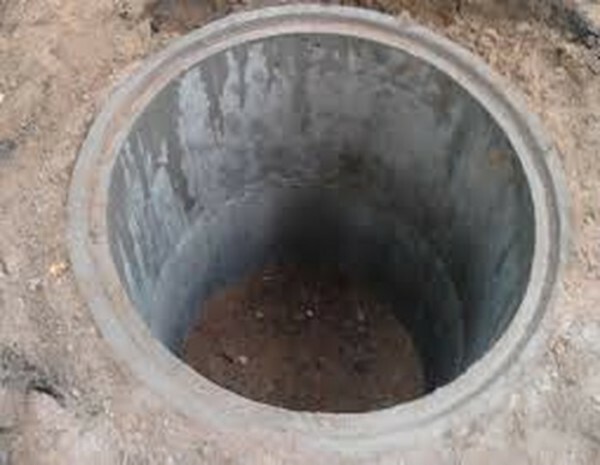
If you need a solid cottage toilet - use for pit concrete rings
- If necessary, the bottom is concreted. Everything is simple: the ground is leveled, poured and compacted sand cushion thickness of 10 cm. Solution is poured on top of 5 cm;
- If you have an open option, the drainage layer is poured on the bottom. Here all easily by taking the average gravel fraction and 20-30 cm layer distributed on the surface.
The construction of the house
Now we look at how to do the toilet in the country with their own hands.
The process is simple and consists of the following steps:
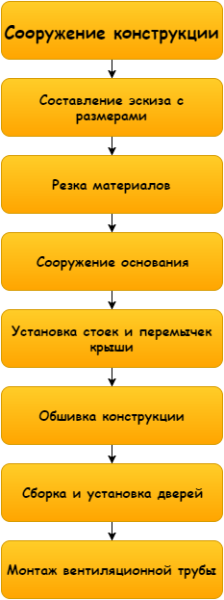
The circuit is quite simple, if you break it down into small steps
- Before you build a toilet, make it a project with all dimensions. This greatly simplifies the working process, as you will know all the parameters of each element. In addition, when a clear idea of the end result, the assembly is much faster and easier;
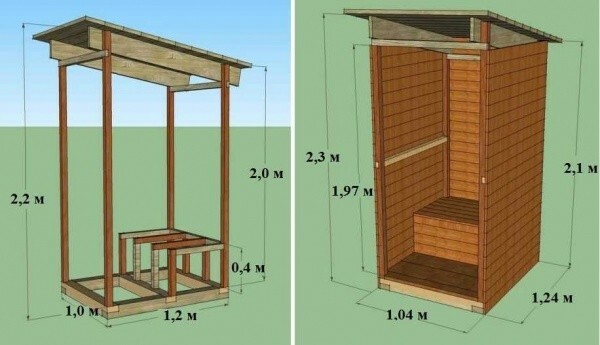
The simplest cottage suite, which can collect each
- According to the drawing made of materials preparation. The bars are cut into pieces of the desired size. If you have a lean-to roof, the pillars should be above the back 20 cm, this is the easiest option of the roof;
- In the first place it is going to base. Here the most important thing is to make the design even, for that before bonding all the elements required to check the diagonal. This is the easiest way to control the geometry and to avoid distortions. Bond of the best self-tapping screws;
To ensure the best reliability of the lower part, it is desirable to process perfecting or other protective compound.
- It sets the foundation soil. The easiest way to use concrete block 4, which exclude contact with the ground wood surfaces and become a reliable support structure. Pour the foundation, I do not advise, blocks an excellent job with the base function;
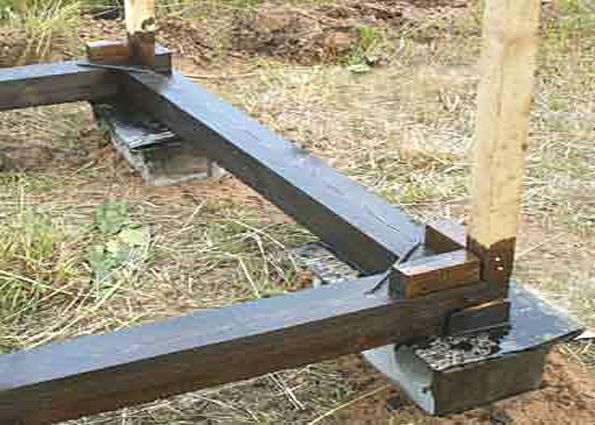
The base is placed on concrete blocks and abundantly treated with a preservative
- Mounted uprights. To work the easiest way to use metal mounting brackets, with their help you quickly and securely connect the elements. It is important to control the mounting uprights using level. If necessary, further lock temporary bracing bar;
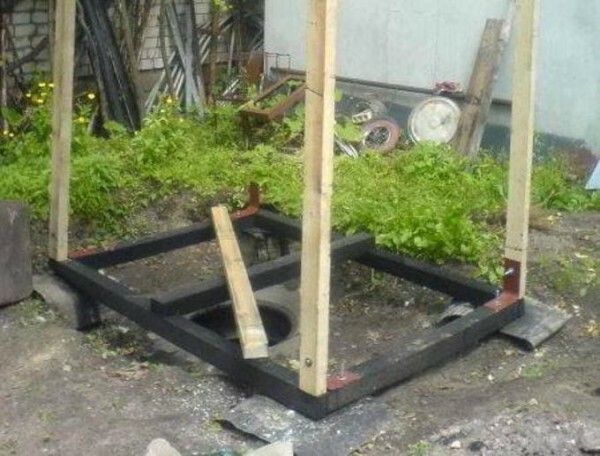
At the corners of the support frame is very convenient
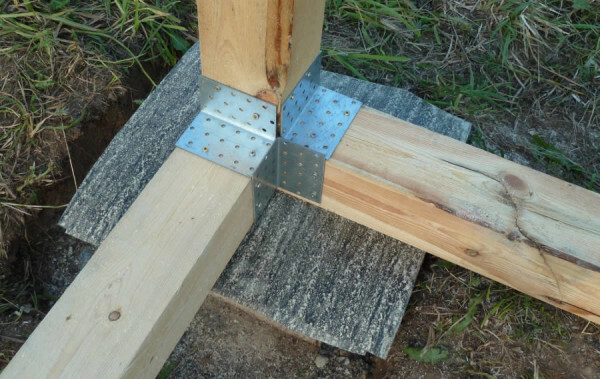
Here is an example of how to connect the corners of the foundation and the rack
- constructed the toilet seat. Everything is simple: from the bar is made frame 40 cm in height and a minimum width of 50 cm. No special requirements, the main thing - to provide rigidity. the same applies to this part of the bar construction as Rack;
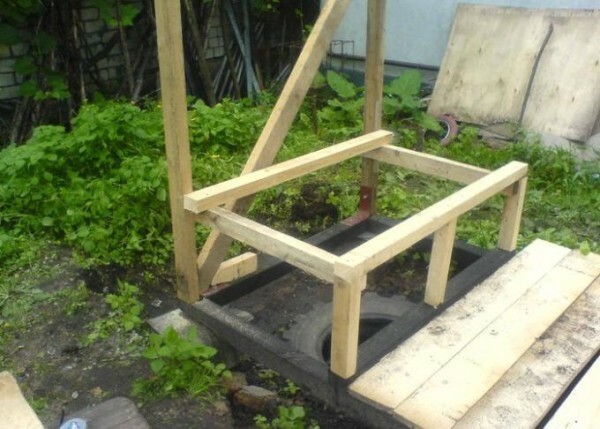
The elevation should have a comfortable size for use
- Fasten the roof supports and framing for doors. As for the bars on the roof, they must have a takeaway from 20 cm to cover the walls from rain. Door is a reinforcing frame on the size of the future of the web. What it looks like when assembled, is well shown in the photo below;
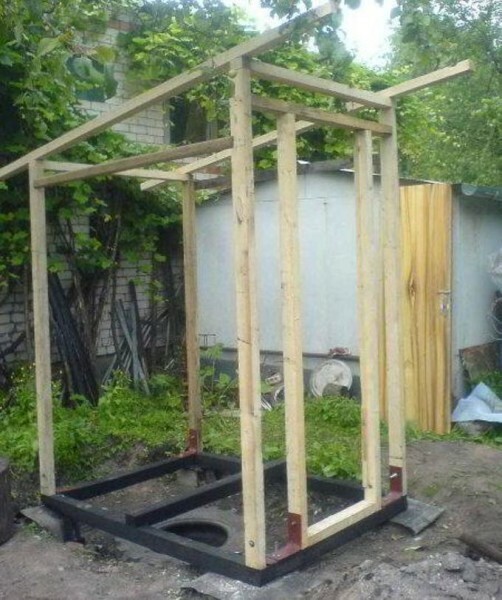
Here is the finished frame under the cottage WC
- Walls clapboard. Everything is simple, the main material is cut to size. The connection is performed by means of screws or nails. Better use of edged boards, to avoid cracks in the structure. Toilet still outside, and undesirable, to where the wind howled;
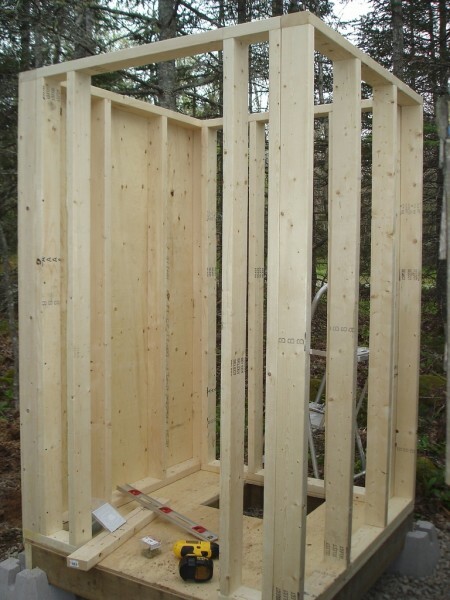
If you have a plywood sheathing can be produced and this material
- Going and put the door. Simple structure is used, which consists of a board, the two webs and one or two braces to ensure reliability. It is better to first collect the design, and then cut cleanly upper and lower part. On the toilet frame canvas mounted on a hinge, which can be bought at any hardware store;
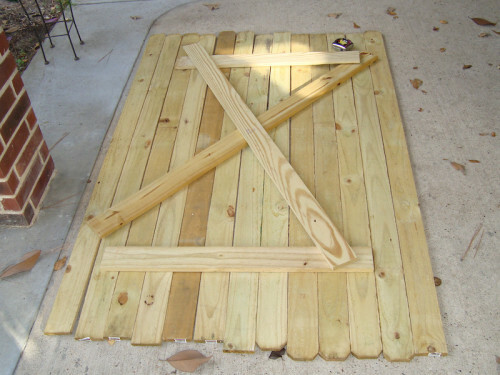
Initially concealed and sealed design, and then cut off all unnecessary through
- The vent pipe is easiest to mount from the rear side. It should be above the roof by at least 20 cm and lowered into a pit of about 15 cm. For better ventilation and protection from rain deflector mounted on top.
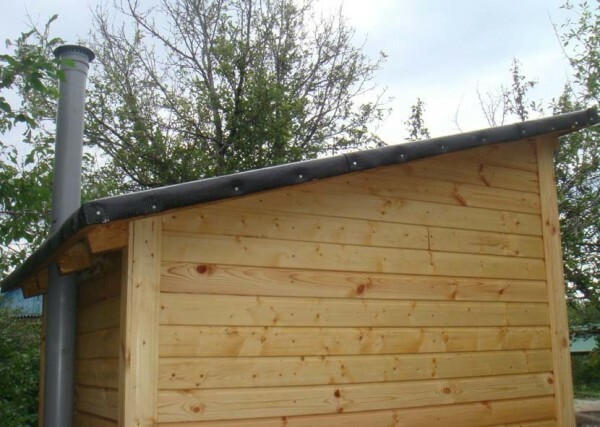
The pipe should be above the roof, or proper ventilation will not
After the construction be sure to handle the construction of protective structure. It can be used as paint and impregnation, which does not hide the tree structure, but effectively protect the surface from moisture and pests. Staining is not necessary to update at least once in 3 years, it will prolong the life of the structure at least twice.
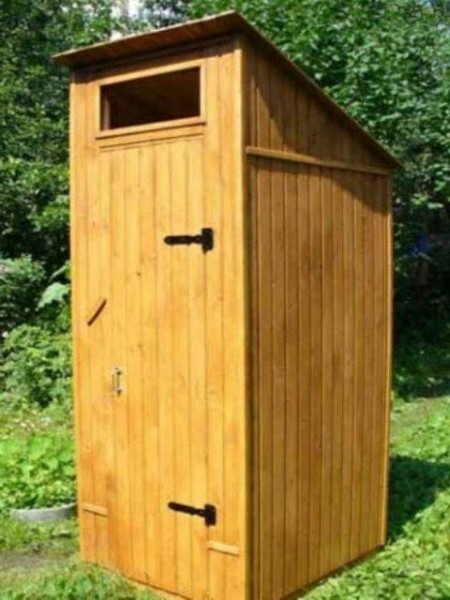
Protective Treatment - final stage of the workflow
The construction of the toilet-powders
If the level of groundwater at the site is very high or there are other restrictions for the construction of the sump, it is easier to build-powders closet. He also called peat toilet due to the fact that as a filler is applied when using peat.
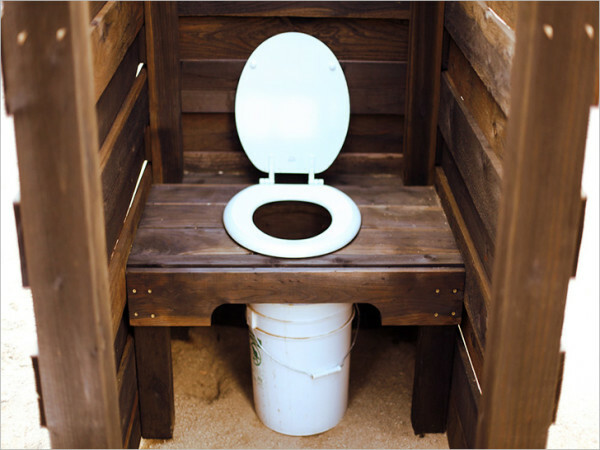
This option does not require a sump
The design is largely similar to the conventional one, but there are differences, that we analyze them below:
- The first thing to make the circuit of the future structure. It is similar to the above described embodiment, but in her house is not on a hole, and on the basis of concrete blocks installed on the ground;
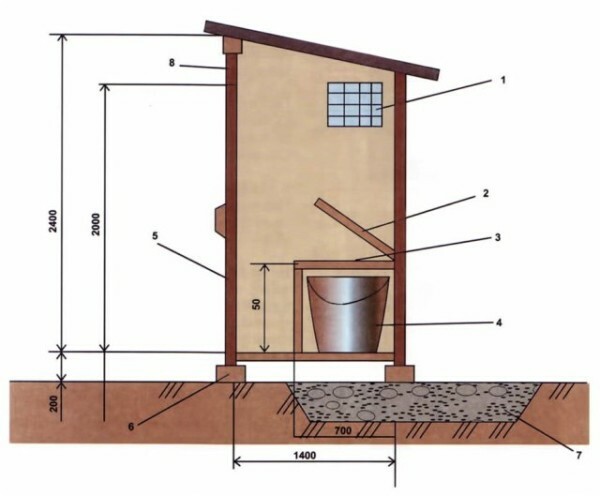
It looks like this option
- House can be assembled anywhere and put it where you need to. The toilet is better to make the floor to put a bucket in the ground, and on the deck. In determining the dimensions do not forget that a number must be placed a bucket of peat. That is why such toilets are usually wider than the standard;
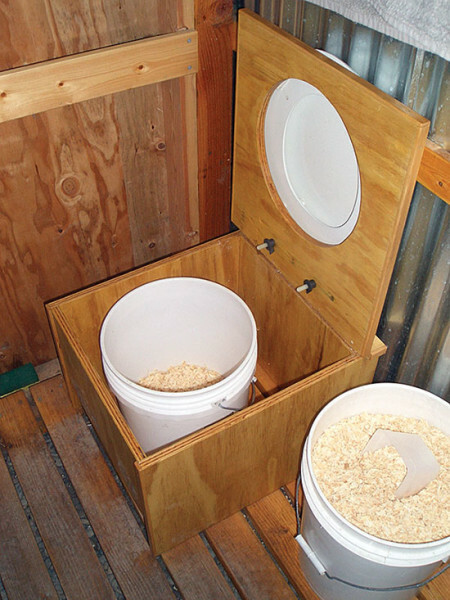
Instead, you can use peat and sawdust
- The height of the pedestal depends on the size of the bucket or container to be used. We first define this aspect, and then get to work. Often it turns out that after the assembly is that the bucket does not fit and you have to adapt, but if you provide it in advance, then problems can be avoided;
- Consider how capacity will be extracted. You can make a folding stool, and you can build a door in the back wall to remove the bucket from the street. Not much difference, choose what is more convenient to you.
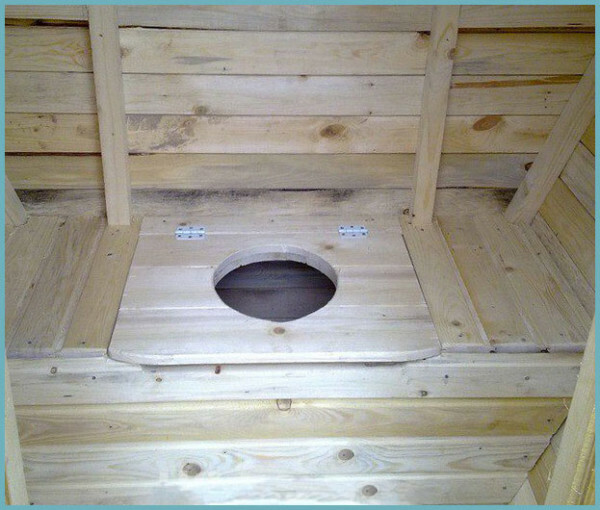
Suburban toilet of this type should provide for easy removal of the container
Output
Using this survey, you will be able to build a cottage toilet easily. All steps are described in great detail, and the video in this article demonstrates the important moments of the working process, to make you more easier to understand the topic. If you have any questions, please write them in the comments below.


