Repair of the bathroom - a step by step description of floor finishes, walls and ceiling
Table of contents
-
1 The walls in the bathroom
- 1.1 Materials and tools
- 1.2 Preparing walls
- 1.3 Laying tiles
-
2 Bathroom floor
- 2.1 surface preparation
- 2.2 Laying tiles
-
3 The ceiling in the bathroom
- 3.1 Materials and tools
- 3.2 The construction of the frame
- 4 installation of plumbing
- 5 Output

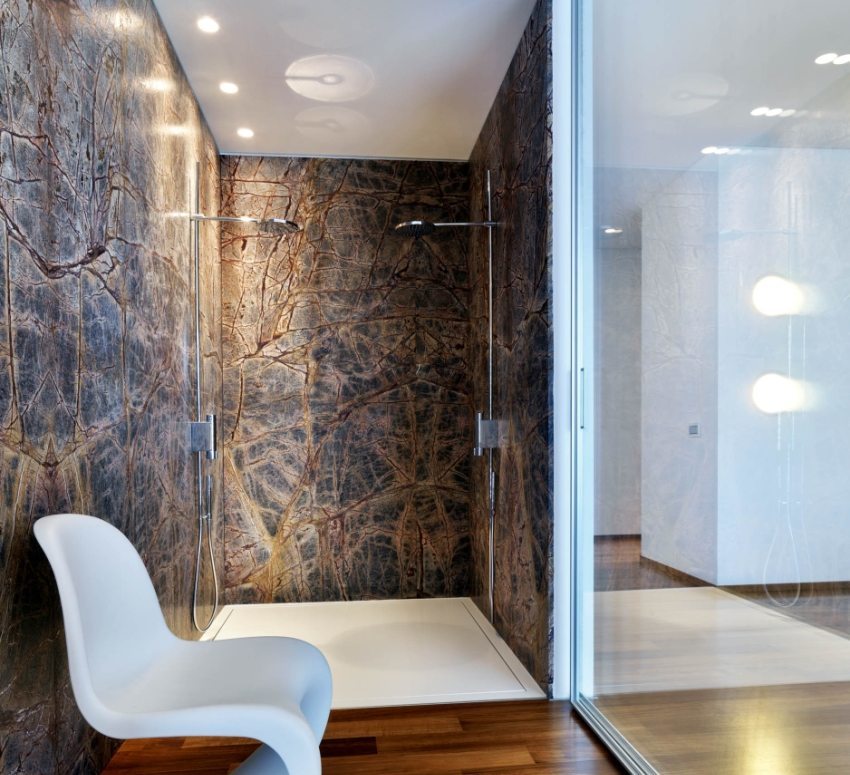
Tiles on the walls and the floor - the most practical and reliable solution for the bathroom, because such a surface is not afraid of water
How to make repairs in the bathroom most? Such work can perform each, there is no special preparation for this purpose is required. But experienced craftsmen have their secrets. I'll tell you what you should know before you get started.

The plastic lining on the ceiling - economy version, which looks very tidy and serves tens of years
The walls in the bathroom
Before the start of finishing the walls should not be anything extra, this is the main condition for a major overhaul.
Materials and tools
What you need to work:
| Illustration | Description |
 |
Ceramic tile. The cost varies from 300 to 10,000 rubles per square meter or even higher, so choose just how much you are willing to spend on the tiles. |
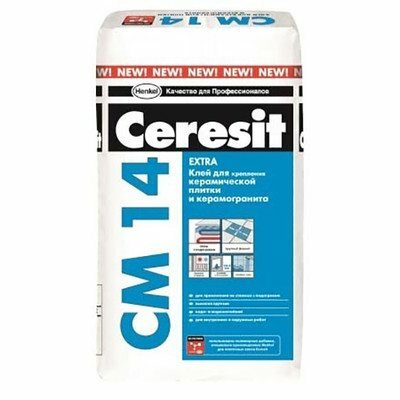 |
Tile adhesive. Uses special formulations are sold in dry form and diluted with water before use. |
 |
Primer. We need to strengthen the walls and increase the adhesion of tile adhesive. Since the bath increased humidity always, I advise you to choose the composition with additives against mold. |
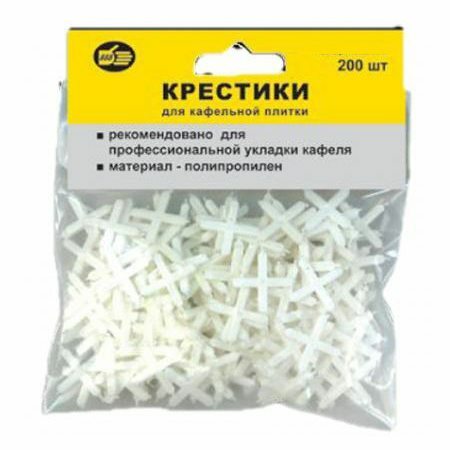 |
Crosses for tile. We need to ensure that the joints between the elements were perfectly smooth. At recommended product wall thickness of 2 to 5 mm. The concrete size depends on the size of the tile, the higher it is, the wider the joints. |
 |
Fugue for joints. The special grout is not only protects joints against ingress of moisture, but also improves the appearance of the walls. Ingredients are sold in different colors, choose the option that is suitable to your plate. |

Example spectacular combination of different types of tiles, in finishing the combined bathroom and toilet
To carry out the work with your own hands, you need the following tools:
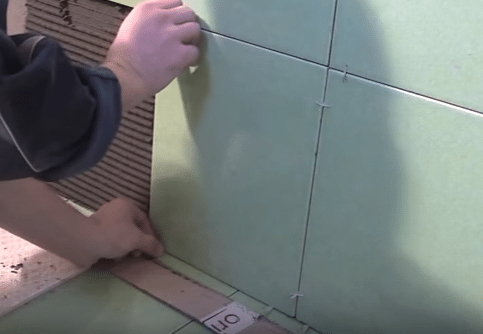
- Builder's level, measuring tape and a pencil. You will also need otbivochnogo cord, it can be held in front of the surface markings tile laying;

Otbivochnogo cord allows you to quickly and accurately mark the walls before laying ceramic
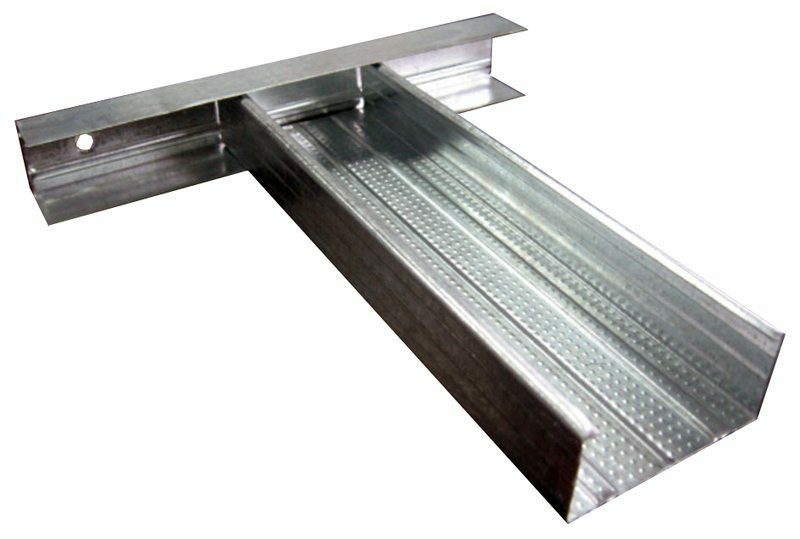
- Metallic profile. Use trim profile for drywall. He serves as a guide member after fixing the wall. The amount of material is calculated according to the length of all the walls of the bathroom;

The guide profile is used to lay out the tiles on the wall perfectly straight
- Drill or punch with a mixer. The tool is essential for fast and efficient preparation of the adhesive composition;
- Notched trowel and smooth.

Notched trowel to apply adhesive leveling layer and remove the excess from the surface
- Tile. If you need to make slits under the pipe, then use the Bulgarian with the disc for concrete;

Tile enables you to quickly and accurately cut tile
- rubber mallet. We need to align the tiles on the surface. Select embodiments up to 500 grams;

Rubber hammer allows you to align the tiles without damaging the surface
- rubber spatula. Used to apply grout to the joints between the tiles.

Rubber spatula allows you to quickly and efficiently fill the joints between tiles fugue
Preparing walls
Repair their own hands in the bathroom always starts with surface preparation. The walls are prepared as follows:
| Illustration | Description stage |
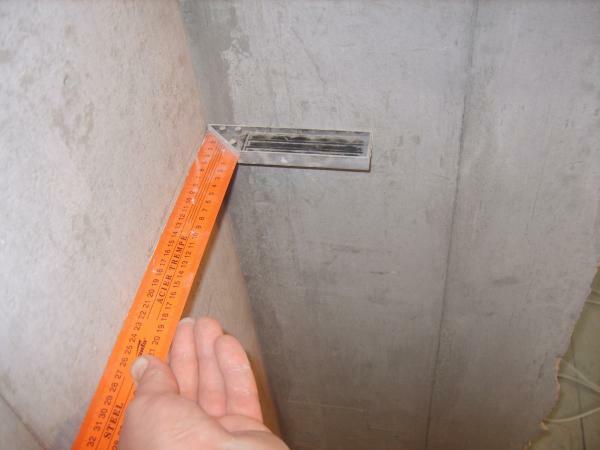 |
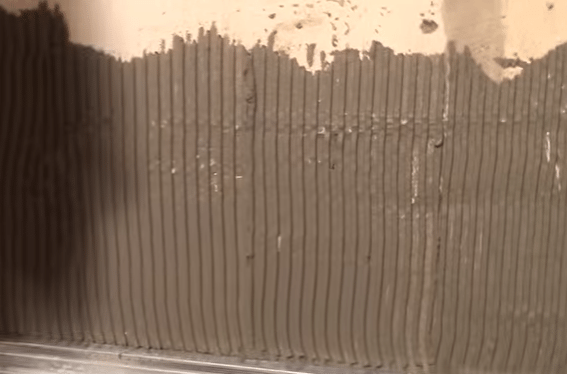
prepared wall. All surfaces must be leveled with the help of cement mortar. Use compositions based on plaster it is impossible, since they are not suitable for wet areas. angle geometry check a square. |
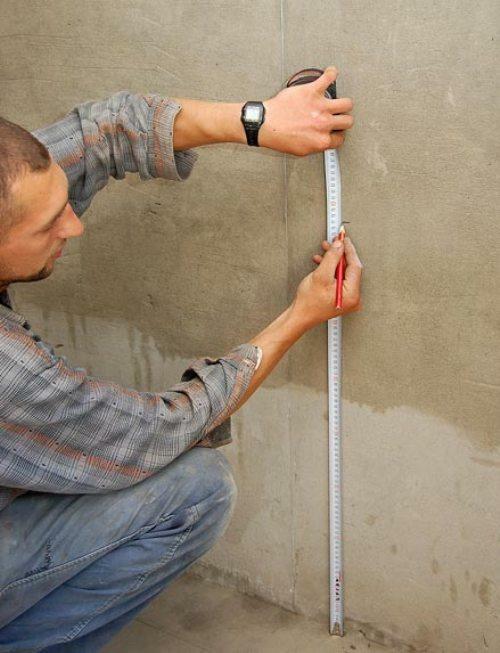 |
Produced marking surface. Tags are placed at the height of the tiles in view seams to be between elements. After label set, is located between the rake or rule level and verified, in the presence of distortions corrected marking. |
 |
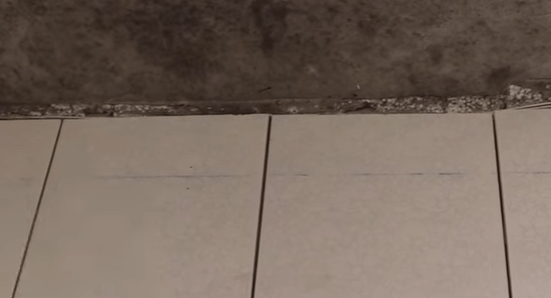
Line cord bounces. Thereafter applied tile and checked signs, it may be slightly below the height of the element. All the same, then the bottom row will be cropped. |
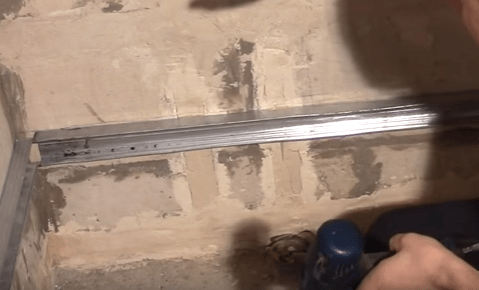 |
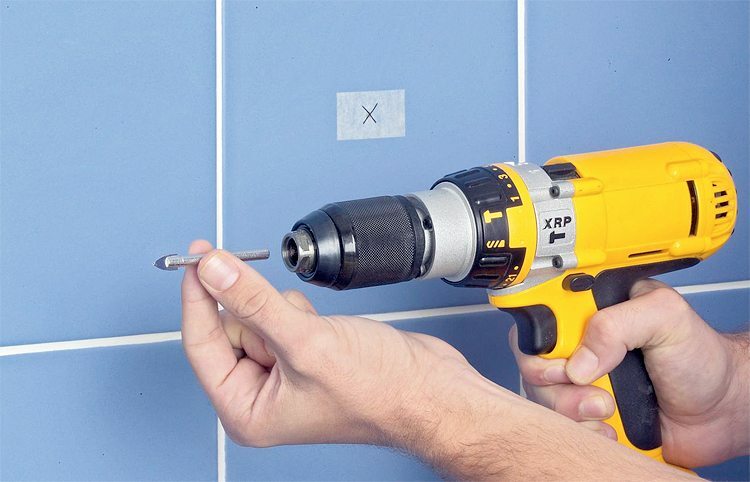
Through the fixed profile. For this purpose in the wall are drilled dowel holes, after which the guide is fixed to the wall. This will be the basis for laying open of the first row, thanks to a horizontal level of support will be met perfectly. |
 |
Be sure to check the position of the design level. Even if the profile is located on the line, you need to control the plane. If suddenly there is misalignment, then at this stage, they are easy to remove. |
Laying tiles
Let us consider how to lay tile on the wall:
| Illustration | Description stage |
 |
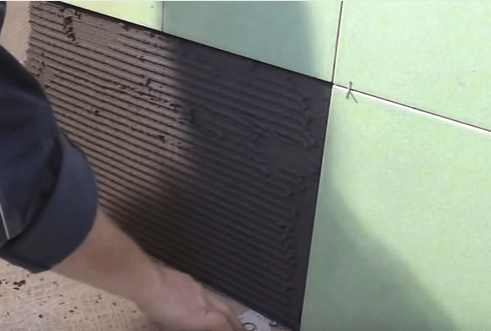
Glue is applied on the wall. Kneading about 8 liters of glue laying over 5 minutes, after which it can be distributed along the wall. The work done in the usual spatula layer must be approximately 5 mm. |
 |
Layer is leveled notched trowel. You just have to walk across the surface to level and remove excess glue. Teeth allow to leave on the wall as much structure as necessary. |
 |
The first tile is glued in the corner. Element gently pressed against the surface and then leveled. If necessary, some parts of inciting a rubber mallet. Be sure to check the horizontal, if there is a misalignment, then under the base element can be inserted wedge or any suitable object. |
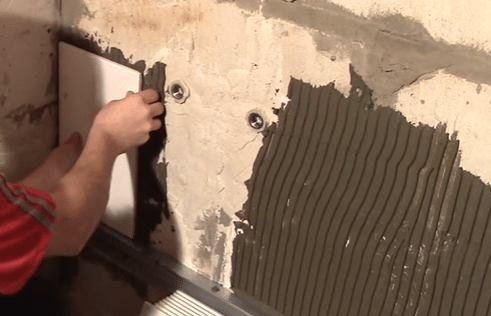 |
Glued tile with another edge of the wall. Her alignment is performed in the same way as the first element. |
 |
Tensioned cord between the tiles. It can simply catch the corners of the elements to set the benchmark by which you can perfectly display the most important first row. This is the easiest way to set a clear target for the rapid installation of the tiles. |
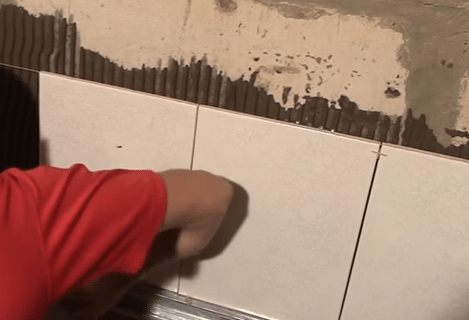 |
Fit a number of other elements. The vertical joints are inserted crosses to joints were the same across the surface. You can just stick element 2-3 and then proceed to the alignment. |
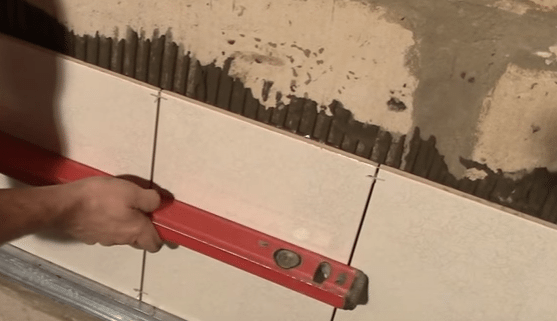 |
The surface exposed by level. Check plane on multiple tiles, and to amend the position of the elements when necessary. |
 |
Put up the second row. There is already a need to put crosses and vertically and horizontally. Incision under the pipe is done by using grinders and disc on concrete. |
 |
Stacking is carried to the top of the wall. The most important thing - to control the surface level, so that each tile was located exactly. |
 |
Finished wall is left for a day. Laying ceramic on adjacent walls you need after the glue has dried, so as not to move the pinned items. |
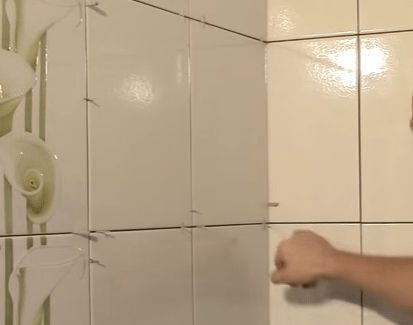 |
When installing the adjoining wall joints perfectly horizontal joints. It should look as shown in the photo. |
 |
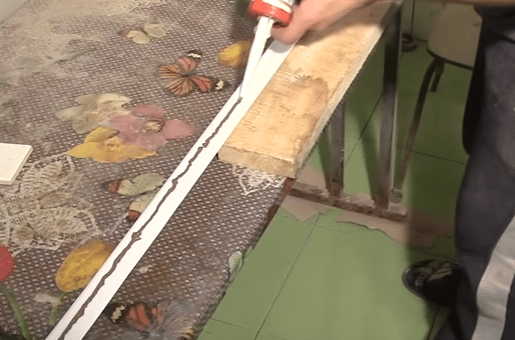
Joints are filled with a fugue. If you have dry mixture, then cook it as prescriptive.
|
 |
After drying, the excess is removed fugue. This is done with a sponge or damp cloth. It is better to carry out the work in two stages:
|
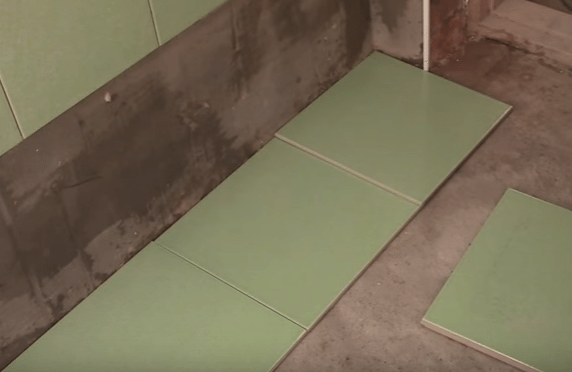
Bathroom floor
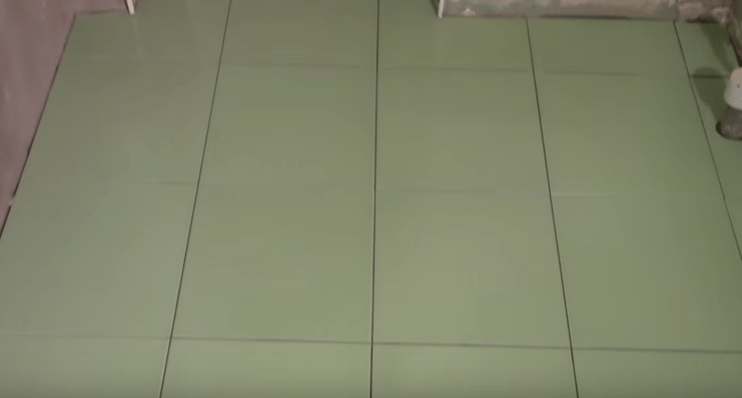
Bathroom Renovation continues laying the floor covering. Here ceramics will also be used to select special wear-resistant variants, preferably with anti-slip surface.

Floor tiles are usually larger wall and usually has a square shape, although there are rectangular versions
Repair bathrooms conducted similarly. A list of materials and tools for the walls and floor are absolutely identical.
surface preparation
Performed the following work:
| Illustration | Description stage |
 |
The room is freed from all superfluous. We need to endure all things, that the floor was free. |
 |
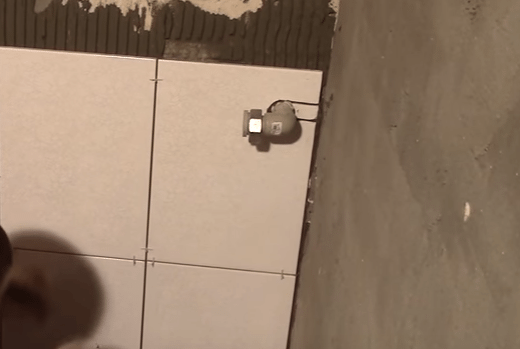
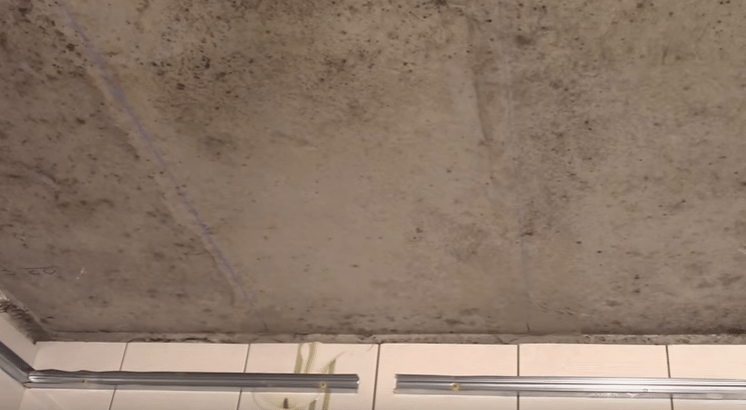
Removed from the walls of the profile. Make this necessary in the first place, so you do not litter. Screws can be turned out screwdriver, then carefully pulled out the guides together with dowels. |
 |
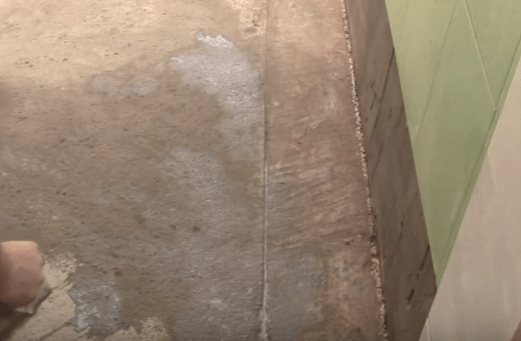
Paul carefully swept out. Better make it even twice. For the first time to remove the main impurities and the second wet the surface and remove residual dust. Frozen tile adhesive to the surface very easily removed spatula. |
 |
The surface is primed. The composition is most conveniently applied by brush-maklovitsej. Do not spare the soil, it is still absorbed. Processing not only strengthens the base, but also de-dusting it, improving the adhesion of the glue. If the surface is very strongly absorbs the solution treatment is carried out twice. |
 |
On the surface of the tile is laid. You clearly see the number of entire rows will be placed and how many tiles have to be cut. Putting need from the most prominent corner. |
Laying tiles
On the floor tile is laid so:
| Illustration | Description stage |
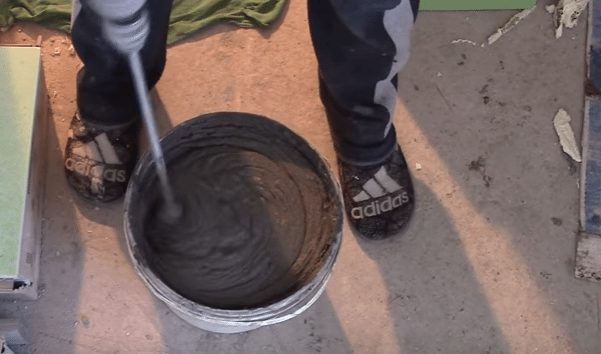 |
Preparing an adhesive composition. The mass of carefully stirred with a mixer, left for 5 minutes, then stir again. |
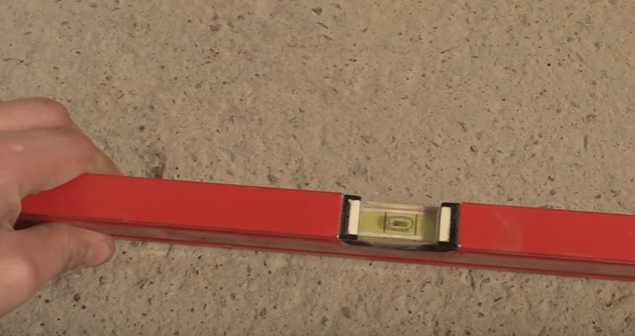 |
Checked floor plane. Level walk across the surface to reveal the rough patches. Small irregularities are not terrible, they are easily eliminated a layer of adhesive. |
 |
Checked the first row. You need to put two tiles along the edges of the room and one in the middle. It puts a level and is pressed against the extreme elements. This step is necessary in order to determine whether the curvature of the walls. If the average tile sticks, the side elements are pushed away from the wall to get a smooth line. |
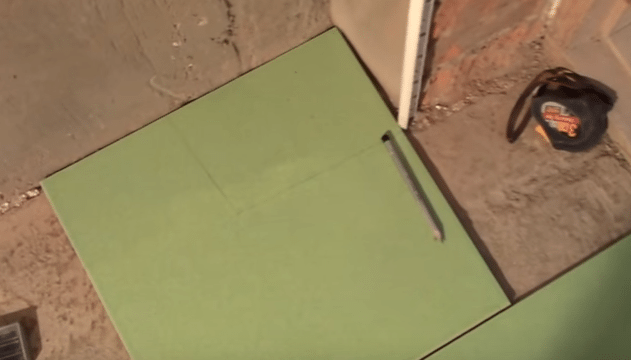 |
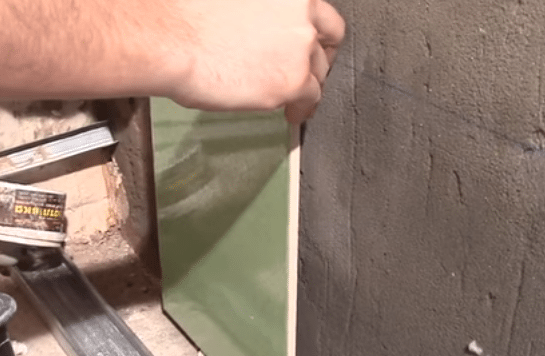
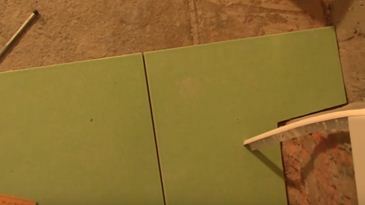
The first element is cut. Most often, in the bathroom first row rests on the slope, so the tile should be cut to make the right size. To determine the exact size, I use a piece of paper, cutting it so that it perfectly follows the contours of the projection (with a gap of 3-4 mm). Then the outlines are transferred to the tile, and it is cut. |
 |
tile is tried. It is important that the item is not rested on the surface. To expose the cut tile by line puts one side member and alignment is performed thereon. |
 |
Applied to the surface of the adhesive composition. Initially, it is distributed evenly, and then aligned toothed spatula. Layer on the floor should be at least 5 mm. The more uneven, the thicker the need to put the glue, to make up for deficiencies. |
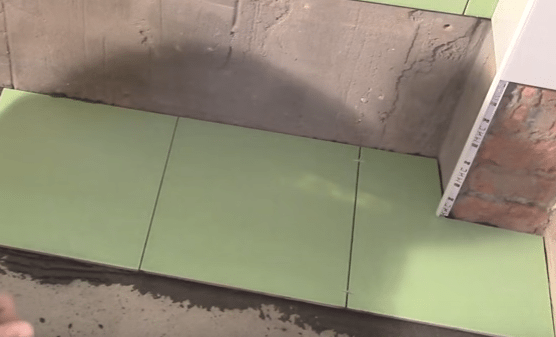 |
Stacked first elements. Usually placed 2-3 tiles, exposed on the wall, and then the plane is checked. If necessary, amended, and then inserted into the seams crosses. The main thing that the outer edge coincide in all the elements, as this seam will be most obvious. |
 |
Several stacked until the end of. If the floor is more or less equal, the work goes quickly. Do not forget to check the level as each individual tile, and on several elements simultaneously. |
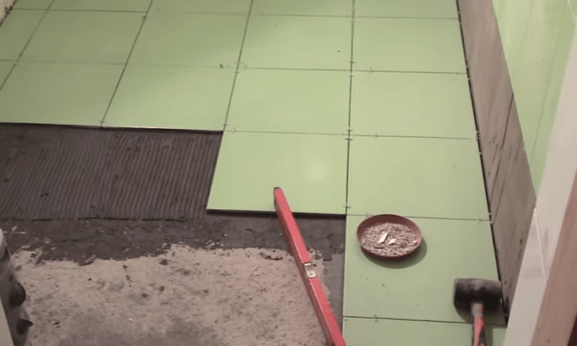 |
Stacking continues along the far wall. From it, you can move to the exit. Everything is simple: you put the tiles so that then can get out of the room. Some put the first whole tile and trim is carried out on another day. I used to do everything at once, so that at a time to carry out all the work. |
 |
After laying the floor is left for a day. During this time, the adhesive hardens and gains primary strength. The next day, the crosses are removed and a dried solution of the seams, if any is cleaned. |
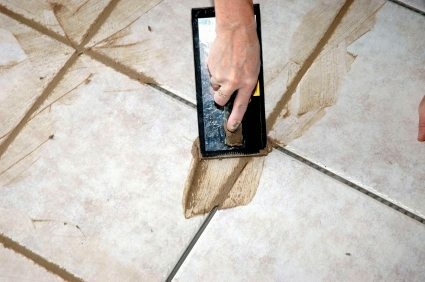 |
The seams are sealed fugue. The composition of the first hammered into the joints, then the excess is removed. After drying, the surface is wiped with a sponge to remove grout residue from the tile. |
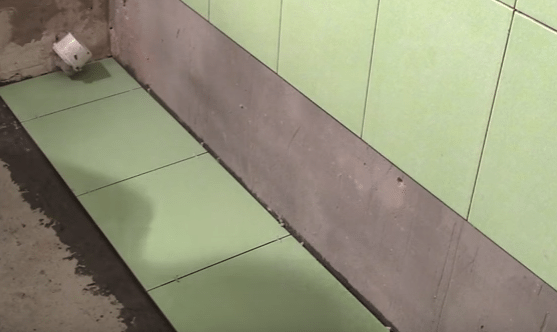
The final fit the bottom row of walls. This is necessary in order to cover the joint and wall tiles, and thereby prevent ingress of water under the coating.
A workflow is as follows:
| Illustration | Description stage |
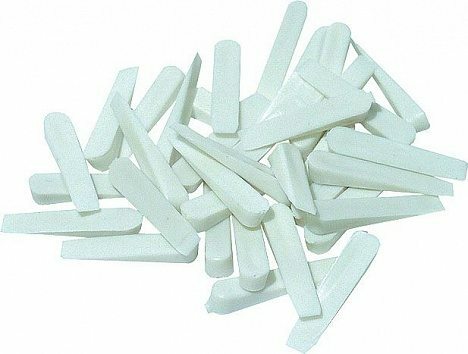 |
acquired wedges. They will need when installing the bottom row, with their help compensated for any irregularities, and the elements are set perfectly straight. |
 |
The elements are tried and are marked. Tile put to the surface, and both edges are made labels, which are then connected by a line. Do not forget to leave a gap in the seam. It is better to number the elements, since the distance can vary slightly. If you bet on each tile serial number, place it exactly where it is intended. |
 |
All elements are tried. After cutting, be sure to tip the tile in the place of its location, to make sure that the pieces fit onto and complied with all the necessary clearances. Extension in a couple of millimeters is not terrible, it is compensated by the wedge. |
 |
Applied glue and first elements placed. The most important thing - once when installing put crosses on top, the joint will be clearly visible and that it is carried out by the alignment. |
 |
The elements are aligned. First, you need to put the plane using a spirit level. Then, under the lower part of the underlay wedges, so that the tile was in place. Do not worry if the seam at the bottom will not the same, it is impossible to see with the human height. |
 |
After laying surface is left for a day. After hardening the adhesive crosses are removed fuguyutsya seams. In this work can be considered successfully completed. |
The ceiling in the bathroom
Knowing exactly how to repair the walls and floor in the bathroom, we come to the ceiling finish. Here we can do without the tile and will use the plastic panels.
Materials and tools
We need the following materials:
| Illustration | Description of material |
 |
PVC panel. Personally, I prefer white glossy elements, but you can choose how you want. Do not forget to measure the ceiling area to calculate the required amount of material. |
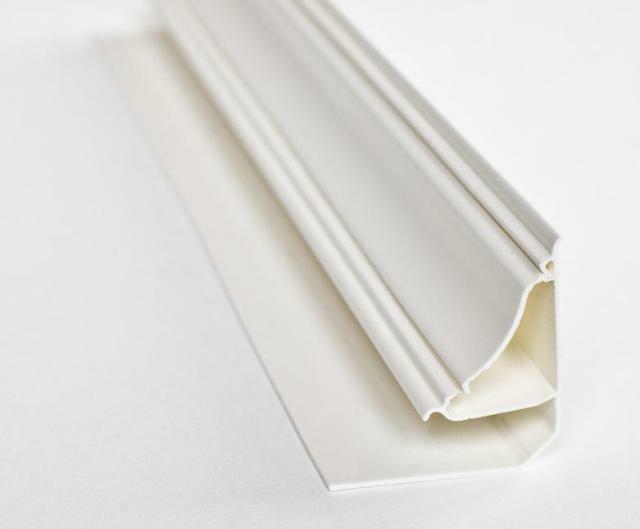 |
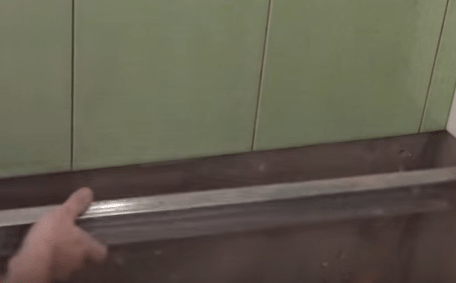
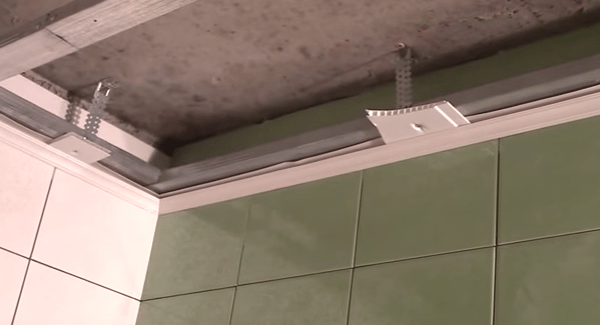
PVC Skirting. We need not only to decorate the perimeter of contiguity. Skirting and used as the starting profile, the panels are inserted into the grooves and fixed in position. |
 |
Ceiling and guiding profile. Used elements for plasterboard structures. Number of wall profile is calculated according to the length of the walls. Key elements are arranged in increments of 50-60 cm, usually in a bath they must be 2-3 pieces. |
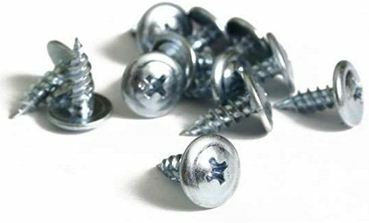 |
Screws with a press washer. They are used for attaching the panels to the frame. Fastener length should be 16 mm. |
 |
Liquid Nails. Need for mounting plinth. On the bathroom area of up to 8 square meters enough of one package. |
| suspensions straight. Needed for fixing the profile to the ceiling. Located in increments of 50 cm. |
Tool:
- drill. With it, drilled holes for the dowels. Included should be the concrete drill of the desired diameter and length;
- screwdriver. Used for tightening screws (need PH2 head). Also screwdriver we will be drilling holes in tile, if you do it puncher, ceramics crack. To work buy special drill for ceramic tiles;

Special drill on the tile has a tail chuck screwdriver, so it is very convenient to operate
- Hacksaw with a fine tooth. With its help cut panel. Instead hacksaw can be used with a conventional disk grinder on metal;
- Crowns Wood. With their help cut holes lamps. Usually it sold accessories in a set, and only costs 100-150 rubles per set;

Crown of the tree allows you to make perfect holes for the lights in the plastic panels
- Pistol for liquid nails. It is used for rapid and accurate application of the composition of the tubes. Standard tool, so suitable for any structure intended for sealants.

Sealant gun is excellent for application of liquid nails on the plinth
The construction of the frame
The process looks like this:
| Illustration | Description stage |
 |
held marking. On the walls are put marks at the desired height, then beat off the line with a special cord. The height of the installation of plastic panels is selected in such a way so that you can fit in the luminaire design. Standard indent is 10-12 cm, it is this need for fixing the cavity of most spotlights. |
 |
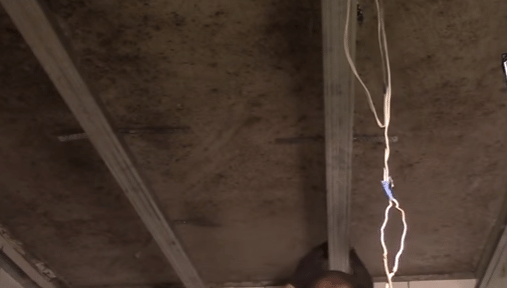
drill holes. Work is carried out as follows:
|
 |
Fixed profile. Elements are fixed as follows:
You can then mark the ceiling, so you can see the location of the line of the main profile. |
 |
Fixed suspensions and exposed profile. The process is as follows:
|
 |
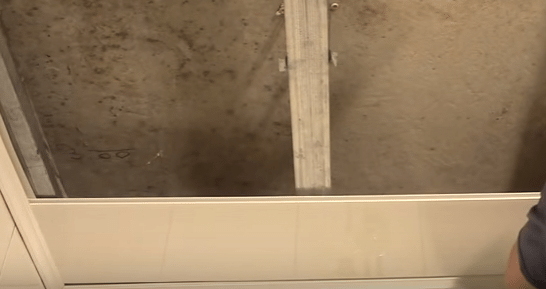
pull cords. It is fixed with screws on a wall-mounted guides and defines a plane structure. On it will be able to quickly align the basic rack. |
 |
fixed profile. For this element is aligned with the cord, it is turned in to the suspension, and through a suitable bore you screwed screws. Extra tips you can simply bend up, so they do not interfere. |
 |
preparing plinth. Initially, cut a piece of the desired size, and then liquid nails are applied to it. |
 |
Skirting adhered and fixed on the frame. The elements are glued to the wall. That they are not slid up to pour the composition into the slots and inserted pieces of panels are bolted to the profile. |
 |
Inserted into the first element. At first it is necessary to get into the grooves, and then carefully fill the butt. For convenience, you can bend the plastic spatula. |
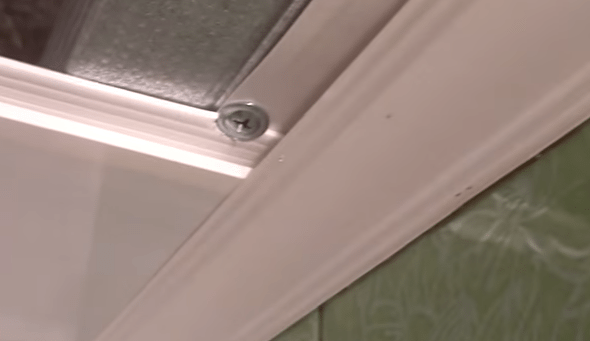 |
fastened to. Self located so as to image, on the edge of the projection to cap pressing member. Along the edges of fasteners and locks panel and plinth. |
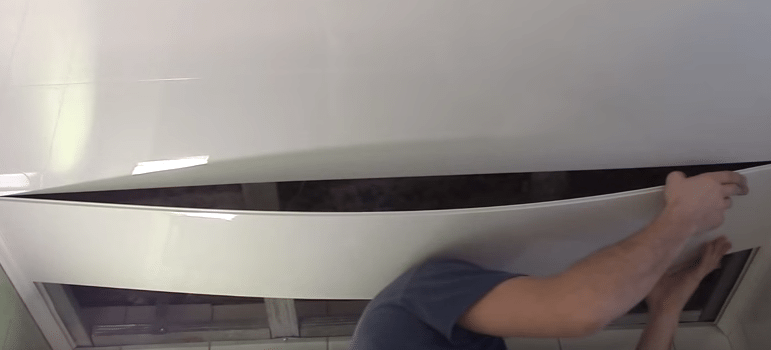 |
Mounting continues to the end. The elements can easily be fed into the guide because of its flexibility. The last panel is cut so that it came into the plinth to 5 mm, so you can start it by tilting the guide. |
installation of plumbing
Repair of bathroom turnkey involves the installation and connection of all sanitary equipment.
Performed the following work:
| Illustration | Description stage |
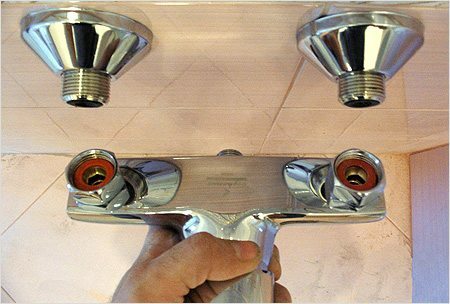 |
Connected bath mixer.
|
 |
Fixed flexible connection shell. The thread is wound fum-tape fastening tightened. The main thing that the length of the liner enough, and it is not stretched. |
 |
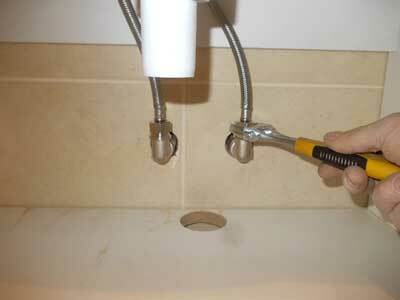
Fixed the sink faucet. It is screwed flexible connection, after which the lower side is fixed to the shell design. Design may differ, all of the features shown in the diagram that comes bundled with the mixer. |
 |
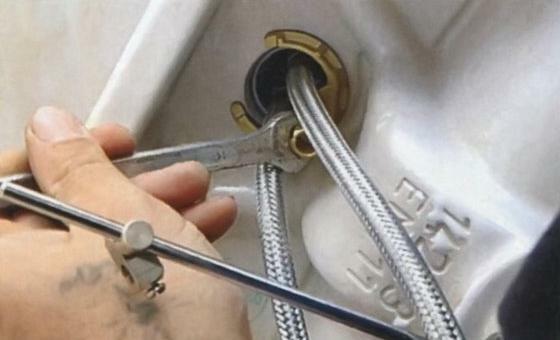
Going to the bathroom and put a siphon. It comes with assembly diagram on it and work. Do not forget to put on all joints and smooth rubber gaskets to fix the drain part by sealing it with a rubber ring. |
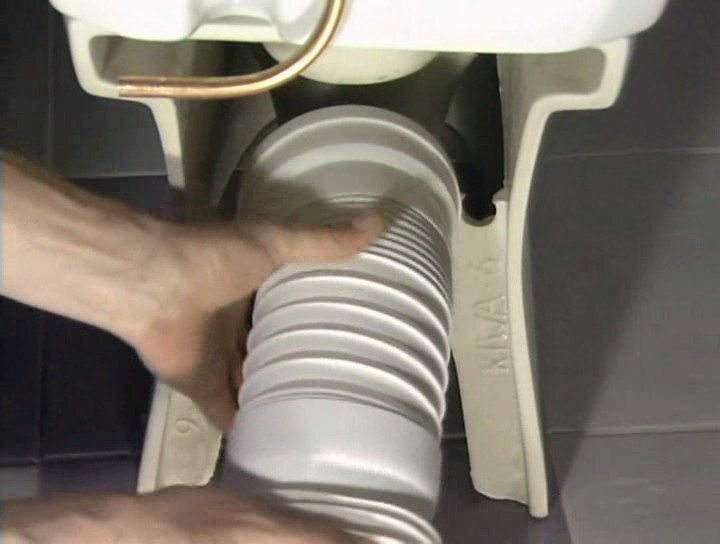 |
connects the toilet. This step is carried out in co-located environments. The process consists of two parts:
|
Repair of bathroom turnkey finishes cleaning the room, then all communications are checked for serviceability.
Output
Using charts, you will be able on its own to make repairs in the bathroom. In order to understand the subject better yet, watch the video on the subject, which I picked up. Still have questions? Ask in the comments.