Repair dishes 5 square meters (33 images). Dissection and transfer walls. Replacing communications. Alignment of the walls and ceiling. flooring Finishes
Table of contents
- 1 Analysis and / or transfer wall
- 2 Replacing communications
-
3 Finishing work
- 3.1 Alignment of walls and ceilings
- 3.2 Floor
- 4 Summing up
- 5 Photo Gallery
If you change something, it is only for the better. And what can be done when to repair the kitchen 5 square meters? The answer to this question you will find in this article.
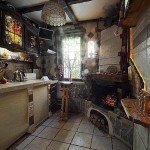
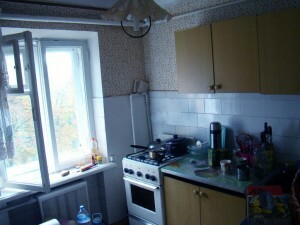
It's no secret that the repair Khrushchev - troublesome. This is due to the fact that the rooms are small and inconveniently located. In the photo you can see, it looks like most kitchens the size of 2x2.5 m to repair. Pile of furniture and household equipment takes up almost the entire room, leaving no free space.
 So, the first question - what is the price of the kitchen renovation?
Estimated repair cost depends on many factors and the responses to the questions:
- What will change?
- What materials will be used?
- Who will do the repair?
- Let's change the furniture or not?
Of these components, and the sum total repair cost. Let's look at a few different on the cost, but the most popular choices kitchen remodeling.
Tip! If you want to save money on repair, do it yourself. Experts you need only to replace the windows, and gas pipelines. Thus, the savings will be at least 1/3 of the cost of repairs.
Option №1.
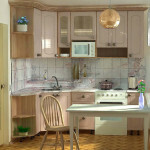
This option is used mainly in cases where the agreed to sell an apartment or rent it out. What is included in a repair? Replacing the wallpaper, painting pipes, windows and floor, whitewashing or pasting of ceilings. Repair does not take much time and effort. What we get as a result? Clean and "fresh" room.
Variant №2.
What work is done by:
- partial replacement of communications;
- leveling plaster walls;
- taping and coating surfaces;
- replacement of floor covering.
Partial replacement of communications meant checking the reliability of water supply and repairs.
The first stage - remove the old coating with ceiling and walls, using the plaster surface aligned, coated with a primer for fixing the top layer from cracking and prevent fungus. Prepared paint or paste over the surface. This option is ideal in the event that you do not plan something radically change.
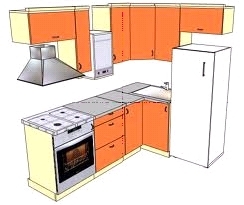
Project placement of furniture
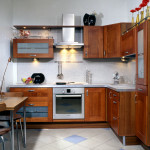
Option №3.
What you need to repair the kitchen? Firstly, kitchen design or pattern of the future premises with furniture in it. Many people make the repairs of small-sized kitchen, conduct all communications and only then choose the furniture - is the wrong approach. At the planning stage it is necessary to carry out all the calculations to determine the type, shape and color of the furniture, which will be installed in the kitchen.
Secondly, tools.
We need:
- Hammer with a peak tip for breaking down the walls;
- screwdriver and a hammer;
- various rollers and brushes for painting of walls and wallpapering;
- spatulas of different sizes for alignment of walls and applying solutions;
- construction level.
Third, the window. Lead time to manufacture products ranging from 5 to 14 days. During this time, you can do some of the work.
Fourth, building and finishing materials.
Tip! Construction materials with a stock take. If you can not buy all at once, break a purchase on the types of work, such as replacing electricity - wiring, switches, sockets.
Analysis and / or transfer wall
Kitchen-dining room
So what we have. Small room of 5 m2. What need to do? Increase the room!
This can be done through:
- demolition of interior walls;
- transfer walls;
- replacement or removal of the doors.
The most commonly used method - combining two rooms into one. In the photo you can see how to change the room, if you do the repair kitchen-dining room.
To do this, we need to tear down the wall between the kitchen and lounge. On the hammer put on the tip of the peak and begin to dismantle the wall. Do not forget to wear a respirator, dust will be a lot!
Tip! Before starting work disconnect indoor light, gas and water. Will make all the pieces of furniture and household appliances. If this is not possible, cover them with oilcloth. And do not rush to get rid of debris. When pouring the floor, you may need podsypochny material.
Replacing communications
As mentioned above, the replacement of windows and piping entrust the art. Electricity can do yourself, but only if you have minimal experience. We need a three-conductor wire with a cross section of at least 4 mm, tools, tires for connecting wires, sockets, lamp and a switch.
Pencil on the wall paint location of electrical outlets and switches on the ceiling - of spotlights. With the help of a chisel or beat Wall Chasers Stroebe. "We throw" the room layout, installing the outlet. Do not forget about ventilation, which also require a network connection.
All outlets should be ground to bring this safety rule. On the ceiling of the wire is attached to the metal frame, which is mounted ceiling. For this purpose, it provides for openings.
Be sure to install the boxes. It is necessary to ensure that the load on the wire was uniform. To connect using a plastic tire, they are easy to use and reliable. Twists should not be!
Finishing work
Alignment of walls and ceilings
For surfacing can be used plasterboard, plastics, cement or lime plaster. The first two are mounted on metal profiles collected in the frame.
- Plastering - a laborious and lengthy process. For this we need the level of the solution and the spatula. If the alignment area is large and deep, work is being done in several stages, each time allowing the previous layer to dry.
That the wall does not crack, use a reinforcing grid. Evenness Surface check level. After drying of the last layer we clean the walls and ceiling with sandpaper fine grain, pass primer and give it to dry. The surfaces are ready, you can start laying tile or wallpapering.
The decoration of the ceiling found great popularity multilevel structure of the drywall. This is not surprising, they allow you to zone the room to mount various lighting sources and carry out design of the ceiling in several shades.
- For the ceiling of the frame profiles collect conceived configuration. We make a paper pattern, cut and install drywall on the ceiling.
Do not forget about the hole for the spotlight. If the ceiling is aligned drywall before painting it is necessary to putty and primed.
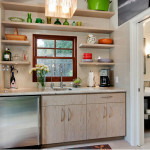
In the photo you see the room after renovated kitchen and hallway. Wall shifted deep into the corridor, this place is perfect for the installation of furniture and a refrigerator.
The increase in area due to the hallway
Floor
Starting with the dismantling of the old flooring. Remove the logs and get to the floor slabs. Spreads steam and waterproofing coating and expose beacons - guide for pouring the floor. All of the above work can be done by hand.
If the height of the threshold to the estimated more using podsypochnye materials (sand, slag, or waste from the dismantling of the walls). For warming the floor, you can use mineral wool or make cuttings from the heating system.
To align smaller depths can be used leveling mortar on cement basis. To strengthen the tie, put the iron reinforcing mesh, which does not give a solution to crack. the floor is completely dry time depends on the humidity and temperature, but it takes at least 3-4 days.
Do not be afraid to start the repair, but fear it is not complete. Stick to the face of difficulties, and the final result will surprise and delight.
Summing up
We hope our article has been helpful to you. In order to more accurately understand the technological and practical issues on our website provides detailed photo and video instruction, in which you will find useful information on the question.
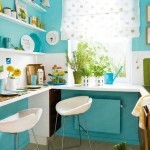
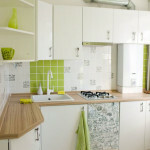
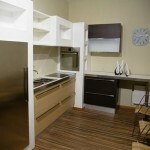
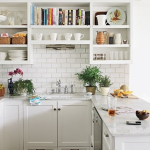
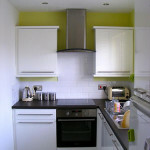
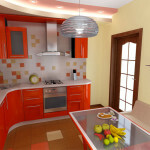
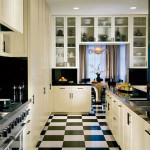
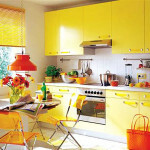
Photo Gallery