Leveling plaster walls. curing period. coating defects
Table of contents
-
1 The main thing about the works
- 1.1 when the plaster
- 1.2 The choice of method
- 1.3 The sequence of work
- 2 curing period
- 3 Coating defects and how to avoid them
- 4 Summarizing
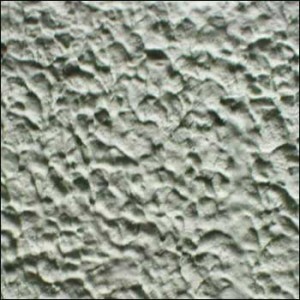
The most ancient form of decorating - it's leveling plaster walls, a layer of solution applied in one or more steps on prepared surface. In addition, the finishing is heat and sound insulation and prevents the penetration of moisture into the wall.
The main thing about the works
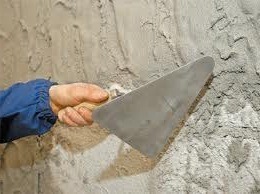
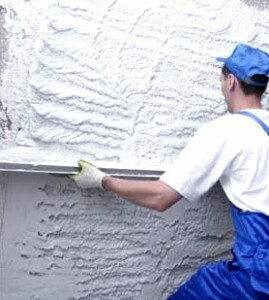
In the photo nakidyvanie the primer
when the plaster
Start work only after the necessary building shrinkage of not less than 11 months after its construction.
Apply the solution best layers. On the surface intermittently superimposed layers - obryzg, primer and finish coat. Apply immediately thick soil layer is not recommended, it can slide under its own weight or after solidification crack.
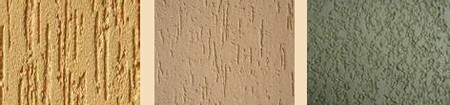
The choice of method
Plaster the walls with his own hands can be done in two ways: sketching or spread. The first method requires a certain amount of experience and skill, the second is accessible even for beginners. Thus obryzg can only throw, as it prepares a sufficiently liquid solution.
If the walls are erected qualitatively and smooth plane can be made thin layer plaster: in brick / stone surfaces - from 0.5 cm or higher and concrete - 0.5 cm.
Wood surfaces need to be coated with finish thickness of at least 2 cm, if the calculation is output from shingles. If a thinner layer applied, it is likely that it will crack upon deformation shingles.
The period setting solutions depends on their composition, porosity and moisture content of the walls, the ambient temperature and layer thickness. If the solution contains gypsum, the next layer is applied in 7-10 minutes; If the cement mixture - after 2-6 hours.
The sequence of work
With solutions of lime plasters continue to run after the previous layer turns white.
Instructions for the work with his own hands:
- removal of old finish (if any);
- Preparing walls;
- staking surfaces;
- installation of beacons;
- major works.
If the roughness of the walls not exceed 0.5 cm, they can be eliminated putty materials. Use the stucco worth only if differences greater than the specified value. In addition, the coating can not be subject to all the wall, but only part of it.
Important! To increase the adhesion of the surface of the walls can be treated with diluted PVA or finished factory primer.
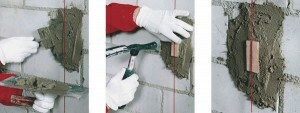
Setting marks for lighthouses
A few useful tips from the masters:
- The roughness of the walls is determined by a plumb, level and regulation. If a significant amount of construction work, be sure to purchase a laser level.
- If the ambient temperature is above zero, and the humidity does not exceed 80%, brick walls dampen.
- If the coating is a multilayered, wait for an intermediate setting of the previous layer and then only proceed with the subsequent application. Finish coat is applied after the full grasp of soil.
curing period
Under favorable conditions, the drying finishing indoor humidity to a value of mass provided snip "finishing" is derived from the formula: finishing layer 1 mm for 1 day.
Normability thickness is 1.5 cm (in some cases 2 cm and more), so the moisture coatings, which, if further work is achieved on average 15 days after application.
Under the most favorable conditions, said SNP normalizes as plaster dries more sparing by the calculation: layer 2 = 1 mm per day.
SNP № 3.04.01-87 «Insulating coating and finishing" indicates that the paint / wallpaper coating work must be carried out when humidity of the mass layer decreases to 8%.
Coating defects and how to avoid them
The formation of defects such as irregular geometry of the walls, cracks, delamination are not rare.
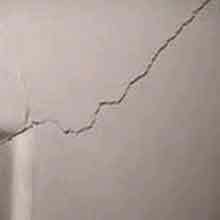
Crack - the result of improper work
To minimize them, stick to the rules:
- The thickness of a single layer should not be more than 2 cm, if the plaster solution - 1.5 cm.
- It is mandatory to carry out staking the wall, even if it looks smooth. In addition, it is necessary to determine the flow plaster 1m2 and labor.
- The main cause of cracking in the finishing - accumulation of binder, arises because of the high fat or a composition of insufficient mixing.
- Cracking is also associated with a small rate of setting of the solution on the other hand - it with a very fast drying. This may be due to the wrong mixing, and with external factors. Before starting work, should ask how to prepare a solution for plaster properly.
- Too moist surface of the walls is not suitable for work, because it is the cause of swelling of the material applied.
- Too dry or heated surface will cause a peeling finish.
Summarizing
Alignment of the walls - a process that requires you to scruples and diligence, but it is thanks to this approach, you can ensure the longevity of the decorative coating. Oh, and be sure to watch the video in this article.