Plaster outer walls (33 pictures): preparation of the base, the installation of beacons, sprayed, application of the base layer and grout
Table of contents
- 1 Substrate preparation
-
2 installation beacons
- 2.1 Why lighthouses?
- 2.2 The sequence of work
-
3 plastering
- 3.1 nabryzg
- 3.2 Application of the base layer
- 3.3 Grout
- 4 Summing up
- 5 Photo Gallery
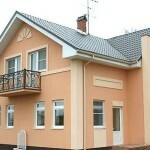
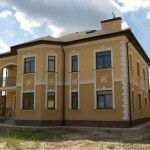
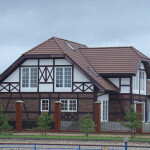
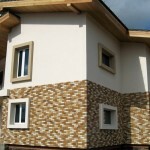
Plaster walls outside and inside is today one of the most popular types of wall cladding. And this is no accident. The thing is, that the penetrating moisture in the raw walls of their spoils and well reduces the thermal insulation of the house. We have to bear the additional costs of heating. Also appearing in this damp, and as a consequence, and fungus, adversely affect the health of occupants. Yes, and just have a good plaster facade - it's beautiful.
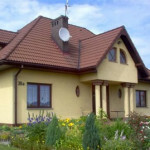
 Now there are many types of plasters. If you look more closely, stucco exterior walls with his own hands and not so unbearable task. We hasten to tell you of the technology and some useful secrets.
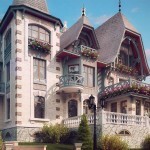
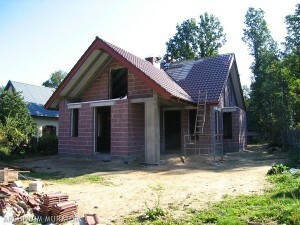
So, for example, there is a small country house. Its walls are lined with the usual silica bricks, concrete blocks or other kind of building material that requires finishing. If you decide to choose as a facade cladding is plaster, it is best to do majachnym way or, as they say, "beacons."
Stages of the plastering are divided into:
- training base;
- installation of beacons;
- plastering.
Substrate preparation
If we ignore this step or execute it properly rely on the fact that the application of the plaster facade with his own hands last long hardly worth it.
The sequence of works:
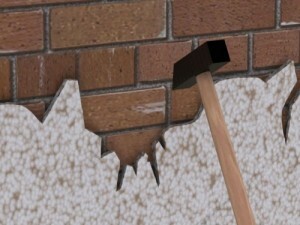
- If the wall has been plastered, remove the old, ill keep trim. To this end, tapping a small hammer or wooden bars the wall. The places in which sound is muffled knock out them with a hammer and chisel, but rather punch in the strike mode.
Important! If possible, eliminate the nodules and bumps on the walls, then because they have to be applied rather thick layers of plaster, which would lead to unnecessary consumption of materials, their own time and effort to work.
- Purify substrate from dirt, dust, oil stains and other contaminants.
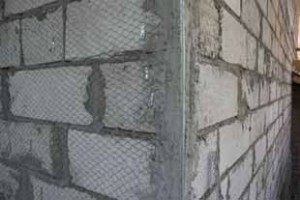
Stuffed in the wall of mesh under the plaster
If the walls are made of brick, it may be worthwhile to do grouting. This will allow further applied plaster stronger "cling to" the base of the wall. Sometimes new brickwork done in advance "in pustoshovku" (from the phrase "empty seam"), which significantly saves time during the preparation of the wall plaster.
In the case of foam blocks unravel is not worth doing. After all, the joints between them are many times smaller than that between the bricks, and, consequently, also places the toe.
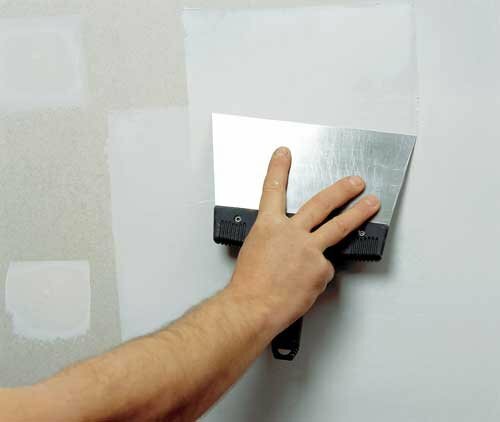
The same applies to walls built "rough" laying or w / w plates with a smooth surface. They immediately fills a special plaster grid, pre-primed surface primer deep penetration.
- Embroidered gruntuem brick walls and give them to dry completely.
In this preparatory work can be considered completed.
installation beacons
Why lighthouses?
Plastering beacons - metal rails mounted on the wall, passing through the nose which rules trapeze leveled by applying a solution in a single flat surface,.
As mentioned plaster beacons is the surest way to make a smooth and perfectly flat surface, even a layman. But for this purpose should be carried out to install them correctly.
The sequence of work
- Prepared proveshivajut wall with a plumb and determine its deviation from the vertical level. If the "sink top" and the deviation from the vertical top more than the bottom, once for itself note that during the installation of beacons need to do more solution under beacon.
- Take the beacon and cut it to size. Typically produced metal beacons 6 and a thickness of 10 mm, a length of 3 and 4 m.
Note! Beacons 6 mm - more flexible. Therefore, in terms of installation, it is best to use a 10-millimeter design. But in this case the thickness of the plaster layers and be 4 mm larger.
- On the wall at 20-30 cm from the corner plot the "dot" pre-prepared solution for plaster. Diameter formed "snout" shall be from about 5 to 15 cm.
The height depends on the thickness of the plaster facade, the thicker, the longer.
- We put our beacon and slightly recessed into the solution.
- On top of putting a rule the level and by pressing and pulling the lighthouse achieve the required vertical wall. Sagging of the lighthouse immediately clean off, and places the speakers above the required level, smooth trowel.
Tip! The longer the rule with the level, the more accurate the lighthouse will be exposed.
- After setting the solution gently remaining voids are buried under the beacon.
- The same procedure is carried out and on the other side of the wall.
The distance between the beacons is best done 1.7-1.8 m. It will be convenient to work with the two-meter rule trapezoid leveling.
- If the wall is larger than 2 m, the corners defined between beacons deliver more guides.
Tip! To put all in the same plane, it is strongly recommended to test the installation process periodically to stretch "lace" between the two extremes guides. Thus, the well will be seen, acts, or sinks are mounted at the correct position in the middle of the beacon.
plastering
Thus, we consider how to plaster facade. Plaster works are divided into 3 stages.
nabryzg
- Dilute the cement slurry to a consistency reminiscent of a rare cream. In the case of dry or pre-mixes for the exterior we are doing everything in compliance with the material manufacturer's recommendations. Instructions for use, how to plaster and dilute solution, usually attached to the packaging.
Tip! The cement plaster is recommended to add a little PVA. Clay will add strength and allow the most reliable mate layer applied to the prepared surface.
- With the help of scoop solution was applied over the entire wall.
Note! The mixture should not be poured, but to be thrown over with a reasonable effort. The more you get "rough", the better.
- We give dry.
Application of the base layer
- Dilute the solution to a consistency of thick cream and throws it to the wall between two beacons in the area 40-60 cm in height.
Note! The maximum allowable thickness of all layers of plaster must not exceed 5 cm.
- Puts narrow side-trapezoid rule to the beacons and begin to move it from side to side (so as to not foul the edge flew from beacons), thus smoothly moving up.

Plaster beacons
Cut off all the excess and get perfectly smooth plaster exterior walls. If the solution was slightly less than that is laid, we throw as far as it is formed in the hole and repeat the procedure again.
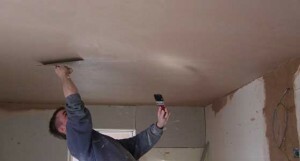
Grout
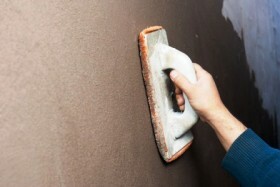
Grout plaster
In the case of cement plaster, after the mixture is deposited on the wall dries, making it grout. For this purpose we use a special foam or wooden float for grouting. When working with other materials clearly guided by technology and the manufacturer's recommendations.
The meaning of this procedure is to reduce the smallest irregularities and embedding small shells remaining after the passage of the rule.
We are doing it in a circular motion in a spiral. With a large range of the small we "stretch the" solution and create a mound. On the contrary - it flatten "out".
stucco facade technology is quite simple.
Summing up
We hope our article has been helpful to you. In order to more accurately understand the technological and practical issues on our website provides detailed photo and video instruction, in which you will find useful information on the question.
Photo Gallery