 The ability to properly embroider a cross will allow you to decorate the old things and decorate the interior of the apartment Embroidering with a cross is a fun and time-consuming process. No wonder many people are deluded, believing that it is worth learning how to correctly read the diagrams, and then everything will go by itself. But there are so many nuances in embroidering, not one way to learn to really master the needlework.
-
- Cross-stitching: correct yarn fixing
- Simple cross-stitching: fixing the yarn at the beginning
- Cross-stitching rules: how to fix the thread at the end, the right way
- How to fix the thread when embroidering with a cross)
Cross-stitched embroidery: correct threading
It is essential to embroider the thread very carefully and, of course, firmly fasten inside the stitches. This is necessary in order for the embroidery to be as accurate as possible, it should be smooth, it should not have any tubercles, and, of course, when it is washed, it does not dissolve. Yes, and in the process of embroidering, the thread can cling to the nodules, which, of course, hinders.
If you embroider with an even number of threads, you will need the first method. For example, you have to embroider a picture in two strands. For this purpose, you need to take an ordinary cut of the thread, but its length should be twice that which you usually embroider. You fold it in half.
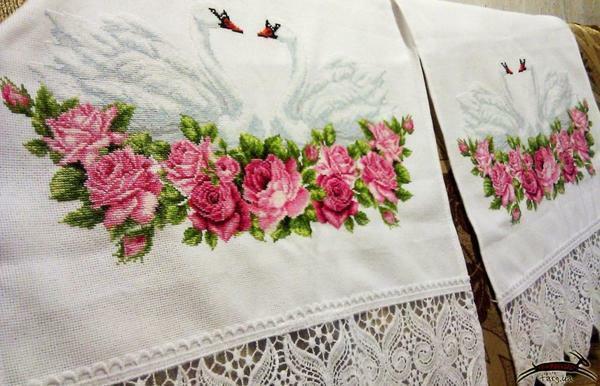
 Correctly fixed thread - the key to success when creating an embroidered painting
After this you insert a thread into the needle so that the ear has passed the cut ends, and the thread on the end was one-piece. It turns out that at the beginning of the embroidery you enter a needle from the wrong side, but do not need to pull the entire thread on the front side, hold the loop.
You have left to pull a needle next to the wrong side, and then insert it into the loop. Here you just need to tighten this loop, and continue to embroider the scheme. As you can see, nothing is difficult - so you can fix the thread in the first way.
Simple cross-stitching: fixing the yarn at the beginning
Let's say you are making an embroidery in one thread. This method is also suitable for fixing in the beginning with an odd number of threads. In that case, fixing the beginning will be harder. But still you need to fix the thread.
 When embroidering with a cross, it is necessary to fix the thread correctly at the beginning, otherwise in the middle there may be a rupture of the thread.
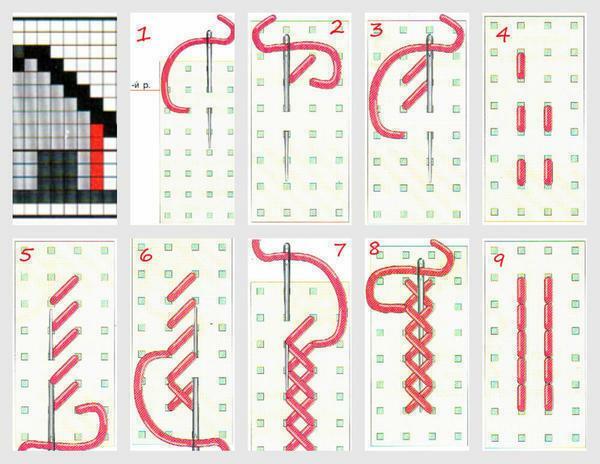
So, the method is as follows:
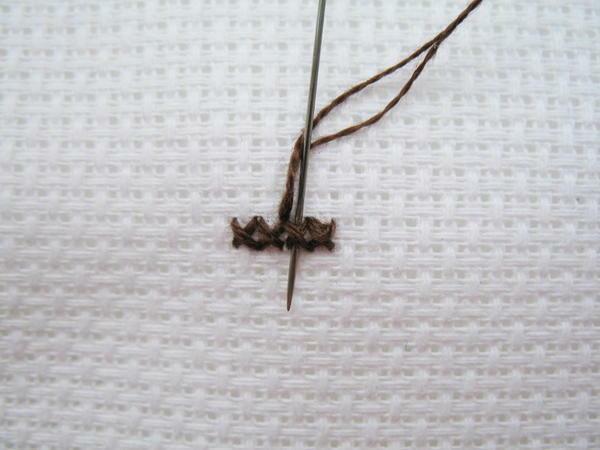
- You thread the thread, pass the thread through 3-4 squares of the canvas;
- After this, vertically, and then horizontally pierce under the central strings of each square - you can say that the thread will go barely visible snake;
- When you embroider crosses from the top, you securely close the end of the thread and thus secure it permanently.
Well, on the canvas the tip of the thread you need to stretch out under the vertical threads along one row of the canvas.
Rules for cross stitching: how to fix the thread at the end, the correct way
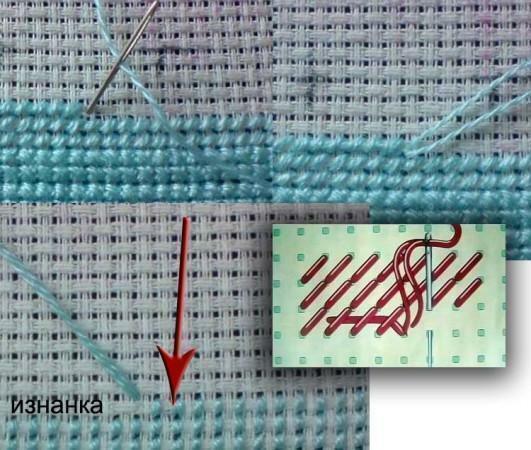
With qualitative embroidery, as you know, nodules on the wrong side should not be. The thread can be fixed in this way - from the inside, enter the canvas with a needle and thread, then tighten the thread, and on the back side leave the tip a half centimeter long. After that, holding it with your finger on the back side, proceed to the embroidery of the desired area. After that, the hoop is turned over, and the thread is threaded into the remaining thread, and this thread is carried out under the made stitches of the same color.
 After completion of the picture, it is necessary to tie the thread accurately and tightly so as not to damage the embroidery
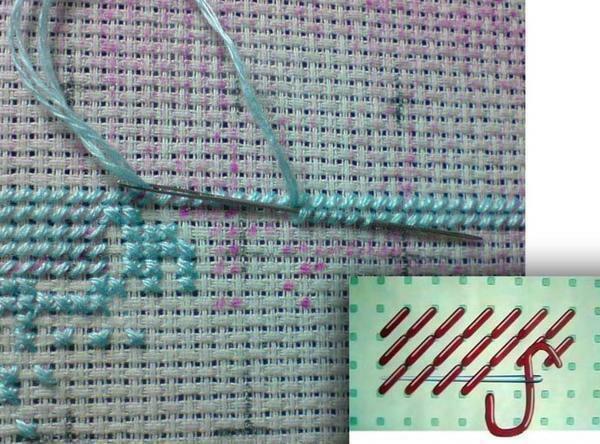
The loop method is considered to be the most economical. A thread is folded in the eye of a needle, but not with a bend, but with tips. The needle is inserted into the fabric so that the bend of the thread is on the wrong side, like a loop. After this, a stitch is made, the needle is threaded into the resulting loop on the wrong side, the thread is tightened, and you continue to embroider further.
If the embroidery is erased often, then, of course, the most practical method is the loop. When the embroidery thread ends, the tip of it is most often hidden on the wrong side, under the stitches. Look at the video examples, and you will understand in which case which option is optimal.
How to fix a thread when cross-stitching( video)
There are a lot of ways, choose the one that is more convenient for you. Try it all, and figure out which one requires less force, or just what you can do very well.
Good luck in your work!