 Before changing the faucet in the kitchen, you need to familiarize yourself with the theoretical part of the process. Faced with the problem of replacing the old mixer, the big problem is not the connection, but the choice of a new type of crane. You need to choose not only the appearance, but also pay attention to the material of the mixer and its components. From their quality of envy the durability of the operation of the device.
-
- What are the hoses for the kitchen faucets
- How to remove the faucet in the kitchen: dismantling the crane
- How to install the mixer in the kitchen step by step
- How to assemble the kitchen faucet: professional advice
- How to install the faucetIn the kitchen( video)
What are the hoses for the faucets in the kitchen
Installing the kitchen faucet, not the least role is played by flexible hoses that connect to the water pipe. They should be reliable enough so that the owner does not have to change the connection frequently to the tap.
Flexible hoses are represented by two most popular types - reinforced and bellows.
 Hoses for kitchen faucets are both long and short
The correct installation of the liner determines the integrity of the structure and the reliability in its use. Therefore, when connecting hoses, it is recommended to use rubber gaskets and sealant.
Reinforced hoses. Represents flexible water hoses from above covered with a metal mesh. On the edges of the hoses are installed standard fittings with connecting nuts. They are designed to connect to a water pipe on one side, and to a kitchen faucet on the other.
Advantages:
- No welding is required for installation, it is easy to install with a wrench;
- The hose is very flexible, it will be able to repeat all the bends and turns on the way to the water pipe;
- Resistant to sudden water pressure drops.
The shortcomings include fast wear of the fixing nuts and punching of rubber gaskets. The durability of the work is also affected by the material of which the braid is made.
Flexible hoses made of aluminum braiding are cheap and wear quickly. After 3-4 years, they will need to be replaced. The most durable - stainless steel and nylon, they withstand high temperatures and can last up to 10 years. Steel hoses do not last for a year, they are often used as temporary piping.
Bellows hoses. The outer layer of hoses is a corrugated metal tube, and inside have rubber or rubber inserts.
Advantages:
- Possessing flexibility and resistance to mechanical damage;
- Hoses withstand very high temperatures;
- Simple to install;
- Long service life;
- The connecting fittings are welded to the corrugated pipe, which makes the sections more reliable.
From the shortcomings can be identified a low level of noise insulation - you can hear how the pipe runs water. This problem can be solved by purchasing a bellows hose whose diameter is larger than a water pipe.
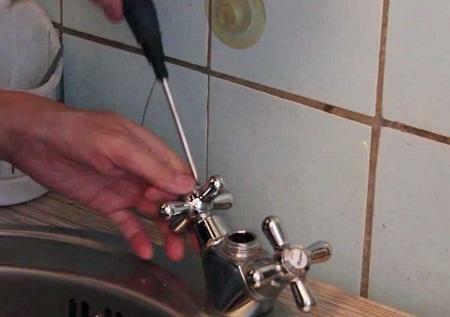
How to remove a faucet in the kitchen: dismantling the crane
Inexpensive mixer models are equipped with poor-quality flexible hoses. When replacing the old mixer, you need to pay attention to the condition of the old hoses. Specialists recommend replacing flexible water pipes at the same time as the tap.
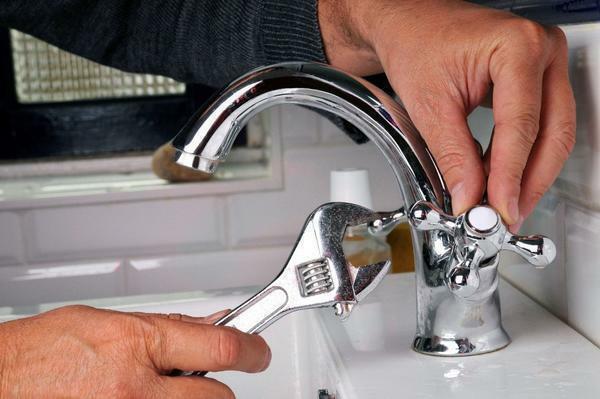 To remove the mixer in the kitchen, you need to use a spanner
To dismantle the crane you need:
- Flat screwdriver;
- Adjustable wrench;
- Phillips screwdriver;
- Sealant;
- Emery.
It is also advisable to have a small bowl at hand to drain the water from the tap after dismantling.
Before dismantling the old valve, it is necessary to close the water on the riser.
The sink will need to be removed to properly dismantle the old faucet - since it's not quite convenient to work under the countertop.
Dismantling process:
- Open the tap and drain the water. Find the location of the joints of water pipes with a faucet and the place of attachment of the mixer to the sink.
- Unscrew flexible hoses using a wrench. Drain the water in a bowl.
- Unscrew the bottom of the siphon from the sink and completely remove the sink from the curbstone.
- Using a wrench and a screwdriver, detach the flexible hoses from the mixer and remove them from under the sink.
- Remove the fasteners with which the faucet is attached to the sink, you can remove the mixer itself.
If flexible hoses are to be used for installation on a new valve, it is advisable to check them for contamination and inspect the rubber gaskets. They must be whole and in place.
How to install the mixer in the kitchen step by step
After the old faucet from the washbasin is dismantled, you can proceed with the installation of a new one. First of all, you need to connect the flexible hoses to the mixer with fasteners. You can use both old hoses, removed from the previous tap, and new ones.
At installation it is desirable not to mix up flexible hoses with cold and hot water supply.
 When installing the mixer on the thread, it is recommended to rewire the sanitary liner
The mixer is replaced with a washer that is turned upside down. Water also can not be opened until the end of all work.
How to connect a new water tap yourself:
- Install the rubber gasket in a special groove in the base of the mixer.
- The new mixer with the hoses fastened to it should be put in the hole on the sink, holding the faucet from below with your hand. Flexible hoses should look out from above.
- Place the rubber gasket and secure it with a pressure plate. Screw the valve with bolts through the holes provided.
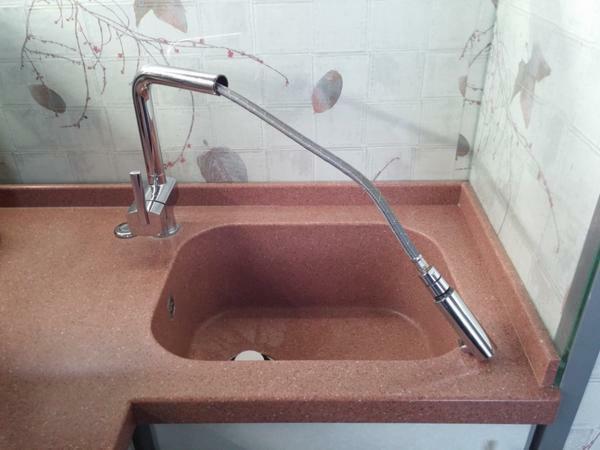
After installing the kitchen faucet in the sink, you can install it in its place and connect to the water supply. To test the mixer, it is recommended to turn on the water with a small head, gradually increasing it. The fixing points must remain dry - in this case the connection is made correctly.
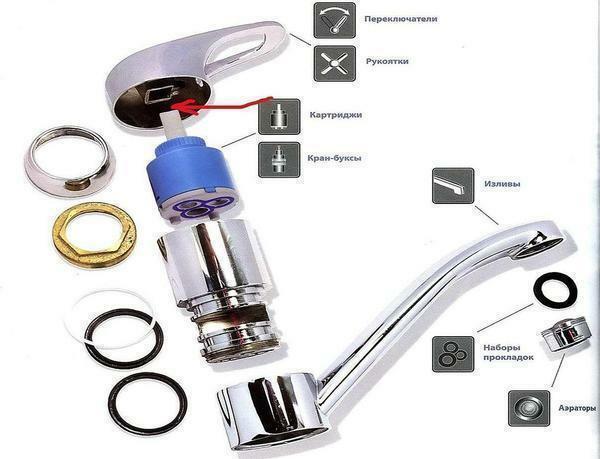
How to assemble a kitchen faucet: professional advice
Before installing a new faucet on a kitchen sink, you need to assemble it. The single-lever valve is usually sold assembled. When buying a mixer with two valves, you need to screw the "gander" into the body.
Do not tighten the fastening nut so that it does not crack( in case the crane is made of a thin material, for example, silumin).
 Before assembling the mixer in the kitchen, it is worth watching the training video with the master class
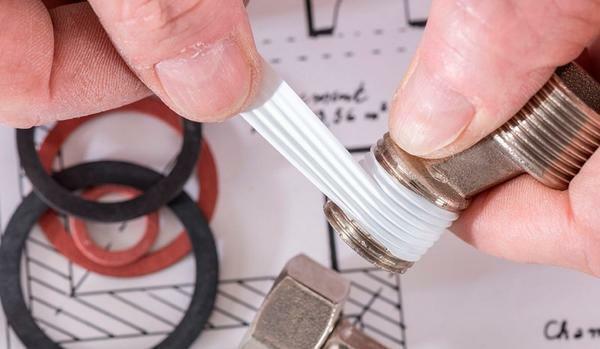
The assembled mixer must be connected to the water pipes with flexible hoses. The connection points must be sealed.
In plumbing applications:
- Linen thread( tow) with special grease;
- FSM tape;
- Sealing thread;
- Anaerobic sealants.
When fixing the nut to the thread, sealed with threads or tape, it must be carefully clamped so that the rubber seal does not move.
How to install the faucet in the kitchen( video)
To change the old valve to a new one, the plumber is not needed. With the editing it is quite possible to manage independently, adhering to certain rules. The quality of the work depends on how long the mixer will last.


