 spackling - is a simple and effective method of leveling the ceiling surface Caulking - is an important procedure for all who wish to see its walls and ceiling are perfectly flat and smooth. The putty on the ceiling is a rather laborious job, but the end justifies the means: an ideal ceiling aligned with your own hands is not only a matter of pride, but also a serious saving of the family budget.
-
- Plastered walls and ceilings made of plasterboard
- Can not putty ceiling: when and why
- plaster ceiling for painting( video)
- Plastered painted ceiling: the nuances and rules
- How putty ceilingconcrete
- how dry plaster on the ceiling
- Stages spackling drywall ceiling( video)
plastered walls and ceilings made of plasterboard
Sometimes people do not realize how important aboutESA putty during repair. However, if you decided to make a qualitative repair, as a result of which the walls and ceilings surfaces will become perfectly even, the putty should become a serious stage of repair work.
Remember that it is possible to fill in the surface with irregularities of not more than 4 mm. To eliminate more serious problems, use plaster or fix the sheets of plasterboard on the walls and ceiling. Puttying will bring your work to perfection.
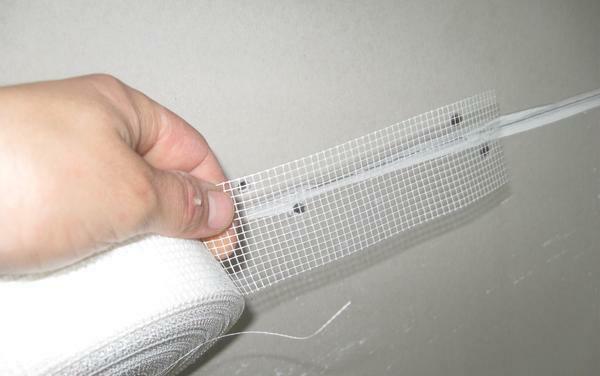 To avoid further cracks in the plaster wall, use reinforced plastic mesh under the plaster
So, if you decided to transform the space with the help of drywall, then shpatlevanija technology will be the following:
- BeforeDirectly to the puttying, you should handle the joints of the sheets. Paste the seams with a mesh( serpyanka).
- Continue working with seams. Puncture the joints especially carefully to even out the small gaps.
- Now you can start working on the wall. Since we apply the solution to the prepared surface, the starting filler can not be used. Take the finish and distribute it over the area of walls and ceiling with a spatula.
- When the puttying layer dries, sand the surfaces with a grinding paper or net if necessary.
Working with plasterboard will not cause much trouble!Be careful and careful, and your walls and ceiling will be ready for any kind of decoration!
Is it possible to coat the ceiling: when and why?
Of course, most of us want to save our energy and money, so we tend to wonder how important it is to prepare the ceiling for the finish coat. Most professionals tend to need to putty the ceiling before the wallpapering, foam blocks, painting or anything else will happen.
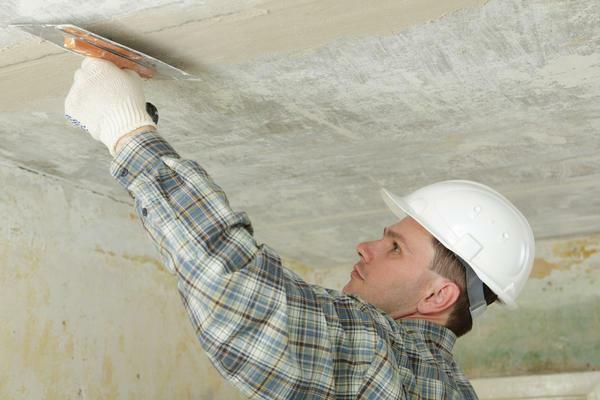
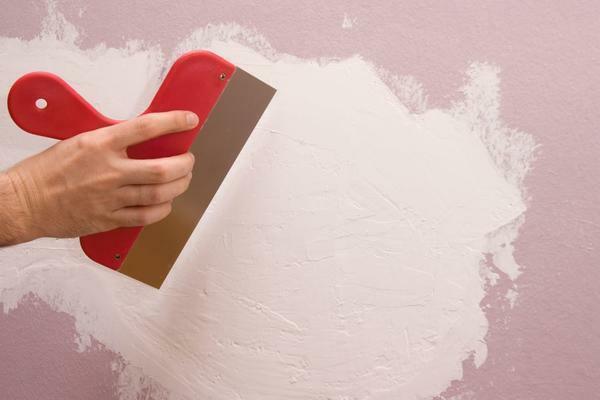 Align the ceiling surface requires DIY skills know the basics of using important tools for building the dresser - spatula
The following arguments for having to apply putty:
- Putty zamazhet all cracks, chips and other irregularitieson a surface.
- This composition makes the wall more durable.
- The puttying facilitates the application of the finish coat, as well as the painting and even the application of wallpaper. Clutching with different materials is facilitated.
- Putty is an excellent preparation of walls for wallpapering. The adhesive glue is less absorbed in such a wall, since the latter has water-repellent properties.
- Color. The surface of the walls and ceilings will be perfectly even after the puttying process.
It is possible to skip the step of filling the ceiling in case you want to glue it with foam plates. However, then it will be necessary to treat the joints with a sealant.
plaster ceiling for painting( video)
Plastered painted ceiling: the nuances and rules
If you are faced with a wall painted, then do not rush to get rid of old paint. In some cases, the application of the putty is possible even on top of the old layer.
How to correctly do with a painted wall? To find out, follow these guidelines:
- Shrink the ceiling with a damp sponge or cloth.
- If the paint began to wash off and foam, then you are dealing with water-based paint. It should be removed with a spatula, after leaving the surface moist for a few minutes.
- If the paint is not washed off with water, then check for strength. Scratch with a spatula a line on the paint and try to peel it off with the flat side of the instrument. If the paint is scraped or crumbled, then it must be removed: the ground will not hold well on such a surface.
- There are several ways to remove old paint: you can tear it with a spatula, if it goes well, you can use a special chemical solution or a building hair dryer.
- If the paint is firmly seated on the wall, and nothing foreshadows shedding and splitting, then you can primer the surface directly on top of the paint. Only on top of the soil in this case it is possible to make the filler.
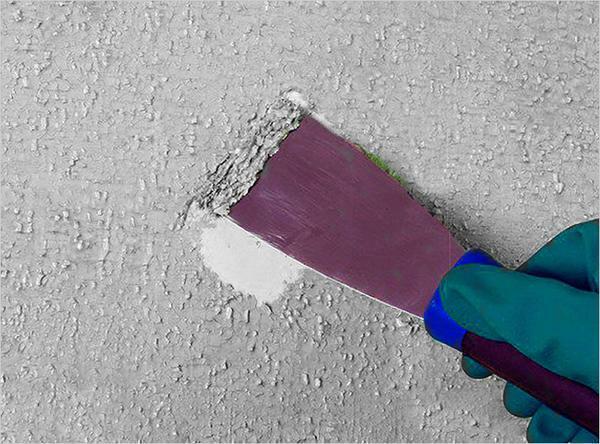 To apply the filler to the previously painted ceiling, remove the old paint from the surface using a scraper or paint trowel
Primer is an obligatory step in the coating of the painted wall. It provides the correct adhesion to the putty. With a smooth surface of the painted ceiling putty will grasp badly.
How to putty the ceiling of concrete
There are various ways to putty the ceiling. The main types of technology can be divided into ordinary putty and putty with a decorative pattern. If you are new to the extraction of ceilings, it would be more useful to dwell on the usual, but high-quality technology putty concrete ceiling.
Before starting the repair work, pay attention to the depths of unevenness on the concrete. If there are too large gaps between the slabs or very deep cracks in the concrete, then additional plastering of the surface is required.
If your concrete ceiling is ready for puttying, then arm yourself with tools and follow the instructions:
- The first step is preparing for the putty. You should prime the ceiling, minimizing the number of large irregularities, as well as providing the best adhesion of putty to the ceiling. One coat of primer will be enough. It is more convenient to apply a primer with a roller.
- On the dried up soil we put a putty. You will need at least 2 spatulas, a tool and a container to create a mixture, as well as a bucket for washing the tool( an electric drill with a mixer nozzle is suitable).
- So, after mixing the starter solution, gently shpaklyuem the surface of the ceiling. If the result seems satisfactory to you, if the irregularities are gone, then you can do 1 layer. If the initial problems in the form of deep unevenness of the ceiling surface are noticeable, then 2 layer should be applied after the first one dries completely.
- After the start completely aligns the ceiling, you can take the finish. Finishing putty is applied in the same way as the previous layer: by soft sliding movements distribute the mixture over the ceiling.
- After the finishing coat has dried, the ceiling must be ground. You can finish the finish with a construction net. Do not stop the action until the ceiling is perfectly flat.
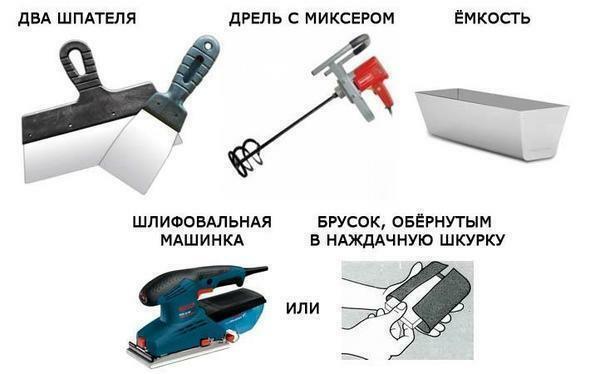 Tools required for laying the ceiling
It is recommended to start work from a corner. Do not forget about the security measures: the ladder must be stable and strong. If possible, do work in union with an assistant.
How long the putty on the ceiling dries
The question of how much the plaster dries is becoming very important during repair work. The fact is that the application of each new layer should take place only after the previous one has dried completely. However, it is not easy to determine by eye whether the drying has fully taken place.
First of all, the drying time of the layers depends on the putty material:
- Cement. This material withstands any moisture level, why it is used for any rooms, including bathrooms and kitchens. Also, cement is good in external repair. The average drying time is about 2 hours.
- Gypsum is designed for dry rooms, but not suitable for kitchen and bathroom. He looks gentle and neat. The middle layer of gypsum will dry for 2-3 hours.
- Polymeric putty. This kind is often used for finish under painting. With a polymer material will have to wait more: it takes a day to be sure of the completeness of the case.
Nevertheless, if you are not yet a professional, then you should wait for a long time. Your layer can be thicker than the one that was counted for counting.4-6 hours for cement and gypsum will become a reliable drying time.
Steps plastering the plasterboard ceiling( video)
Decorating the room is a task that requires considerable calculations. It is necessary to correctly allocate the time and expense of materials. However, when carrying out home repairs it is not necessary to comply with GOST.Lessons found in the network, will teach you to quickly and efficiently primed, shpatlevat and polish ceilings. Dare, and you will succeed.