 Russian oven is a useful and practical building for house heating and cooking Brick Russian stoves are still very popular among owners of country houses, cottages, cottages. Unlike most heating appliances, the brick structure is capable of maintaining a comfortable humidity and an air temperature in the room in an autonomous mode. In addition, a classic Russian brick oven can be used for cooking various dishes. How to lay down a stove without professional help - read in the article.
- Traditional Russian furnaces with a stove and a stove: photo
- Standard Russian oven: dimensions
- Russian furnace stove: technology and construction advice
- How to foldStove with your own hands: step by step instruction
- Modern Russian oven with your own hands: recommendations
- Russian stove with a tamper: how to execute the masonry
- Mini-Russian oven with your hands: photo
- How to fold the oven yourself:Step-by-step instruction( video)
- Design of Russian stove( photo in interior)
Furnace yourself: diagrams and drawings
The construction of any furnace begins with the drawing up of a detailed layout and appearance of the structure. Drawing orders( ordering - this is an accurate description of the placement of bricks in each row of masonry) can be found on the net. But before that you should determine the type and size of the structure, its location in the house.
The oven must be positioned so that its outer surface is capable of heating as many rooms as possible( for example, near one wall or in the partition wall of several adjacent rooms).In addition, do not forget about the ceiling: the oven should be placed so that its pipe does not account for the beam. Dimensions and type of construction largely depend on the area of the house. Almost any project of the furnace can be processed for own needs. In this case, the structure of the furnace will be the same.
For example, a Russian oven of any kind consists of:
- Grounds( as a separate foundation);
- Ashtray, which will provide airflow to the combustion chamber, and accumulate ash;
- Fuel tank with a door for loading firewood;
- Chimney, which is responsible for the removal of combustion products( one of the main roles here plays a metal flap that will cover the hole between the chimney and the crucible);
- Smoke - channels that connect the firebox to the chimney.
The design can be done on plain paper, you can create various projects with the help of programs for 3d visualization or make a model of the oven from cardboard( for this you can use a conventional box, forming inside the channels of paper).
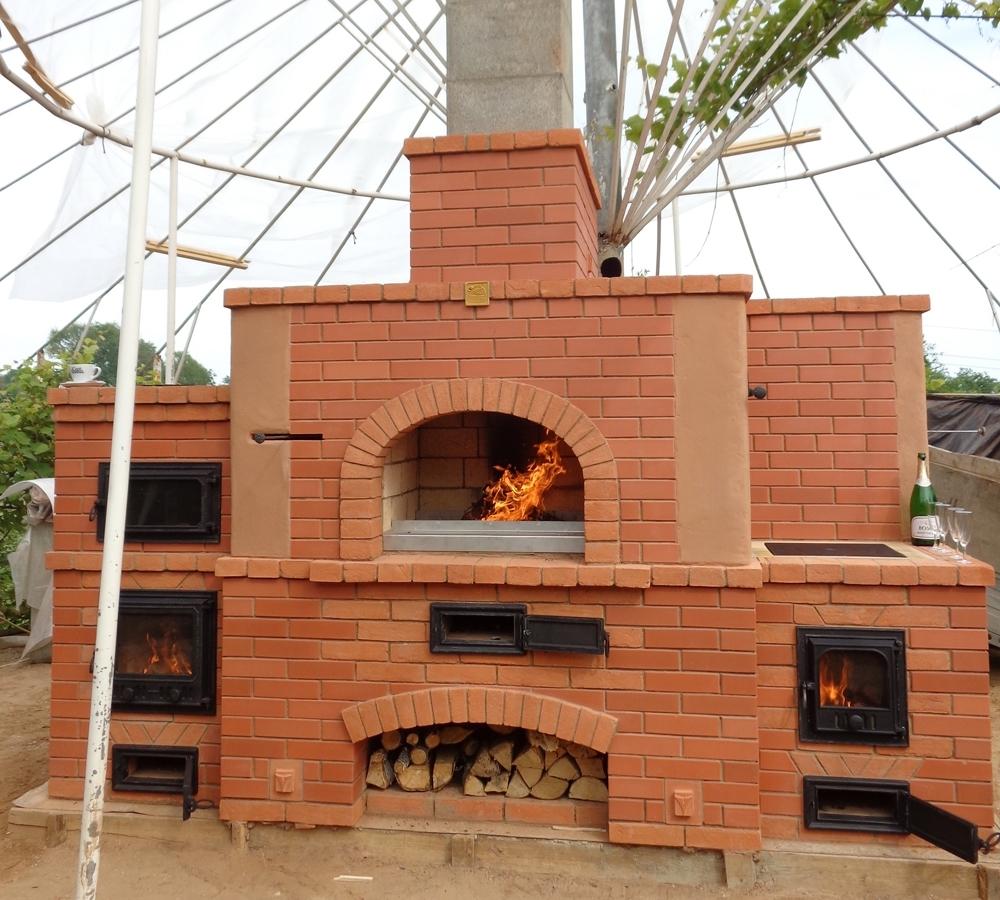
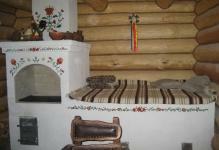
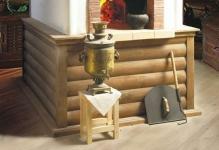
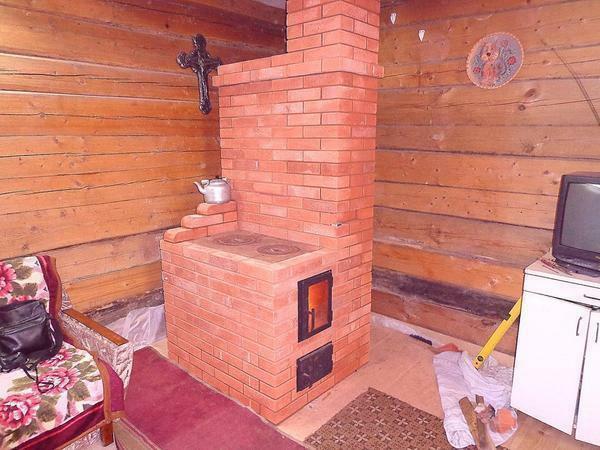
Traditional Russian stoves with a stove and a stove: photo
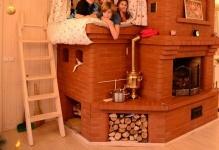
Russian stove with a stove is a traditional design that was used not only for heating the room and preparing various dishes, but also for sleep: in the case of installing wooden shelves, the oven can easily fit twoAdults.
The classic oven with a couch is quite large, and occupies a height of 200 cm, 150 cm - in width and 250 - in length.
 Russian ovens with a couch allow you to relax on a warm surface after a hard day at work.
. In order to lay down such an oven, you need at least two thousand bricks and a hundred buckets of mortar. And this is without taking into account the material on the pipe. Before the construction of the furnace, care must be taken to lay a proper foundation with a layer of heat and waterproofing.
Find the order of the oven with a couch easily can be on the net, or you can apply for a scheme to professional stoves.
In this case, it is necessary to pay attention to the dimensions of the furnace. Modern designs often differ from classical ones in smaller dimensions and, correspondingly, in power.
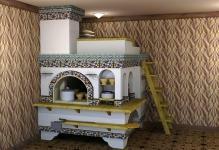
Standard Russian oven: dimensions
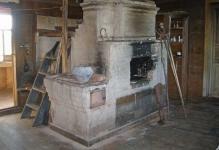
The dimensions of a Russian kiln depend on its type. So, the most bulky are the stoves with a fireplace and a lower heating, the oven is rough( coarse).Such designs have undeniable advantages: they are multifunctional, look attractive and are able to heat a large room. In addition, such furnaces can be easily located on the street. But, unfortunately, they can not always be put in the house.
The classic Russian stove has a width of 150 cm and a length of 200 cm. At the same time, the stove in the traditional oven should be located at a height of 180 cm and the center - 45 cm.
The small Russian stove occupies 153 cm wide and 165.5 cmin length. A small housekeeper has a width of 100 cm and a length of 130. A popular "Swede" Buslaeva and even less - 116h90 cm At the same time, the location of cooking plates and the crucible determines the growth of the hostess.
The choice of the furnace depends not only on the dimensions of the room, but also on the heat transfer parameters of a particular design.
 The dimensions for the oven should be chosen based on the area of the house
That is, the furnace must be of such power that it is capable of providing the house with heat throughout the night, until the next furnace. In order to make calculations, you can use the generally accepted data, for which for heating a room of up to 10 sq. M.Should choose oven with dimensions 150h150h200 cm.
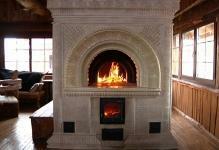
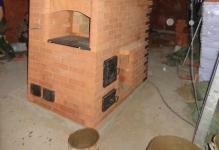
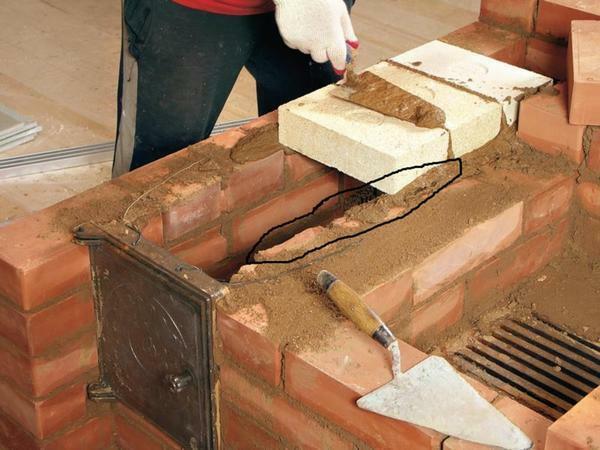
Masonry of the Russian oven: technology and construction advice
In order to lay down a simple Russian stove you need from 1.5 to 2 thousand bricks. Bricks are stacked in rows. The standard furnace includes 25-31 rows( excluding the chimney).
Any oven is placed on a foundation, which can be represented as a reinforced concrete slab or brick( depending on the weight of the future furnace).
It is better to put the first row of the oven with waterproof, recycled bricks. The walls of the furnace are one brick thick, and the front part of the hob is half the size. In the opening of the forecourt, usually, have a timbering made of wood. When laying the vaults of the forehead and the crucible, it is best to use wedge-shaped bricks. They can be easily made by hand, as the manufacturing involves the processing of ordinary bricks.
How to fold the stove with your own hands: step by step instruction
The construction of brick stoves requires attentiveness and great patience. The time that will have to be spent on masonry depends on the dimensions of the structure and the qualification of the worker. In order to do the work as quickly as possible, it is necessary to thoroughly understand the features of stove construction, to determine the principle of work.
 Before proceeding with the construction of the stove, it is worthwhile to study the recommendations of
specialists. So, irrespective of the size and type, the erection of the heating plant includes:
- Preparatory stage. At this stage, the furnace dimensions are calculated, its location in the house is determined, and drawings are prepared.
- Base plate - foundation under the furnace.
- Formation of ash chamber and purging channels.
- Mounting the panel plate and forming a cooking niche with two channels.
- Forming of the steam duct.
- Organization of drying chamber, chimney.
- Masonry of the chimney.
The same applies to a street oven. After the work is completed, the structure should be dried. Drying can be natural and forced. In the first case, drying takes 6-9 months, in the second - 3 weeks.
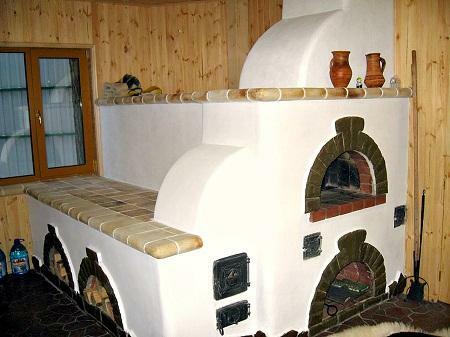
The modern Russian oven with its own hands: recommendations
In order for the furnace to become reliable, attractive and long serving the owners, it is important not only to observe the instructions for laying the rows, and to know some tricks that are used in the work of experienced stoves
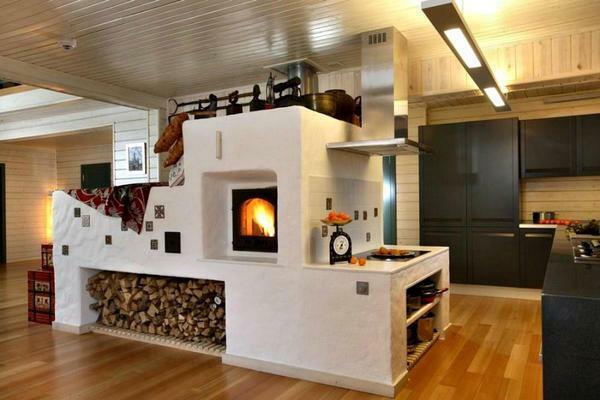 Thanks to the finishing materials, the stove can be made modern and attractive .
So that the masonry is solid and reliable, and the furnace is efficient and safe it is necessary:
- Choose a quality brick without chips and cracks, which, before laying, you need to soak.
- In the places where the cast elements are installed, it is necessary to leave a technological gap between the brick and the plates for expanding the metal.
- Every 5-8 rows do a fire cut in half a brick. If there is not enough room for bricks, then materials with low thermal conductivity( vermiculite, supersil, calcium silicate) should be chosen for cutting.
- The joints in the masonry should be made no thicker than 7 mm.
- For the organization of firebox it is better to use refractory chamotte( yellow) brick, which can withstand temperatures up to 1600 ° C.
Before you begin to put the oven itself, professionals are advised to study the relevant literature, if you can, then watch the work of the stove-fitter. To prepare for the work should be approached responsibly and thoroughly, because incorrectly folded stove can cause fire situations, endangering the lives and health of all occupants of the house.
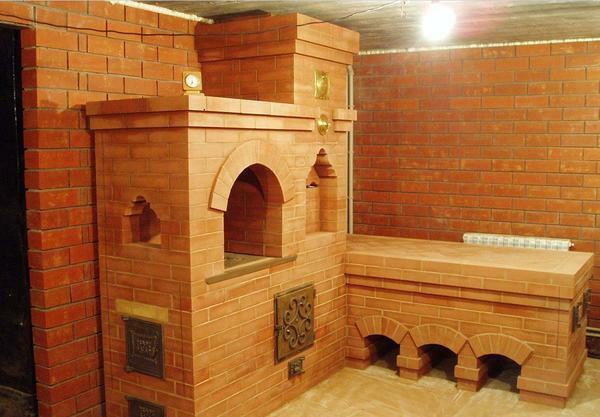
Russian oven podtopkom: how to perform masonry
Russian oven podtopkom - a modern, robust design, focused on fulfilling several functions. The device of the furnace with a heating device allows to prepare food both on a cast-iron plate and in the furnace, to heat a room with an area of up to 60 sq. M.It looks traditionally, which makes it the most suitable for interiors in a rustic style.
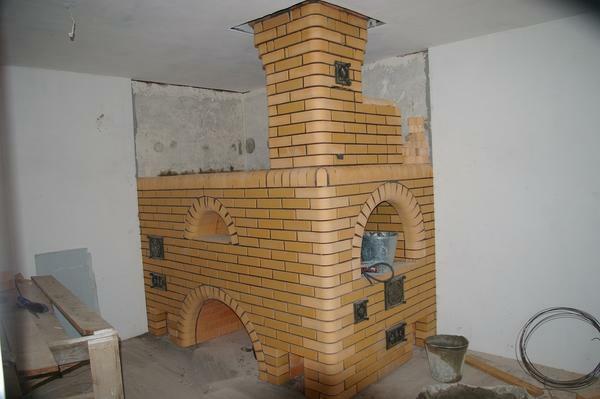 For the construction of the stove should be used firebrick
To assemble Russian oven podtopkom necessary:
- Put in the front row of the base pipe, small and large podpechki.
- Form similarly the second and third row with a place under the ash pan in the latter.
- Lay the fourth row of rows from the ledge( as in the usual construction).
- In the fifth row should be cut off the ash pan, and in the sixth - to set the grate, lay the flue( if the stove is on the wood, and gas).
- To form in the seventh row a place under the furnace.
- Eighth and ninth row spread with a cramped brick.
- Chimney to close in the tenth row.
- Lay out the pipe.
Finishing the finished oven can include painting. You can paint a trough or a roof of the furnace so that the stove turns out to be fabulous. It is better to use traditional colors and motifs.
Mini-Russian oven with their own hands: photo
Today, the dimensions of private houses, cottages and cottages do not always allow practical placement in the kitchen of a standard Russian stove. If there is not enough space for a sufficiently large design, then instead of a traditional oven, you can put "Swede".Such a stove will occupy no more than one square meter, and at the same time it will be able to cope with heating of a room with dimensions of 30 square meters. There are several modifications of the "Swede".
The most common options - a mini-oven with built-in oven cooking stove of cast iron and high-grade trehoborotka oven with chimney, hob, oven and niche-drying.
To build a "Swede" is quite difficult. In order for the building to cope effectively with its cooking and heating functions, only high-quality materials should be selected for work. Performing the clutch will help step-by-step instructions and recommendations of experienced stove workers.
 Mini-Russian oven allows you to prepare delicious and healthy dishes for the whole family.
So, before you start laying, you need to lay a square foundation for a 1.21-square-kilometer oven. M.
The first two rows of masonry are made solid. In this case, in the second row we set the grate under the fireplace. In the third row of the furnace we build an ash chamber, a vertical channel and a place for the oven, lay out a fireplace firebox. The next row is placed as the 3rd, and in the 5th we place a place for mounting the grid grate. Passage between the oven and the vertical channel is blocked in the 6th row.
In this case, it should be borne in mind that between the oven and the furnace, the bricks are always placed on the edge.
In the 7th row above the furnace we put metal strips( 2 pieces), and the 8th and 9th rows are done similarly to the previous one. Chimney for cleaning the fireplace is equipped with a place for installing the hob in the 10th row. We form the crucible in the 11th row. The front wall of the fireplace in the 12th and 13th rows is laid out obliquely bricks. In order to make a shelf in the 14th row, we put out the bricks by 2.5 cm. We finish the laying of the cooking niche in the 16th row, the next two rows are made the same.
We arrange chimneys in the 19th row: between the fireplace channel and the vertical one we lay the bricks from two sides cut obliquely.
The following series are laid out equally, and in the 26th row we connect the vertical channel with the chimney. In the 30th row, we push the bricks from all sides 30 mm outwards, and the pipe masonry starts from the 32nd row.
How to fold the oven with your own hands: step by step instruction( video)
The Russian oven in a country house is a stylish and efficient design that allows you to simultaneously heat a large enough room and prepare food in several modes. You can lay out a brick oven for free - with your own hands. To do this, it is necessary to approach responsibly to work: to calculate the dimensions of the furnace, draw a drawing and make up the order of the structure. Carrying out the clutch, the recommendations of experienced stove workers should be taken into account. And then you will have to make a reliable and durable new design, and shift the old furnace!
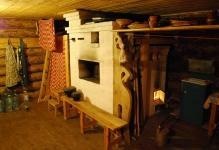
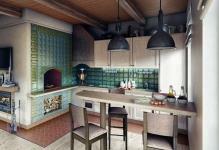
Design Russian furnace( photo interior)