 To create a topiary of cones, it takes quite a bit of time and effort. Topiary of cones is both a simple and concise idea for creating decorations for the new year with your own hands. And if you also believe those needlewomen who are engaged in the manufacture of topiary for several years - such a "symbol" brings happiness and luck to all family members. And for its manufacture it will take only a few big cones, a pot, rubble, sand, wire, a gun for hot glue, as well as any other jewelry, beads, Swarovski stones. Naturally, the creation of topiary from cones can be dealt with, including with children.
-
- Topiary of cones with your own hands: what you need for this
- Topiary of cones: how to make a tree of happiness
- Topiary of cones: master class on decor
- Autumn topiary of cones and leaves
- How to make a winter topiary from cones( video)
- Examples of topiary cones( photo)
Topiary of cones with your own hands: for this you need
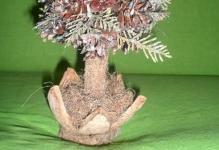
The topiary of cones is made in a similar way asAnd withThe "tree of happiness".That is, to start everything follows with the foundation, which is the flower pot( which can also be made from improvised materials, for example - an old musical plate) and a wire frame.
It is advisable to make it from a wire - it eventually does not rot, does not shrink, and perfectly retains the given shape. What form should I ask?And this depends only on the master's imagination. You can - usual for a tree, you can - for a fictitious. There is nothing wrong with being guided by the photos of other topiarias.
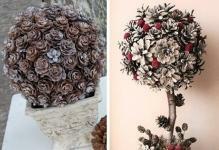
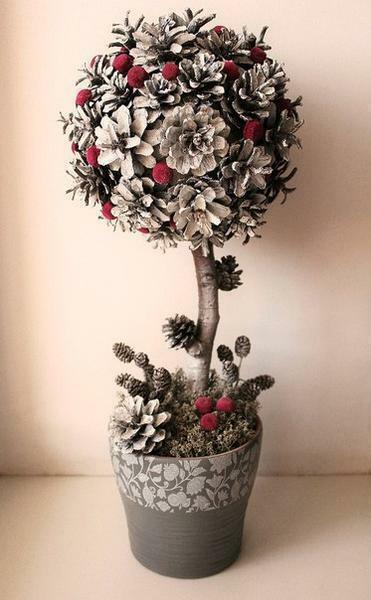
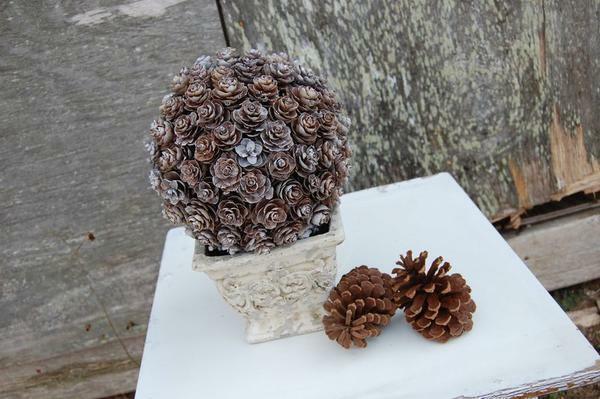
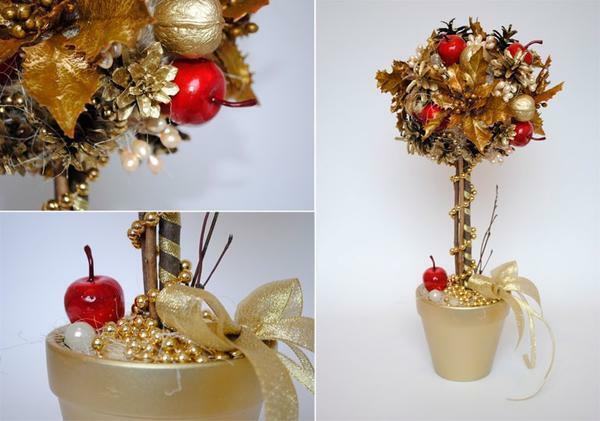 The topiary of cones perfectly fits into any interior on the eve of New Year's holidays
Wire to the pot is better fixed hard, for example, by puncturing and tightening from the back. You can simply fill the entire bottom with glue or sanitary sealant, only the wire is screwed into several rings, so that the base is as tight as possible. Next, you need to prepare yourself cones to decorate the "tree."Spruce fir is best, although pine trees will not be worse. The main thing is their size. The bigger, the better. Previously, all the cones should be dried and "roll out", so that later they do not pour seeds from them.
To prevent the cones from drying out, it is necessary:
- Several times to pass them by boiling water before drying.
- Keep them warm for 15-20 days.
- Process with copper sulfate( simply sprinkle with an atomizer so that the solution gets into all the cracks).
After "harvesting" the cones and the pot - you can take directly to the creation of topiary.
Topiary of cones: how to make the tree of happiness step by step
So, after preparing the basics, you can directly glue the topiary. The first thing to do is make a shape for the crown, and already to it - to fasten all the crafts. For this purpose, the same wire is suitable, on top of which any fabric will be wound. The more it turns out, the better. It is desirable to make it firm, not soft, like a toy. The base should be strong and withstand a rather large weight load.
 You can create a large hand-made articles of cones, the main thing is that the base is strong enough.
To prevent the fabric from unwinding, it is better to sew, although you can do with the most common staples or even glue. And it is not necessary to make absolutely equal shape of the crown. It is possible and a triangle, a pyramid or in general without any explicit form. The main thing is that the end result should be liked by the master.
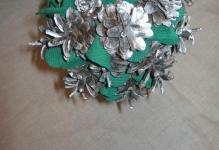
After the crown you can take on the decoration of the topiary. Cones should be fastened to hot glue - so it will be strong and durable. From above they can be decorated with sawdust, sparkles or herbarium - as you like.
To make this look attractive in the future, you need:
- Treat all with hairspray( maximum fixation).
- Tops of cones - treat with transparent nail polish.
- Carefully wipe out all the seeds( some of the scales will fall off - this is normal).
Topiary of cones: master - class according to decor
It's natural that you can not manage only with cones. They also need to be embellished, but that's what everyone uses to decide for that. You can fasten all the decorations again to glue, to paper clips or to sew it trivially. If the tree is made on the eve of the new year, then for decorating will require every New Year's decor.
And yet, what can be used as an ornament?
 Creating a topiary, combine and experiment, give vent to your fantasy
For these purposes, the
- hat of their acorns.
- Rowberry berries.
- "bouquets" made of chestnuts.
- Needles made of pine or spruce.
- Beads.
- Foil.
- Herbarium.
- Tissue flaps( more commonly known as patchwork).
Naturally, this is the shortest list of what can be used for decor. Someone at all uses autumn moss, leaves of trees. The master class itself will have to be demonstrated with a combination of all these things in one "tree of happiness."But most importantly, there are no rules in this regard. It is allowed to combine even seemingly incompatible compositions. And it's not necessary that they like someone."Tree of Happiness" is done for yourself!
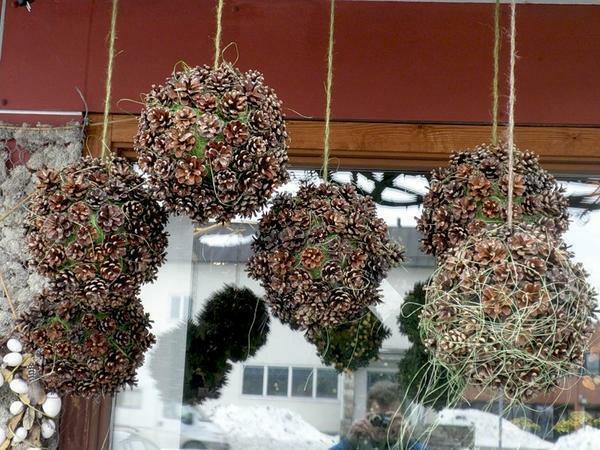
Autumn Topiary of cones and leaves
The most unusual decor for topiary is the decoration of the leaves. But what for this purpose and how to use them correctly?After all, by themselves, the dried leaves are very brittle, scattered from the slightest physical impact. To fix this will help ordinary nail polish( colorless) or turning lacquer, which is used for the final processing of furniture. That is, the composition of the leaves is done in several stages.
Apply the varnish with a brush. The thinner the layer, the better. And you can cheat and do without painting at all, but this will require a very ordinary scotch( preferably wide).
 Leaves and cones perfectly combined in one topiary
The sheet is glued to the adhesive tape, after which it is also glued on the reverse side. In this case, the entire leaf should be in Scotch tape, without protruding parts. Extra pieces of adhesive tape can be cut.
Attach this decor to the topiary:
- For hot glue( you need to be careful - the base is to melt).
- On staples( if the fabric is woven - it will be just right).
- Pressing the cones( connecting its protruding scales).
How to make a winter topiary from cones( video)
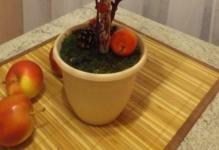
There are no rules how such a topiary is developed step by step. The main thing is a reliable foundation and a preliminary sketch. And since the topiary of cones is made on the eve of the New Year, it should also be decorated with artificial snow. Or other "New Year" toys, be it serpentine, "rain" or even a real garland. By the way, if you use the latter, then only LED - for fire safety.
topiary Examples of cones( photo)