What is the most important thing when wallpapering? The quality of the materials? Correctly prepared glue? Flat walls?
All this in combination affects the final result and requires careful consideration, it is about the intricacies of wall preparation that we will talk today.
When Preliminary Work Is Necessary
Strength test
So, in order for the work to be successful, it is necessary that:
surface for sticking must be dry. This is necessary so that in the process the wall can absorb the moisture contained in the adhesive. If it is wet, it simply cannot absorb glue. You can learn about the need to dry the surface from a simple experience - use adhesive tape to glue a piece of cellophane to it overnight. In the morning, check it, if drops of water appear under the cellophane, the room needs to be dried and carefully ventilated.
Also, the surface must be durable. This point is important because canvases have internal stress. First, their size increases with moisture, and then they shrink when dried. If the surface crumbles or peels off, the finish will begin to flake off.
You can check the strength with a sharp object, for example, a screwdriver. Of course, this seems primitive, but in fact, this method is one of the most effective. Swipe the object over the surface, if there is no trace, no preparation is required.
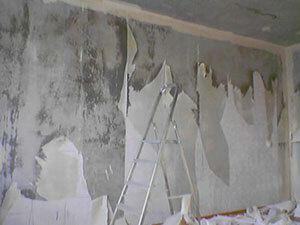
Removing the old coating
A few words about primer
Preparing the walls for wallpapering includes applying a primer.
Your attention! In order to find out whether stains will show through the finish, you need to examine the sheet in the light. In the event that they are heavy and dense enough, then it is unlikely that anything will be visible through them, but if they are transparent and have streaks, then a stain will certainly appear through them. For such canvases, the surface will need to be primed.
Dealing with limescale
No less important is the absence of lime streaks. Such a problem is faced by those who have just settled in a new building. The danger here is that such surfaces are not able to absorb moisture.
Glue a piece of litmus paper to the surface, if you see a change in color, canvases that contain silver or gold will not work for your walls. To determine the ability to absorb moisture, you can wet the surface. The presence of drops is a sure sign that it requires re-polishing.
Fungus: elimination methods
You can determine the presence of a fungus with a careful examination, pay special attention to the corners and places near the window.

Nabel removal
In the presence of dark greenish or black spots, the preparation of walls for wallpapering must necessarily include the application of antifungal compounds.
Do not forget that after their use the surface must be dried. Areas that are moldy and have dark spots should be carefully sanded.
Before sticking vinyl sheets be sure to remove the old coating.
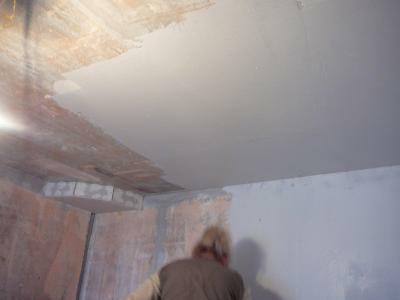
Preliminary work on the ceiling
How is the ceiling prepared for wallpapering?
Basic moments:
- Previously whitewashed ceiling requires thorough washing.
- For a painted ceiling, washing and cleaning with sandpaper is necessary.
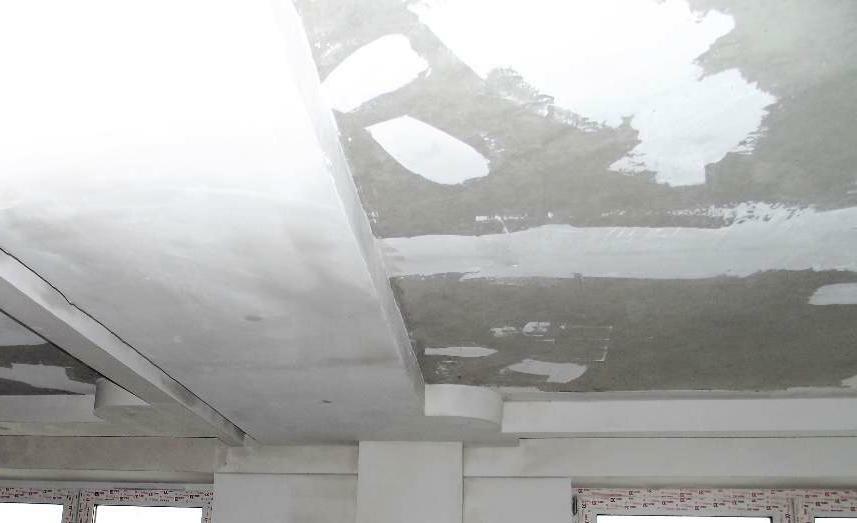
Ceiling preparation
Advice! In the event that the ceiling consists of a concrete slab on which work has not yet been carried out, leveling and plastering will be required. But remember that canvases cannot be glued onto wet plaster.
- The ceiling, which is finished with drywall, does not need additional preparatory work.
Advice! Experts recommend pre-priming the ceiling and waiting for it to dry.
Previously before gluing vinyl coverings on the ceiling, covered with newspapers. We do not recommend using this method as over time the printing ink will develop and ruin the whole look.
To ensure that the canvases are glued evenly, pre-mark and do not forget to make allowances.
Summing up
We hope our article was useful to you. In order to more accurately understand the technological and practical issue, on our website detailed photo and video instructions are presented, in which you will find useful information on this question.
At the final stages of finishing, the correct preparation of the walls for decorative plaster plays a very important role. The thing is that the aesthetic properties of such a material can be fully revealed only if they are not prevented by defects in the surface itself.
That is why the preparatory stage should be approached with all responsibility.
In any type of repair work, theoretical skills are important, and the preparation of walls for plaster is no exception.
In this article we will tell you how to prepare concrete, brick and wooden walls for finishing, we will tell you about ways to level the surface, teach you how to use a plaster mesh for these purposes and wooden scrap.
2017-2018. Copying site materials is possible without prior approval in case of installing an active indexed link to our site.


