Contents
- 1 Construction of water-heated floors
- 2 Installation of water-heated floor with own hands
- 3 Polystyrene system of water-heated floor
- 4 Wooden system of water-heated floor
 To feel all the charm of comfort and comfort of your apartment, you need a warm water floor, which you can easily install with your ownhands. It's not as simple as it seems at first glance. If you are poorly versed in the work of this kind, then you'd better turn to specialists. Well, if you decide to do it yourself, then this information is for you, we will figure out which device, technology of laying and mounting by own strength and photo instruction. See also how to choose the warm floor correctly.
First of all, we need to make a project, then make all the necessary calculations related to the load of the heating system, and, for each room separately. It is optimal to correctly calculate the contours of the water floor. All these works should be dealt with by people with experience in the design of such structures.
As experience shows, the device of a warm water floor, is best suited for buildings of country type. In urban buildings, you will be faced with a number of problems related to installation and connection to the central heating system. This is prohibited by law.
To pluses it is possible to carry the fact that using warm water floors, at you the consumption of the electric power essentially will decrease, and it means, that money charges will be reduced. In addition, the electromagnetic radiation that we receive in huge quantities, you and your loved ones will be bypassed.
Correctly designed water floors have an advantage over the floors electric, as the heat in the room will be distributed evenly.
The device of water-heated floors
For each premise it is necessary to select the optimum system of a warm floor. And, as you know, there are three of them.
- Installation with concrete screed.
- Installation without concrete screed - flooring technology. Here it is a little more difficult, as a floor covering( linoleum, a tile, a laminate, etc.) are stacked through additional waterproofing( the expanded polyethylene, a cardboard) on aluminum sheets.
- The last view is wooden. This is the installation of a warm water floor on slabs or on wooden bars - logs.
The complete set of a warm floor looks like this: flooring of heat-insulating material, metal-plastic or polymer pipes, fixing fittings, a set of couplings, a counternut for connection, a pump creating pressure and circulation, and an enclosing element - a concrete screed and the floor itself.
Installation of a water-heated floor with your own hands
The first technology is concrete. It is most often used among all other species. As experience shows, can be made by a person who knows at least a little knowledge of plumbing and construction, and has an instruction manual at hand. Let's look at this editing technology.
What you need for this. First of all, we mark out our premises. The sectors should be approximately 40 square meters. In this case, the parameters influencing the temperature characteristics of the concrete screed will be compensated.
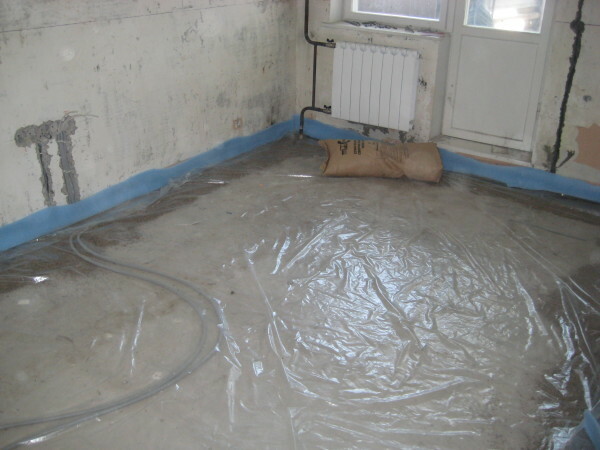
Then, on the slabs, put foam plastic or foam foam as a heat-insulating material. Thermal insulation is necessary in order that there is no heat loss. To compensate for the thermal expansion of the screed, a special tape is laid along the walls. The next stage will be the layout of the reinforcing mesh, which is a fastening and fixing element for the pipes.
Now go to the distribution and laying of pipes. Many are concerned with the question of how to make a water-heated floor with their own hands so that the heat spreads evenly. It's simple. Pipes can be stacked as you like, but mostly they are laid in a spiral or snake, shifting the center, shell. The photo below shows the main options for laying pipes of the water floor.


After laying the pipes, we move to their attachment to the reinforcing mesh, using special clamps at a distance of 90-100 cm. To avoid deformations, tighten the clamps severely. Since when the body is heated, the bodies expand, so our pipes can fail.

For reference: according to the technology, the pipes are stacked 10-35 cm apart, from the wall, the pipe of the water floor should be about 7 cm apart.
Assembly. We insert and fix the first end of the pipe into the supply manifold. Then, proceeding from the project, we lay along the contours of the pipe and attach them in the above way. The length of the spiral should be approximately 50-60 meters. After completing work with the first circuit, insert the end of the pipe into the return manifold. The collector should have as many exits as you are going to lay the outlines.
To avoid problems in the future, the installation of a warm water floor must be carried out according to the instructions. When crossing the joints between the contours, use a corrugated hose or corrugated pipe.
Having finished the work related to assembly and fastening, we check the system for leaks. For this, it is necessary to fill the pipes with water and create a pressure above the norm of 1.5 times( 0.6 MPa).It will be better if specialists check this out.
When the device of the warm water floor is completed, you can proceed to work with the screed. There are many mixtures used for warm floors, for example, Teplolux-Glims is one of the recommended. When the screed is installed, the pressure in the pipes must be working. As a result, your floor will rise by 5-7 cm.
Polystyrene system of water-heated floor
This system is designed for rooms with low ceilings, consisting of polystyrene plates, in the slots of which heat distribution plates are inserted.

The photo shows the sequence of layering depending on the finish coat - laminate, parquet or tile.
| 1a. Finishing coating( parquet, laminate) | 1b. Finish( tiles) |
| 2a. Substrate( foamed polyethylene, cardboard, etc.) | 2b. Assembled screed( GVL, DSP, etc.) |
| 3. Laying of underfloor heating pipes | 3. Laying of underfloor heating pipes |
| 4. Mounting of aluminum plates | 4. Mounting of aluminum plates |
| 5. Polystyreneinserts with grooves for pipes | 5. Polystyrene inserts with grooves for pipes |
| 6. Basis of | 6. Basis of |
Thus, the installation of a thermal water floor by one's own hands will be carried out according to the following technology: The insulation is laid on the slabs. Begin the installation from the corner, and in accordance with your plan, evenly distribute all the polystyrene plates in the room. Further in these plates heat distribution plates are mounted. After completing the stacking of slabs, the pipes of the contours should be inserted neatly into the landing nests. Now they will be flush with the plates. The test can be done without screed. And if everything is fine, we remove, temporarily laid the finishing floor, and we make a screed.
Wooden underfloor heating system
This technology is well suited for wooden house construction. In this house, it is not difficult to make warm water floors with your own hands. Between the wooden logs are laid mineral wool or polystyrene, performing the function of thermal insulation.
You can apply a modular system type. This is a chipboard structure with already prepared pipe channels.
Or, the rack system, by the way, is also not difficult. Between the plates of the chipboard, previously screwed to the base with screws, the plates and contours of pipes are laid. The width of the chipboard racks should be in the range of 150-300 mm. The photo shows in detail the technology and the device for laying the wooden system of the water floor. In principle, there is nothing difficult, you can do everything with your own hands just like that.

The finishing floor is laid on top of the aluminum sheets, on the waterproofing material. Before you start laying linoleum or laminate, the aluminum plates are covered with a gypsum fiber liner.
Thus, you have learned the device of a warm water floor and its installation can be done by yourself, without recourse to specialists, if you have knowledge in this area and use this instruction from the site to repair the apartment yourself. Stay with us and find out a lot of useful information on repairs. And what kind of heating does it cost?