Sibling plasterboard in the living room
Materials and tools
The process of installation is simple to implement, but requires precision, so a set of tools might seem rather big when brevity materials list.
Materials for the installation of plasterboard ceilings in the hall: photo samples
List the basic materials and fixing devices, which will be needed for the installation:
- sheets of drywall plasterboard and optionally gypsum plasterboard (gypsum board moisture resistance increased);

Drywall in the living room makes it possible to organize any type of lighting
A set of tools for the installation of drywall ceilings in the hall with his hands
The living room can be called a "face" of the apartment, so choose the tool should be carefully, because of its quality depends directly on the end result. Minimal set of tools for decorating the ceiling of plasterboard is as follows:
- Water level (can be normal, but then the marking procedure will require an order of magnitude more time and effort);
- carpenter's square and a triangle for measuring right angles to lay out the ceiling;

After installing drywall sheets need treatment to help align joints and to achieve a perfectly flat surface
After mounting his own hands the false ceiling of plasterboard in the hall (photo confirms this) need treatment to align the joints and achieve a perfectly flat surface. This will require:
- trowel and putty;
- Construction knife;
- sandpaper;
- reinforcing tape.

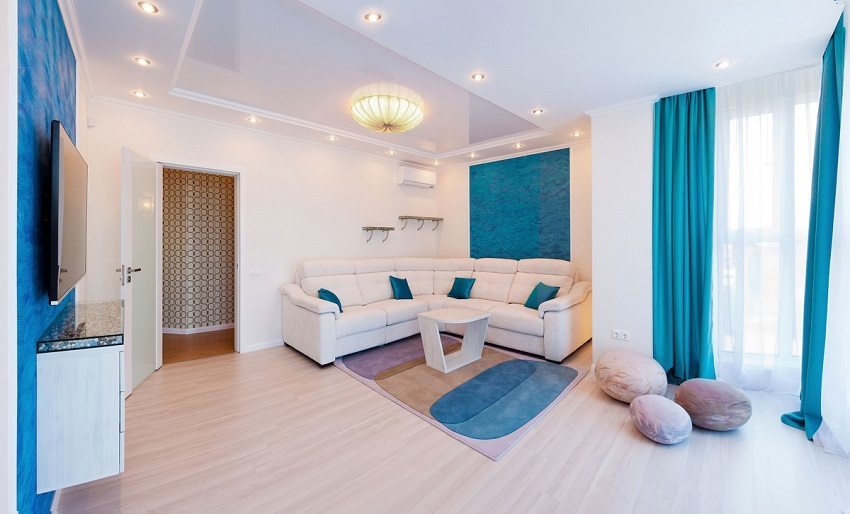
room lighting is implemented by spotlights
Types of plasterboard false ceilings in the hall: making beautiful photo
Photo or design sketches will help identify two main types of ceiling structures made of plasterboard: single-level and multilevel.
Related article:
Split-level ceiling for the living room of plasterboard, photos of different options in the interior. Step by step guide construction with their own hands the two-level ceiling, the necessary materials and tools.
Sibling ceiling - the most simple design of the drywall with laconic design without sophisticated decor. Best suited for creating peaceful interiors in rooms with low ceilings and uneven. This ceiling can hide all the wires and embed any lights (the preferable spotlights). To finish, you can use any paint, wallpaper, fabric, film, self-adhesive.

Suspended ceiling in the living room is decorated with the help of gypsum boards
Useful advice! One-level ceilings are best to use for creating classic interiors, as well as in the style of minimalism and a loft.
With multilevel curved drywall ceiling of the hall, even small, you can achieve a feeling of volume and depth. This design will help not only to zone the space, but also to create an individual interior.

Plasterboard in the living room, decorated in a classic style
Installation of the ceiling of plasterboard with their hands
If there is even the slightest of skills to perform repair installation of the ceiling of plasterboard with their hands (video instruction with a gradual layout process will in any case) will not be difficult task. Is only necessary to carefully design the design, consider how to hide under the sheets of the main disadvantages of the ceiling, and communication, as well as to know the characteristics of the material.

Partitioning walls before installing plasterboard ceiling
Consider a brief review of the steps in a ceiling made of plasterboard in the hall, then the detail - the subtleties of each step. Unlike bedrooms, Kitchen, loggia and a corridor, a living room should be universal, so lets not be shy in zoning areas, but it requires more careful attention to the installation. As a rule, living always has a very large area, and this complicates the process of assembling the hall ceiling drywall. With their hands (photo guide will come in handy) can be carried out all the necessary work.

The modern design of the living room with the ceiling plasterboard
Mounting frame for suspended ceiling of plasterboard in the hall: a photo of stages
The first step is to decide whether to use lights in the plane of the gypsum layer or not. A plurality of fixtures for this location, but eliminates the plasterboard of one single light source in the form of a central chandelier. Halogen spotlights allow "play" with light in a wide range, zoning space even without changing its geometry.

Design ceiling affects the entire visual look of the room
5 years ago in the sale began to appear energy-saving LED lamps, which differ not only brightness, but a spectrum similar to daylight, and superior in the quality of the luminous flux even fluorescent Sveta.

Plasterboard, ideal for both the classic and the modern interior room
If the lights are not installed in a false ceiling, will have to sacrifice only 5 cm height of the room. If installed, there is a need to allocate a bigger span of about 10 cm (standard lamp has a height of 9 cm).

Calculation of plaster-board ceilings
Elevations. By measuring the height of the room with a tape measure, should find in it the lowest angle (on the wall of a length of 6 m allowed construction error in the 1-1.5 cm in height, and when installing a suspended ceiling every centimeter critical). Then from the floor (not on the ceiling!) You need to measure out the correct height to the ceiling to the left 10 cm. By means of the water level along the walls around the room represent the horizontal and mark out its masking cord.
Setting profiles and suspensions. Within the walls of the marked line ream holes for dowels in increments of about 40 cm and secure the guide profiles.

False ceiling in the single-tier metal frame: 1 - single-level frame; 2 - gypsum plasterboard
Then mark a ceiling parallel lines is fixed and suspensions. Usually it is sufficient to set them in increments of 50-70 cm. If the design is complex and multi-layered, the suspensions are set not by one, but in pairs at a distance of 5-10 cm from each other.

Plasterboard in the interior of the living room
After that, the guide is inserted into the grooves basic profiles and fix them in suspension. Not to miss in the attachment height, it is best to pull the fishing line along the diagonal of the room from the most distant from each other angles. "Wings" hangers bent.

With plasterboard ceiling can create a unique design living room
It remains to be diluted wiring when mounted lamps, and tighten it to each installation site about the soffit with meter margin. Thus it is desirable to skip the wiring in the corrugated plastic tube: it will protect it from damage in the case of Bay neighbors above or from burnout (static voltage carcass with obschedomovoy voltage jump in the network can cause breakdown).

The ceiling space easily hidden pipes and wires,
Fastening drywall to the frame
Alone, this procedure is difficult to make even an experienced installer. It needs assistant.
First you need to prepare a cutting work: by first putting a sheet on a flat surface face-up table. Large sheet should be cut to the size 120h250 cm sheets (if you have an assistant) or 120h125 cm (if the installation will have to be managed independently). In any case, it is necessary to calculate the cutting so that the ends of the sheet were in the reference frame profiles. An incision is made with a sharp knife, then pulled up to the cut edge of the table and breaking. Sheet is inverted and again held a knife to the planned line. Scrapping is rough, but smooth.

Installation of ceiling gypsum board
Then scrap is treated with a plane millimeter less than the projection of the blade, and the protrusions and irregularities pre-cut with a knife. Now you need to cut out holes for the fixtures, pipes and sockets, if any. To do this, use a drill with a suitable nozzle. It should be remembered that the grooves for the pipes is best done with a centimeter margin in diameter, as opposed to the lamp tube to move impossible.

For cutting holes for fixtures used with a special drill nozzle
After this, the fastening sheet to the frame: the sheets can be attached as a parallel main bearing profiles and perpendicularly. The first method is used when the cross sections a little extra. The second option will be more durable fabric, but it will take 1.5-2 times the cross-bridges.

Fixing plasterboard sheets to the frame
Self-tapping screws screwed at a distance of 1-1.5 cm from the edge of the sheet so that they entered the profile to a depth of more than 1 cm. Since the sheet weighs a lot, the ideal distance between the screws - 10-15 cm. On sheet 120h125 cm leave 60-80 screws. Cap screws must be recessed by about a millimeter into the plane of the sheet of drywall, but not more than - or in this place cardboard ruffle and screw sooner or later, permission or excuse. In the case of an unsuccessful mounting screw is removed and screwed into the new location, but no closer than 5 cm from a failed port.

Installation of plasterboard ceiling in the living room of a wooden house
It is necessary to ensure that the joints of sheets are always placed on the profile. In this case, the edges should be placed in polusantimetre from the walls. In the case of a small sag this margin will help to avoid deformation of the ceiling. By the way this gap is better not to putty, but simply disguise pripotolochnym area.

Treatment of joints between worms GCR sealant
Important! Before starting work, you must give the plasterboard "lie down" at least a couple of days in the room where it will be installed, so that he "used" to the humidity and temperature of the room.

For registration ceiling living room used drywall sheets
Preparation for finishing
Before fillers should be kept 2-3 days - during which time the entire structure will shrink and come into balance. If then there exist defects, they are removed by a knife and sand paper, it should also remove dust from the cuts. Usually shpatljujut the entire surface of the ceiling, but some expensive brands can process only the seams. In any case you should put on all joints of reinforcement tape - it will avoid possible cracks.

Aligning the seams on the ceiling plasterboard
Laying the reinforcing tape is quite simple: the joint is slightly moistened, then pressed with a spatula putty and immediately placed reinforcement tape, checking carefully that no air bubbles remain. Tape coated with a thin layer of fillers and are completely dry. Nazhdachkoy rid of burrs, sanded and then again treated with a thin layer of filler and is ground and again dried.

Before finishing must be removed from the surface of the ceiling all the irregularities
Installation of the two-level ceiling of plasterboard for the hall: photo
Drywall installation technology is so simple that any form of multi-level ceilings created by the algorithm is not difficult to describe. Suffice it to draw a sketch of the second tier, to mark its outline on the ceiling under it and attach the main second guide layer 5 or 10 cm below the first - U-shaped hangers calculated just two layer.

Sketch plasterboard ceiling, consisting of several levels
Tip! Split-level ceiling for the hall, where the photo enough on the Internet, can be painted in various colors. To cover any drywall fit perfectly paintAnd experiment with shades is endless.

One-level ceiling is best suited for small-sized halls
If a complicated shape (e.g., oval), the guide nadpilivayut approximately every 7.5 cm to provide as much as possible a smooth curve, diluted wiring carefully cut out the desired shape of the sheets and attach them to the plate. To close the ends of the ducts are cut drywall strip width of 5 cm or 10 cm, and - if a complicated shape - the front side of the strip is incised (for convex curves) or the back (for concave). The incisions are made at a distance of 5-7 cm (in general, this distance depends on the degree of curvature of the lines - the steeper it is bent, the slits must be closer to each other). Get a blank box closed.

The plasticity of the drywall can create smooth transitions in the ceiling design, arches and poluarki
After fillers, processing and finishing just plug and insert lamps.
Plasterboard ceilings in the hall: a photo of successful examples of design
The construction and design of the ceiling in the hall combined with zoned lighting will help to visually enlarge the space of the room, as well as to expand its functionality.

Hall ceiling in a private home is decorated with the help of gypsum boards
Design ceiling plasterboard room: pictures in Khrushchev
Room or living room in Khrushchev - is usually a small square room with ceilings up to 2.5 meters high and almost zero soundproofing. Therefore, in the planning and design of ceilings is necessary to choose solutions that will help improve zvukozaschitu and visually enlarge the room.

Gypsum ceiling in modern design living room with kitchen
The best option for such rooms will be ceiling with scattered light, visually expand the space. Create such lighting, you can use built-in spotlights. If the ceiling combine matte and gloss surfaces that reflect light, you can achieve the effect of "lift" the ceiling.

Gypsum ceiling in the living room interior
Soundproof materials, if necessary, is placed in the ceiling space.
For finishing the ceiling in such rooms is better to use light shades of warm part of the spectrum, it is recommended paint the upper part of the walls and ceiling of one color scheme: it "blurs" the border between them and creates the illusion of increasing volume.

Gypsum ceiling light shades visually push the boundaries of space
Photos in the hall ceiling drywall. Photo rooms of 25 sqm
A large room can be really great, but the visual perception of its size depends on the aspect ratio, lighting and ceiling heights. Narrow and long room with low ceilings and poor lighting will look closely. Complex two- or multi-level ceiling also visually reduce its volume.

Plasterboard ceilings are fairly simple in design and can be mounted on their own
To visually expand the space and create a sense of freedom is better to use a single-level ceiling with built-zonal spotlights having adjustable brightness function. This will provide an opportunity to adjust the amount of light in each part of the room (as well as to save energy).

Gypsum ceiling fits perfectly into the overall design of the room
Tip!If the room bright wallpaper and interior itself has a complex finish and abundance of decor, it is best to choose a simple roof without superfluous details. In a quiet interior ceiling many levels can become a "highlight" of the interior.

Sophisticated design of the ceiling created with sheets of drywall
For painting the ceiling is better to use a low tone to be brighter walls or wallpaper paste on the wall in a strip that will be visually "raise" the ceiling.
So, nothing complicated technology works Installation of suspended ceilings not only requires precision and accuracy. Plasterboard is a very "grateful" material and allows for any design ideas.