Content
- Benefits of LED Strip
- Types of LED Strips
- Features of mounting LED strip
- Controller connection
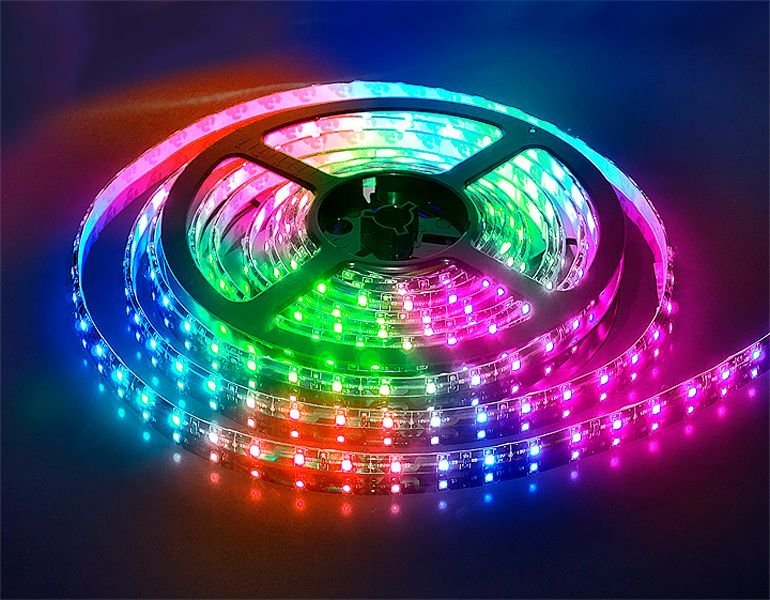
Lighting a modern apartment is carried out using various design techniques and technical means, one of which is the LED ceiling lighting. The most practical, cheap and effective way to organize such lighting is to use a tape with LEDs.

Benefits of LED Strip
- Diode lighting provides ample opportunities for the implementation of design ideas. In particular, with the use of LED strip, you can make uniform illumination along the entire perimeter of the ceiling, organize the internal lighting of ceiling panels or light zoning of premises, as well as achieving the necessary intensity and directivity of light flow.
- Easy installation and connection. Thanks to the simple electrical circuit and the small number of elements included in it, LED backlighting can very well be done with your own hands.
- Low consumption of electric energy.
Types of LED Strips
Waterproof tape. A feature of this variety of LED lights is the use of a silicone shell to prevent moisture from affecting the elements of the electrical circuit.

Using tapes of this type it is possible to make a lighting system both inside and outside the room.
Monochrome and multicolor ribbons. The type and color of the emitting diodes mainly regulates their use in a particular room interior. At the moment, there are a large number of models of these lighting devices that have elements in their design with varying degrees of light emission intensity.

-
Neutral or natural white - 3,500–5,000 K 42%, 1008 of votes
1008 of votes42%
1008 votes - 42% of all votes
-
Warm White - 2700–3500 K 39%, 920 of votes
920 of votes39%
920 votes - 39% of all votes
-
Cold white - 5000–6400 K 19%, 446 of votes
446 of votes19%
446 votes - 19% of all votes
Total Votes: 2374
11.03.2018
×
You or from your IP have already voted.Features of mounting LED strip
Installation of LED lighting is quite simple. Its main stages are trimming the tape, its installation, as well as connecting the adapter and controller.
Pruning
Most models of this product are available in rolls or sections of 5 meters. Naturally, when placing the tape around the perimeter of the room, segments of a strictly defined length are necessary.
Important! It is impossible to cut the tape in an arbitrarily chosen place, since this can lead to a violation of the electrical circuit and failure of the entire device.
To obtain a length of the required length, it is necessary to make cuts in strictly defined places that are marked with a dashed line, as well as with the arrow or symbol of scissors.

The choice of adapter should be dictated primarily by the total capacity of the connected to it segments of the tape, to assess this parameter should take into account their combined length and power of one meter products.
Wiring diagram
Connecting LED lighting systems in most cases requires the use of a reduced voltage of 12 volts. The required voltage value is obtained by using special devices - adapters that connect to the household power supply via a plug or terminal connections.

In cases where it is necessary to provide several modes of operation of the LED strip (changing the brightness of the glow, flickering or working in Christmas tree mode), the controller is used. This small device consists of a housing in which elements of its electrical circuit, a plug for connecting an LED strip, as well as a sensor that allows you to control the controller from a remote management.

Installation
Since the LED strip is not intended for outdoor installation indoors, it placed in such a way as to be able to illuminate certain areas, while remaining imperceptible. The most popular ways of mounting these products is to place them behind a stretch ceiling canvas, hide the tape in baguettes or in drywall niches around the perimeter of the ceiling.

LED backlighting can be arranged quite simply. The most popular way is to place a tape with LEDs on the upper perimeter of the room. Almost all models of these products have a self-adhesive base. To attach to the surface, it is enough to remove the protective film from it and attach the product to the surface around the perimeter of the ceiling, gently pressing it with your fingers along the entire length.
To connect to the mains, in most cases you will have to use a soldering iron. Depending on the total length of the mounted lighting system, as well as on the availability of places in which quite voluminous can be hidden adapters and RGB controllers, a parallel circuit for connecting LED strips can be used, providing for their connection after exiting adapter.

The advantage of such a connection scheme is the use of only one adapter in it, however, in this case it has a sufficiently large size, which creates certain difficulties in the secretive placement of this device. In addition, when connecting several LED strips, there is a significant voltage drop on their elements, which leads to a noticeable decrease in the light emission intensity of the LEDs located at the opposite end from the adapter connections.
In many cases, it is preferable to use a parallel connection, which can be performed using one or two adapters.
It is often easier to covertly place several small secondary power sources around the room perimeter than one larger one. In this case, use a parallel circuit for connecting LED strips, in which the connection is made on phase wires before entering the adapters.
Controller connection
RGB controllers are used to control the operation of colored LED strips. Connecting these devices is also not particularly difficult. Red and black wires coming out of the adapter are connected to the controller input. When connecting them, it is important to observe the polarity (red wire - “plus”, black, respectively, “minus”). Next, wires going to the LED strip are connected to the controller output.
Marking Used:
- R - wire with red insulation.
- G - with green.
- B is blue.
The fourth wire is common. As with connecting a single-color tape, it is undesirable to combine in series connections their sections over a total length exceeding 5 m.

When connecting several colored ribbons in parallel operation, it is often necessary to use fairly massive power supplies or, as an option, install additional signal amplifiers.
The infrared sensor that the controllers are equipped with should be positioned so that it the location did not interfere with the transmission of the control signal from the remote management.
LED ceiling lighting is most in demand as additional lighting systems that can profitably emphasize certain interior details, emphasize some of its elements or highlight functional areas premises. Since the installation of LED strips is quite simple, and their price is quite reasonable, then Today, these devices are quickly gaining popularity as an element of the home. electrical wiring.


