Content
- Wall putty cost
- Tools and materials
- The choice of putty mixture
- Wall preparation
- Independent operations
- Some tips
When performing repairs in the apartment, one of the important stages is wall decoration. Before applying the finishing material, it is often required that the surface is perfectly even. In this case, expensive wallpaper or paint looks especially attractive. At the same time, various small notches or tubercles can ruin the impression of the most beautiful coatings. Therefore, before finishing the surface try to perform leveling the walls with putty.

Is it possible to level the walls only with putty? This is only possible with smooth concrete walls without significant flaws. Of course, if the defects are very large, then use drywall finish or plaster. These types of wall alignment are used at the initial stage of surface treatment, which is previously cleaned of old material.
It is necessary to putty after removing the significant shortcomings of the apartment walls. This is almost the final part of the repair, after which it remains only to glue the wallpaper or paint.
To complete the work, you can invite a team of professional masters. However, many home craftsmen can do well without paid help, while saving a round amount of money.

Wall putty cost
In Moscow, the prices for puttying the walls are approximately the following:
- putty for wallpaper in 2 layers - from 220 rubles. for 1 square. m;
- putty of walls for painting in 3 layers - from 300 rubles. for 1 square. m;
- plasterboard putty - from 250 rubles. for 1 square. m
In St. Petersburg, the minimum price of wall putty is 180 rubles. for 1 square. m, in the regions the prices for putty services are quite different, sometimes reaching the level of the capital.
Note! The cost of wall putty, indicated in the price lists of construction companies, in most cases does not include related work, such as preliminary priming, grinding. Each of these works costs separately from 50 rubles. for 1 square. m, so be careful when calculating the cost of your repair.
USEFUL INFORMATION:Do I need to prime the walls before painting: do I need a primer
Tools and materials
Aligning the walls with your own hands requires preliminary preparation of tools and materials.
To complete this task, you will need:
- Dry mixes or ready-made mortars of various types.
- Drill with a mixer nozzle in case of purchase of powder material.
- Container for the finished solution.
- Spatulas - small (15–20 cm), large (45–60 cm), angular.
- A bar wrapped in fine-grained sandpaper.
- The level is usually a plumb line to check the evenness of the walls.

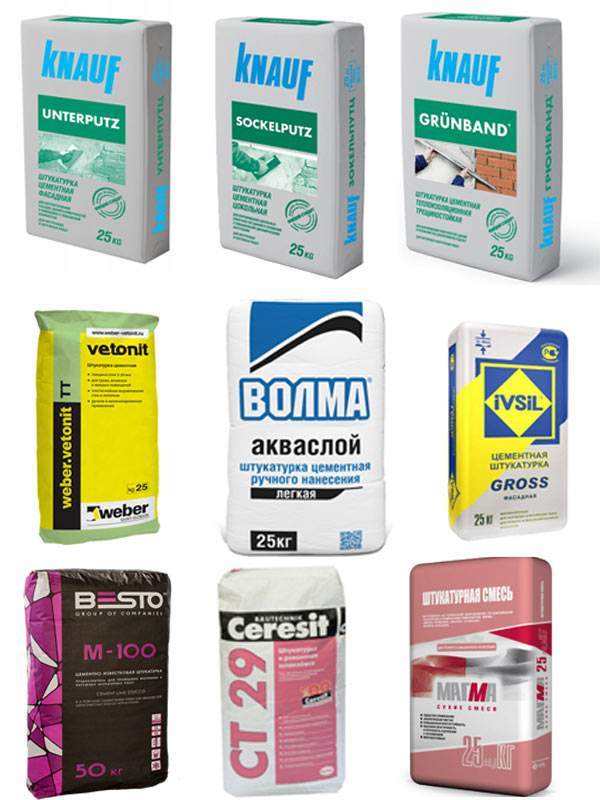
The choice of putty mixture
To align the walls, there are several types of putties. They differ in both purpose and composition. Different manufacturers have their own special components that give the finished solutions one or another quality.
In general, mixtures intended for pretreatment, as well as for finishing, can be distinguished. There are universal solutions.
Which mix is best for repairing a room? It all depends on the quality of the created solution.
The composition of the material can be:
- gypsum;
- polymer;
- cement.

Which type is suitable, it is necessary to determine in each case.
- In order to smooth the walls with putty in the bathroom or in other rooms with high humidity, usually choose a cement mixture. However, due to the possibility of strong shrinkage and cracking, it is used for the rough layer.
- Gypsum mortars can be used both for primary, rough, layers, and for finishing. They do not shrink, but are only suitable for rooms with low humidity and the absence of sudden changes in temperature.
- Polymer mixtures containing many different specific additives that improve the quality of the material are usually referred to as universal coatings. They can be used for both roughing and finishing. They are also beneficial in that, when used, you can work without haste (the finished solution dries out only after a day).
USEFUL INFORMATION:Plastic skirting boards for the ceiling: mounting methods
Having determined the quality of the mixture, add a small amount of water, corresponding to the information on the package.
Note! Dry mixes are lighter, therefore it is more convenient to store and transport them. Ready-made solutions have the best qualities.
Putty leveling the walls requires careful preparation. The material created after adding water should have a creamy appearance.

Important! It is necessary to take into account that the prepared solution dries very quickly, so it is better to make batches in small portions, noting the time of their use.
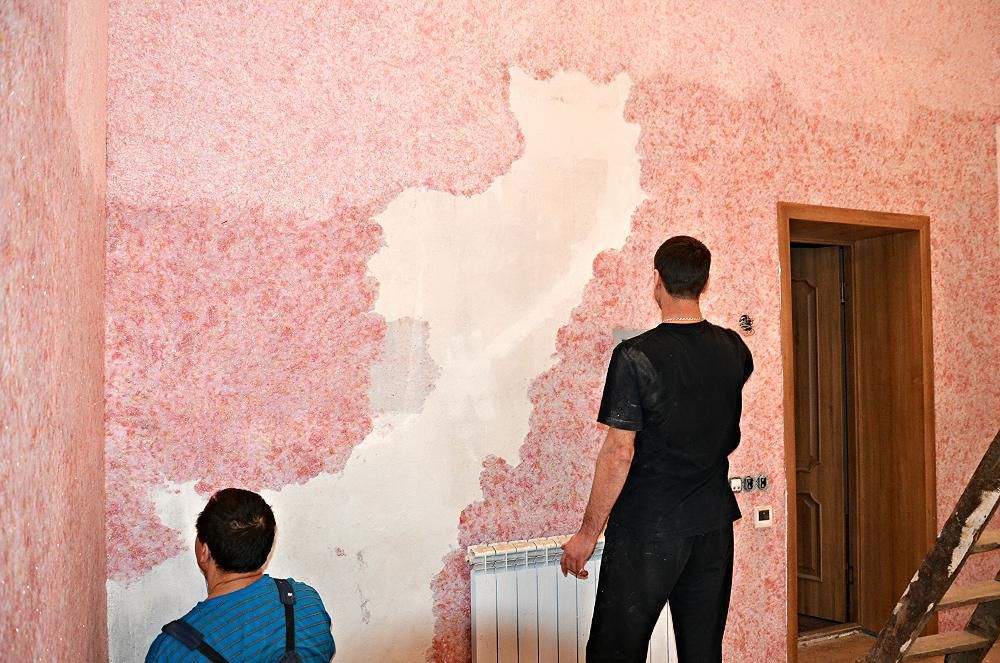
Wall preparation
The walls are cleaned of old coatings - wallpaper, paint, old putty.
Before applying a layer of putty, it is necessary to prime the surface with a deep penetration composition. The primer improves the adhesion of the leveling mixture to the wall, strengthens the surface, filling in small cracks. The primer mixture is most conveniently applied with a roller. You can smooth the walls with putty after 6-10 hours, when the surface is completely dry.

Independent operations
Beginners who begin to putty with their own hands can find many recommendations on the Internet, many of which are presented in the video.
Each stage of work consists of two steps:
- checking the evenness of the wall;
- applying a leveling layer.
By applying a broad rule, the size of the gaps is checked. These pits will need to be filled with a starting putty mixture, so you need to mark them with a pencil. The rule must be applied in different directions - vertically, horizontally and diagonally.
Note! If most of the protrusions are horizontal, then putty should be horizontal, if vertically, the spatula in the first stage needs to be moved down up.
How to properly level the wall with putty?
- With a small spatula, the mixture is applied to a large one, evenly and effortfully distributed. Often, professionals recommend using a tool with a width of at least 45 cm to quickly and accurately align the walls.
USEFUL INFORMATION:What is Venetian plaster: do-it-yourself application methods

Attention! You need to start puttying from the corner. To derive accurate corners it is convenient to use a special angular spatula.
- Movements are carried out in two directions: vertically and horizontally.
- Sometimes experts advise applying one layer strictly from top to bottom, and the other from left to right. Moreover, the masters, explaining to beginners how to level the walls, recommend creating two or three rough layers and the same amount for the finish. Whether it is necessary to strictly adhere to such rules, everyone can determine from their own experience, however, when doing work for the first time, it is better to follow the recommendations.
- Having distributed the putty on the wall, the remaining material is removed from the spatula. After each movement vertically or horizontally, a little solution is added.
- Each new movement is overlapped with the previously applied solution.
- After processing the area of about 0.5 square meters. m it is necessary to attach a rule to the surface and stretch it from top to bottom to remove excess material.
- It is required to wait until the wall, lined with the first layer, dries well. This can take up to 2 days.
- Then a clean spatula or bar wrapped in sandpaper is carried out along the wall, removing the formed tubercles and grouting the surface. This can be done with a special grater.
- Next, the evenness of the surface is checked again.
- Alignment of walls with special finishing putty is the final stage. It is carried out when achieving an almost perfect flat surface according to the principles described earlier.

Some tips
We offer you some useful tips to help make your job easier.
- Dry mixes are cheaper than ready-made solutions, but they dry faster when combined with water. Therefore, it is advisable to know how much material to use at a time.
- You can check the evenness of the walls with a diagonal thread.
- With a long break during the puttying process, before applying the solution to the next section, moisten the edge of the already treated section with water.
The technology for performing the work is simple, but requires an attentive and accurate attitude. It is necessary to foresee all the little things.

EXPERT SITE
Tsugunov Anton Valerevich
Master Station Wagon
- Since 2003, I have been engaged in the repair and decoration of premises.
- Over 100 completed objects.
- I appreciate the quality, more than the quantity!
Personal page >>>
Friends!
I offer you the service "Friend Builder"
As this site develops, subscribers and visitors are turning to me more and more often asking for help with advice on various issues of repair and decoration.
Questions are sometimes asked very complex and interesting. You can’t write an article for each situation, so I decided to advise you individually.
Thanks to you, friends, a new direction of my favorite work has been born - share your experience and benefit everyone who is undergoing repairs!
Get a one-time consultation from me >>>
Order full apartment repair support >>>