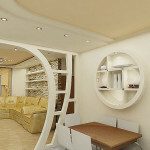
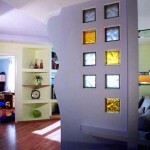
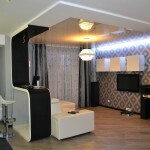
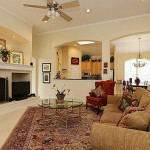
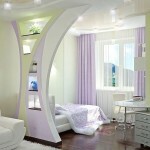
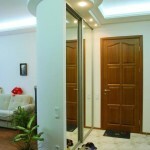
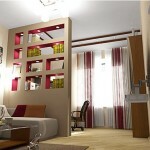
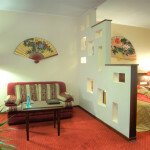
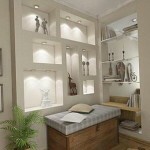
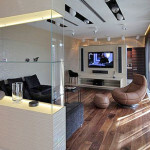
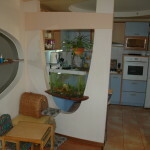
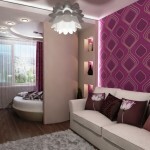
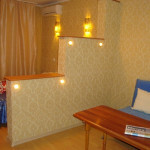
Decorative plasterboard partitions (36 photos): interior of the apartment
Table of contents
-
1 Working with structures
- 1.1 Working with metal profile
- 1.2 Plasterboard work
- 1.3 Assembly
- 2 conclusion
- 3 Photo Gallery
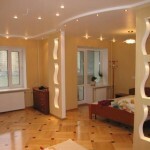
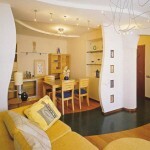
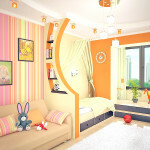
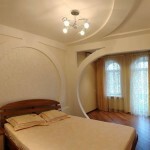
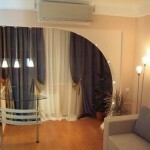
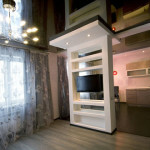
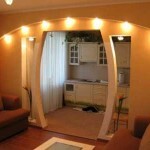
The concept of a modern and stylish interior is largely determined by taste and possibilities landlord. Design step you can take - a decorative partition plasterboard with their hands, and that we will learn to do now.

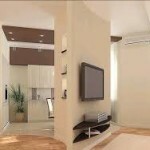
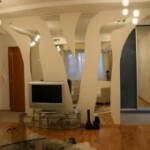
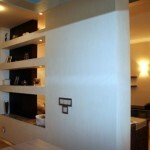
Interior decorative design
Working with structures

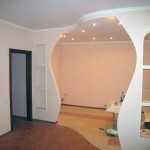
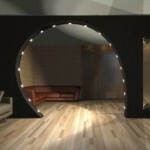
Option decorative design
To create a decorative partitions we need to learn how to do two things - to bend the metal rack profiles (CW and UW) and GCR itself on a given form.
Working with metal profile

CW profiles of different widths
Instructions for assembling the frame:
- Rack profile CW used for structures without braces (rounded) bends or in places where they do not exist. This rack is equipped with reinforcement ribs on the whole plane, so stick to it impractical. The width CW of 50 mm, 75 mm and 100 mm.

UW different width (the price - from 133 rubles).
- Reinforcement ribs at the UW, in contrast to the CW, are only on the bottom rail. Below we look at how you can stick to a similar design to create figure skeleton. UW width also of 50 mm, 75 mm and 100 mm. (cm. Proper installation is also an article Profile for drywall)

Shelf Trimming UW for bending
- For decorative interior partitions are frequently used form rounded openings and projections, which involves bending of profiles. As mentioned above, the round bends in the profile arches used UW. (cm. also features an article finishing plasterboard with their hands)
- As can be seen in the photo above, master undercut shelf (cuts are carried out at a distance of 10 cm from each other), it is enough for the smooth bending of the profile. In those cases where need a sharp bend, the distance between the cuts is reduced to 7 or 5 cm, but it must necessarily be the same.
- If necessary, folding rails in the direction of any of the shelves, with the convex side of the bend is cut one shelf and rack base at a distance corresponding to the curvature of the line.
Plasterboard work

A method of bending "wet" method
- To sheathe rounded lines, it also needs to bend and for this there are several options. If the bending line is smooth, without sharp radii, GCR segment often falls on the rail, repeating its contours without any problem.
- But in most cases for covering the chassis curvatures required mechanical changes in the structure of the sheet, for example, soaking. GCR first pass a spiked roller, and then the night draped with wet rags. The paper on the sheet is pierced to allow water to freely penetrate into the slurry (filler) macerating and softening it.
- After this procedure, the soaked sheet bend in the preformed template. This method is quite effective, but it takes a long time.

Bending embodiment drywall "dry" method
- There is also a quick and easy way to bend the sheets - a "dry" method with the help of cutting paper with one hand. To do this, cut out a piece of the desired size and the FCL on the other side is counting. The distance between the cuts will depend upon the bending slope, the steeper the curve, the more often they make incisions.
- Please note that marking is done on the two edges of the cut pieces of drywall, even if it is a narrow, slit must be symmetrical, otherwise the band "will lead" to the side. Between the special tags (for drywall) or a paint knife with a sharp blade is performed line and then breaking.
Assembly

Mounting rack frame profiles
- Primarily UW profile is screwed to the floor, ceiling, and possibly (depending on configuration) to the walls. To do this, you need to make a mark on the floor and then raise it from the walls using the level of the vertical line, which you can connect a cord from the ceiling of a paint, having beaten off the line between them. (cm. also the article What should be the thickness of the walls of plasterboard)
- After marking the screw to the ceiling and the floor (to the walls) UW profiles, fixing them at least 40 cm, and if the attachment points are obtained weak, more often. Thereafter slice profile CW rack and insert it vertically in UW with the expectation that one entire GCR (120 cm) had 4 longitudinal strut. Metal rails cut to 0.5 cm smaller than the height of the net, so that they were free in UW or curled.
- Fastening profiles among themselves is carried out using special small screws (11 mm) of metal. Once you have collected the backbone of the carcass, you can proceed to the figures here from the masters there is a disagreement on the priority work prioritization. For smooth transitions without openings uniquely primarily mounted profile, then the sheet.

Bent profile is substituted for already carved arched doorway
- In working with curly designs can be assembled first frame with curly elements, but there is another technology - in first cut piece of plasterboard, then fasten it to stand straight and only then con bent (cut) profile.

Mounting
- On one entire GCR normally takes about 60 screws (25 mm) for metal, but their costs are significantly greater FIGS. If you fasten the cut sheet in bending, each element must be at least one screw.
Advice. When installing drywall screw in it must be recessed about 0.5 mm from the plane of the sheet. That when tightening the screws, he did not sit too deep and not break the paper, using a special nozzle for FCL with shade.
If you need to sheathe the arched doorway below, divide the sheet into pieces of 40-50 cm and then Screw the.
conclusion
Now that you know how to install a partition. In order to more accurately understand the technological and practical issues on our website provides detailed photo and video instruction, in which you'll find the information you need without problems on this issue. Good luck!
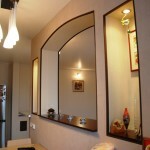
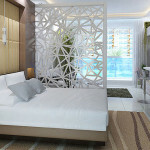
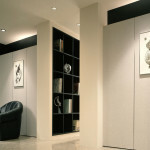
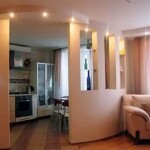
Photo Gallery