Dressing out of the closet - 5 aspects competent REFURBISHMENTS
Table of contents
-
1 The working process
- 1.1 Step 1 - Preparation of the project
- 1.2 Step 2 - Communication laying
- 1.3 Step 3 - Preparation and finishing facilities
- 1.4 Step 4 - Registration of a doorway
- 1.5 Step 5 - Build shelves
- 2 Output

Small dressing room from the pantry can be very comfortable and functional
You do not know how to convert a storeroom or a niche in an apartment or house? Or plans of a small walk-in wardrobe closet? I'll show you how with a minimum expenditure of time and resources to carry out repairs to the synagogue instead of junk you got a great place to store things.

Compact closet - 2 square meters used for maximum
The working process
Dressing room with his hands out of the closet is as follows:
- Components of the project;
- Summed up the necessary communications;
- The room is released and finished;
- Issued a doorway;
- Constructed storage system.
Let us consider in detail each aspect.
Step 1 - Preparation of the project
At this stage it is necessary to determine the configuration of the racks and shelves, and their location. By arrangement structure can be of three types:
| Illustration | Description |
 |
Shelves along one wall. This embodiment is suitable for very narrow (less than 1.2 meters) spaces. The shelves are placed along the wall, and still pass on the length of the structure. It turns out like an open cabinet. Very narrow pantry equipped that way. |
 |
L-shaped shelves. More streamlined version suitable for building a width of 150 cm and more. Usually at the end portion is placed under the cross bar storage outerwear or settling compartment for storing the vacuum cleaner, and other equipment. |
 |
U-shaped variant. The most functional and roomy solution in which the structure is located along three walls. Shelves may be any configuration, as long as the middle remained passage width of at least 60 cm. |
As for the filling of a dressing room, it all depends on the type and amount of clothes and shoes, which will be stored. In addition, some things can be stored in drawers or on open shelves. Dimensions of compartments for different types of items shown in the diagram below. Proceeding from this, picks up its storage configuration.

The height of compartments for different things different, do not lose sight of this point
Make a dressing can be made of different materials:
| Illustration | Description |
 |
Chipboard. The most common version of the arrangement of a dressing room. You can order the items already cut to your size and easy to assemble everything in place, and you can cut it yourself (but I still advise to use ready-made parts). If you have an old hall, you can adjust it, this furniture is well-suited for dressing. |
 |
modular. The perfect solution for small closets in our pantries. The simple design of the racks, brackets, shelves and compartments, which are arranged in the order you want, and you can optimize your system the way you need to. The only negative - a considerable price, but the convenience is worth it. |
 |
Pipe constructions of furniture. Another good option for the construction of furniture which uses the tube. Put the rack on which are mounted in the right places shelf brackets, beams and other elements. Simple and interesting solution. |
You can combine different design options in your wardrobe, no rules. Do as convenient to you.
By selecting the design and manufacture of the material, make future storage sketch. So you'll know its configuration and basic dimensions.

The sketch will be clear final result
Step 2 - Communication laying
When equipped with a dressing room of the closet, it is necessary Wiring and installation of the fan for forced ventilation. Perform these works need to finish, so you do not spoil the surface. It is necessary to carry out the following:
| Illustration | Description stage |
 |
Stroebe made by wiring. You need to pre-mark the location of switches and sockets, to consider the lighting system, and on this basis, make Stroebe for cabling. Do not forget that you need to bring the wire to place the fan installation in the wall. |
 |
Route wires. At the same time put the box under the switches and sockets. |
 |
Make a hole for the fan. You can drill it with a special crown and can punch holes around the perimeter nasverlit and knock a piece of the wall. |
Step 3 - Preparation and finishing facilities
Installation instructions for this phase is as follows:
- In the first place to make all things out of the closet. It is not necessary - throw you need - and then add up the place at the bottom of the racks. Anyway, it is necessary to remove all of the premises;
- The walls, floor and ceiling cleaned of the old finish. If you have a flat panel in the house, it may be that the need to seal the joint between the slabs on the ceiling. This is done in advance, a special composition;

The joints between the boards are sealed with a special compound
- Laid flooring. This can be a laminate or wooden board, and cheap linoleum. It can not even be fixed, simply cut a piece the size of a closet and gluing tape on the perimeter;

Linoleum - the cheapest material for laying on the floor
- Aligned and finished walls. The room under the dressing easiest way to paint. If walls or ceilings have irregularities, the surface previously puttied and then painted. The ceiling is made in the same way, it is better to use for painting white paint, as the room is small and the natural light in him.

You can paint the room in any color
For the operation, use washable paint. In this case, the wall will not stain clothes, and if necessary, you can quickly wash the surface with a damp cloth usual.
Step 4 - Registration of a doorway
You have to determine in advance how to decorate the doorway. I suggest to choose one of three options:
| Illustration | Description |
 |
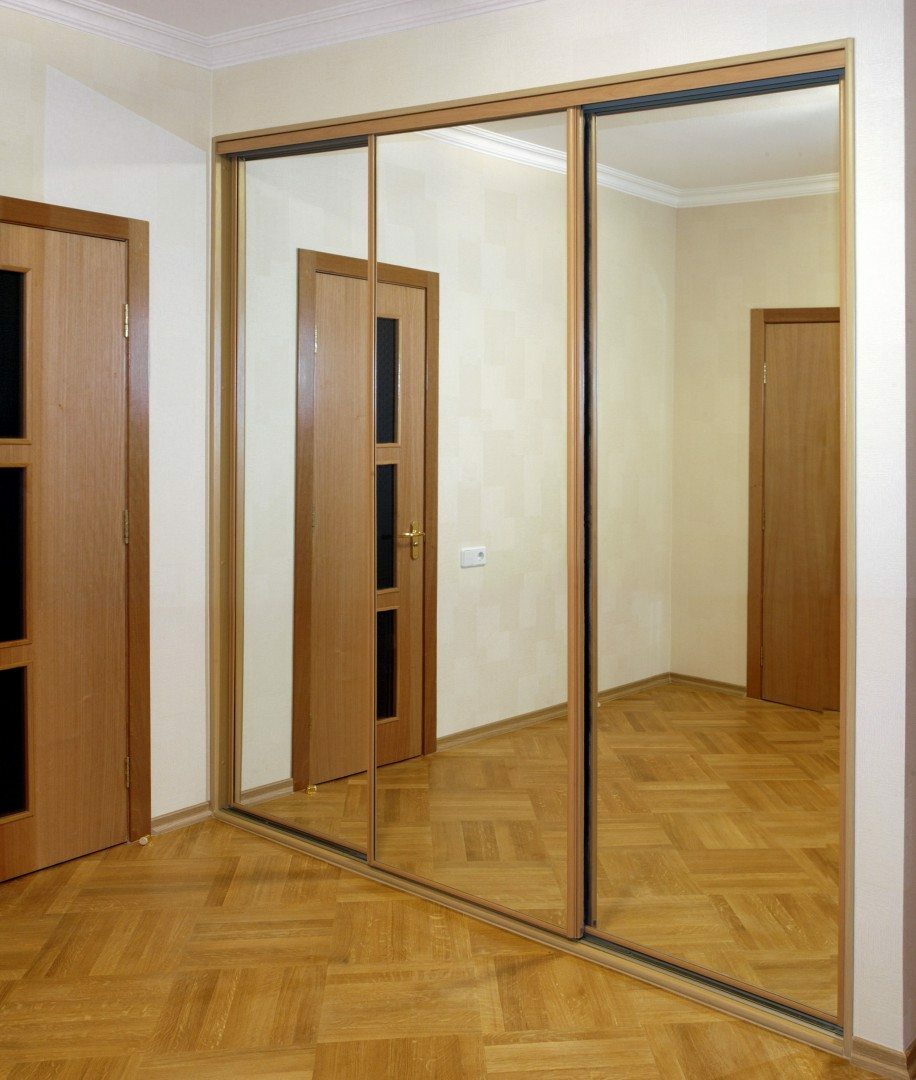
Sliding doors. A very practical option which allows you to save space. You can make the door of the mirror, then they will perform two functions at once. |
 |
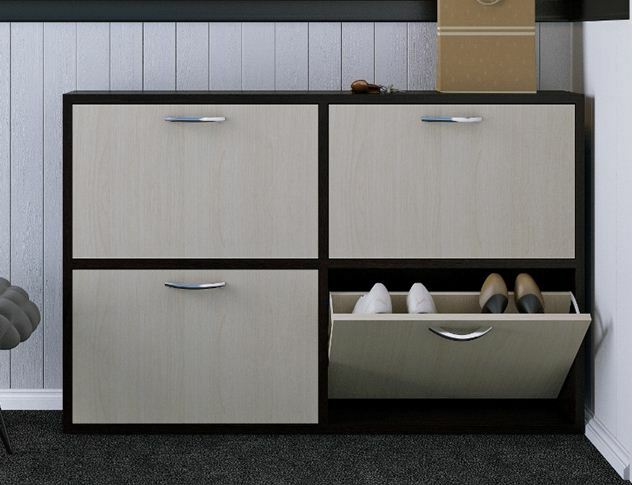
classic door. When refitting the pantry in the dressing room, you can leave and the usual door cloth. In the photo shows how it can be upgraded by attaching a narrow shelf along the entire height. |
 |
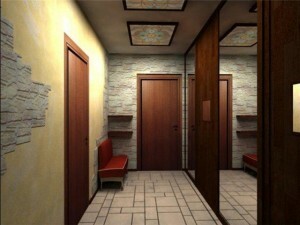
blinds. Most low-end solution, which can be done in minutes. If this option is right for you, you will spend a minimum of means. |
Step 5 - Build shelves
The process of assembling the furniture made of particleboard and furniture tubes considered in many reviews, so I'll tell you about a variant arrangement of a dressing room of the modular elements:
| Illustration | Description stage |
 |
kit is unpacked. You should just make sure that all the elements are in the right quantity and not damaged during shipping. |
 |
Position is marked carrier elements. They are also called rails and arranged horizontally. There may be two of several elements depending on the load and configuration of your storage system. Before marking the rail is cut to the desired length and applied to the wall. Do not forget to check its position building level. |
 |
drill holes. Used for fastening dowels or 8h60 8h80 mm. The holes should be deeper fasteners 5-10 mm. Work carried out by means of the gun, it is important to keep it horizontally to dowels not become awry. |
 |
The guides are mounted to the wall. For this dowels inserted in the wall, and then puts the rail and clamped by screws or screws. When installing do not forget to check the item level. |
 |
Put hinged guide. They are located either on an arbitrary width, or at a distance of 63 cm, if you put the sliding elements with a fixed size. |
 |
On the uprights are placed shelves brackets. It is very simple thanks to fixing holes and the entire length of the structure. |
 |
Wire shelves and baskets are cut. To fit under the elements of the desired width, they need to be cut with a hacksaw on metal or a bite of special tongs. |
 |
put shelves. They are neatly arranged on the brackets. |
 |
Put the other elements. This may be rods, baskets, sliding elements, etc. |
Output
You learned how to make a dressing from a small closet, and be able to carry out all the work without help. Videos in this article will reveal the theme even more, and if you have any questions - ask in the comments.