Preparing walls under the decorative plaster: features
Table of contents
-
1 Stages surface preparation
- 1.1 cleaning
- 1.2 Elimination of cracks
-
2 plastering
- 2.1 Total
In the final stages of finishing a very important role is played by the correct preparation of the walls under the decorative plaster. The thing is that the aesthetic properties of the material can fully unfold only in the event that they do not prevent defects in the surface.
That is why the preparatory phase should be approached with great responsibility.
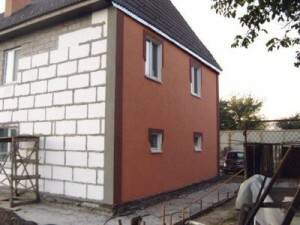
 Structural fine blends are truly versatile material. Finish used for outdoor applications and indoor applications. With the help of a skilled master of the decor can add personality and give a unique style, even the most ordinary, typical house.
Structural mixture has a sufficient ductility is applied (in the presence of certain skills, of course!) very easily, so this kind of finish is quite capable not only to professional builders, but also masters of self-taught.
In addition, the advantage of laying the structural plaster with your hands is the fact that it allows you to experiment with the texture and color of the resulting surface. Final design limit only your skill and imagination.
What should be the surface for applying plaster with your hands? preparatory work technology is not too different from the preparation walls for painting and wallpapering. However, it is not necessary to be zealous, too - decorative mixture due to its plasticity perfectly hides all the small defects.
So perfectly smooth wall we do not need, but still have to work on the elimination of major irregularities.
Stages surface preparation
It should be remembered that the application of decorative finishes - this is the final stage of finishing the room (no matter whether it is a new home construction or major repairs).
It is applied as a final touch, when the windows and doors were installed, flooring laid, and carried out of the space debris and crossed it with a vacuum cleaner.
If the original was done leveling plaster walls Scots before them decorated layer should stand for at least four weeks.
Instructions:
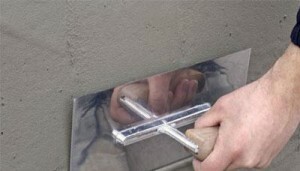
- Remove from the surface of the paint residues of wallpaper and flooring. Dedusting surface using an industrial vacuum cleaner.
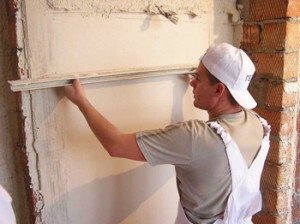
In the photo wall alignment process
Note! It is the presence of undesirable oil-based stains. If such stains are present, they should be removed with a solvent and wash the surface with mild soap.
cleaning
The cleaned surfaces should be assessed carefully. If it is not sufficiently tight, treat it with a primer with a reducing or firming. It has proved effective, such compositions as Acryl-Hidrosol (for surfaces that are prone to shattering) and Tiefgrund TV (for an old plaster or drywall), the estimated price - from 160 rubles. per liter.
Note! If the room in which you plan to finish walls, characterized by elevated levels of humidity along with the primer should be treated with an antifungal composition of the wall.
Elimination of cracks
- The discovered cracks embroidered with an angle grinder with diamond disc. Embroidered and cleaned repair cracks fill composition. If the cracks are deep enough and volume, repair the product is applied in several stages.
- Once filled cracks and wall surface fully primed, proceed to application of the base layer fillings. This layer is intended to not only align the wall, but also serves as a basis.
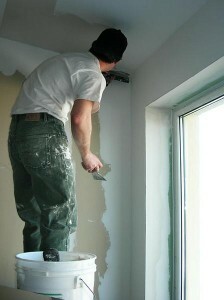
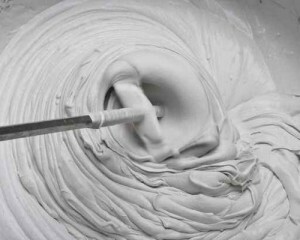
putty walls
If you plan to a method for applying decorative plaster sufficiently thick, which has a distinct texture type, filler surface is not obligatory. But if you plan to apply a thin layer of smooth plaster, the perfectly flat surface you will need. Otherwise defects tread base through the inlay, and the decoration layer flow will be considerably greater. And it can be quite painful blow to your pocket!
plastering
- Each layer base fillings dried at least 24 hours.
- In order to avoid cracking of the layer of putty, experts advise to use self-adhesive mesh construction (so-called serpyanku). Putty is applied using a special wide spatula, carefully treating the "problem" areas.
- Once a layer of putty is applied and dried, the dirt acrylic cover it. The optimum is the use of deep penetration primer, it provides the best adhesion layers.
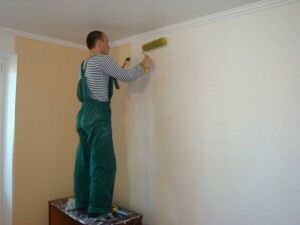
priming
Note! To putty does not separate, it requires a mandatory impregnation, so give up ideas to use fillings that prevent absorption (based on plaster or oil-in-adhesive basis).
- After filling is completed, the grind surface. The best result gives the hand sanding with fine sandpaper.
Recommended for decorative finishing layer is laid a special primer.
Primers mixture under the decorative plaster is applied, taking into account the following points:
- The thickness of the primer layer must be at least 20 mm, otherwise virtually impossible to achieve uniformity of the decorative layer.
- When the grout primer must be a substantial seal it.
- Nipped and sealed primer square off.
- After the primer is applied, wetting it for at least 7 days (handle wet sponge 3-4 times daily)
On the thus treated surface of the decorative plaster can be applied both smooth and textured.
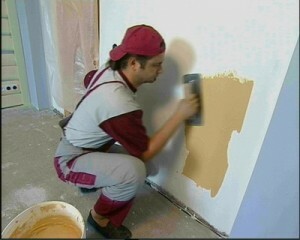
Trial plastering
Before you start plastering the walls with his own hands, it is recommended to conduct a trial process: select a location on the wall near one of the corners and cover it with plaster. So you will see the actual texture of the new decorative coating and its hue.
If you plan to combine on the same wall both options, then to create a smooth transition between the lines smooth and textured applying, you can use masking tape. Apply a smooth plaster (taping tape will help you not to climb on the "texture" part), and then protecting the area already plastered the same tape, apply textured plaster.
Total
This is how to approach the preparation of walls by plaster, if you want to finish with a decorative coating. We should not neglect the preparatory work, because the decorative plaster is applied fairly thin layer, and all surface defects will appear under the finish. But if the surface is to be prepared efficiently, the decorative plaster will look "one hundred percent!" Oh, and be sure to watch the video in this article, prepared by our masters.