Repair toilet plastic panels: features and installation material
Table of contents
-
1 A bit of plastic panels
- 1.1 manufacturing principle
- 1.2 Benefits
- 2 Preparing for the installation of plastic panels
- 3 We begin installing panels
- 4 conclusion
Before each landlord or a private house, sooner or later the problem ceases to repair the bathroom and toilet. Today, simply to repair the bathroom plastic panels - videos, photos, various instructions and advice of our experts tell us how to do it correctly.
The current range of materials and designs are simply amazing, greatly complicating the choice. In this article we will focus on finishing materials such as plastic panels, analyze the advantages and disadvantages of siding.
To repair a toilet, should be made a little bit of free time, a certain amount of money and instructions to arm professionals. Most often in older homes bathroom is connected to the toilet than a little complicated procedure toilet repair their own hands.
We will not discuss the execution of works to the sewage system and water recovery process, because the first thing that people pay attention when entering the room - it's walls. Here we come in handy plastic panels.
A bit of plastic panels
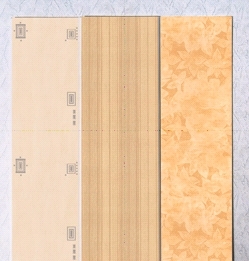
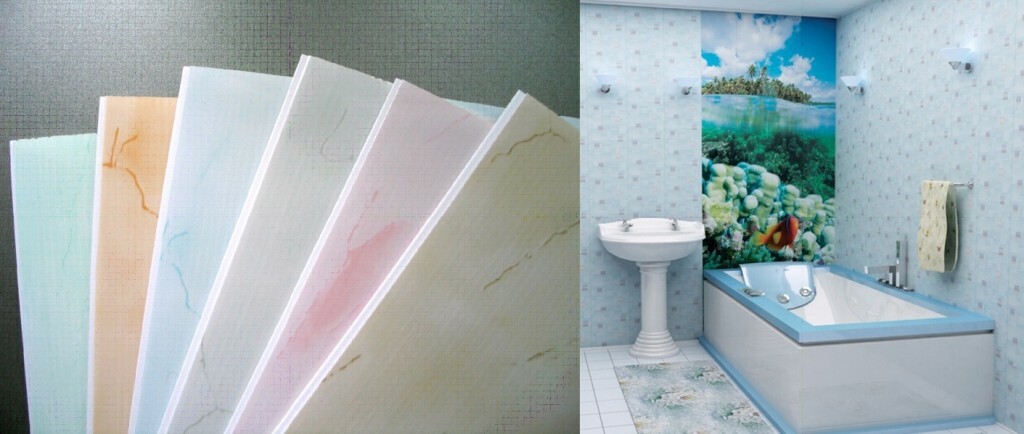
All kinds of plastic panels
manufacturing principle
Plastic panels in the construction sector is considered one of the alternative coating materials. Their main advantage - Design principle by which any part can be disassembled always when necessary. Moreover, walls can "breathe", which is important under conditions of high humidity.
Qualitative plastic cladding panels are manufactured by extrusion from a variety of environmentally friendly materials, for example, solid PVC.
Benefits
Most of these panels are safe, because they are resistant to fire. This kind of facing materials have a number of advantages, the main ones are simplicity of installation, aesthetics, durability and high quality.
toilet repair wall panels makes it possible to experiment with the interior, creating a most unusual designs. To date, manufacturers offer a wide variety of not only colors but also of textures - stone slabs from the effect to simulate wood.
The enormous popularity of this kind of material provided in its efficiency compared with wallpaper, tile and stone. Price - from 120 rubles. per sheet.
We single out the following advantages of plastic panels:
- good deformation resistance and high strength;
- excellent sound and thermal insulation;
- ease of care, fire resistance, and moisture resistance;
- ease of assembly;
- durability.
Preparing for the installation of plastic panels
Note! Before installing the panels will determine the future design of the room, the color range of cladding materials.
In our case, the room of small size, since we are talking about how to make repairs in the toilet or bathroom. Despite this, the design should be creative and show your excellent taste.
Think carefully about not only the color of the panels, but Audit window arrangement of shelves.
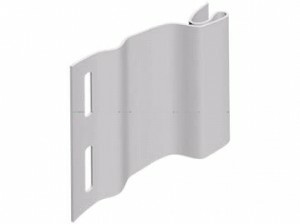
Siding
So, to finish the toilet or bathroom renovation PVC panels, we need to pick ourselves plastic panels, 8 mm thick, as they are much more practical.
The thinner the panel, the greater the likelihood of damage to the lock in the assembly process and the appearance of cracks in the structure. Below, we provide a list of all the necessary materials, which are needed for our repairs.
Directly plastic panels themselves. In this case, each color and texture selects at its discretion, and the total number of panels is determined by calculating the total perimeter of the room with the addition of 10-15%.
The standard length of panels 6 m, so suggested initially cut in half for more convenient transportation. Besides standard ceiling height of 2.5 m.
- Start lane. Starting number of bands is determined by calculating the perimeter of the ceiling. She will need to trim doors, manhole (it passes through all the floors) and an audit of the window.
Cesspit at the same time can be located inside the walls, it will simplify the repair work. But there are options when the pipe passes indoors. In such cases it is necessary to trim the plastic, so we buy a stock like himself plastics and accessories.
- Skirting floor and ceiling, the inner and outer corners. They are purchased with the expectation of a particular room. The size of the audit of the window just enough to define themselves.
It is important to note that the water supply system should remain open or else you need to consider unhindered access to it.
- UD and CD profiles of metal. toilet repair siding only with the use of metal.
- Also, we need the plug-Nails 6 × 40 "quick installation" white silicone adhesive plates, through which the profile is attached to the walls. Do not forget also about the press washer 3,9 × 16.
- Tools: water level, Bulgarian, level, hammer, hammer and cutter.
We begin installing panels
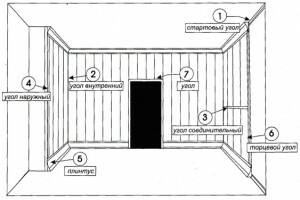
Scheme plastic mounting panel
Driving installation of plastic panels is quite simple:
- Gaining frame for mounting plastic panels from metal profile.
Please note that the right to start facing the ceiling.
With the water level repel the start line of the ceiling, while the lower it is not too low, only 10 cm.
- Fasten profile UD perimeter roof line via dowel-nails. In the future, to the UD profile by means of a press-washers will be attached CD profile. In between 60-70 cm mounted CD profile strips, they will strengthen the plastic panel.
What is important is another point - it is necessary to fix each of the profile strips to the ceiling in one or two places. This is done to the ceiling with the passage of time has not started to sag.
- A set of panels should start with the most surveyed hand, since there is a fairly high probability that the last plastic strips have to be cut. Before you make a set UD to the profile you want to attach the starting strip, in which we shall insert the plastic.
Pay attention to the fragility of the plastic that is typed to repair toilets - one awkward movement can cause a broken lock. Each of the strips must be attached with the help of the press washer for the next CD profile.
- Next, go to the repair of the walls. They are faced with the same principle as the ceiling. To start typing a metal frame to suit all levels. Profile of do the partition between the vertical stripes that provide additional rigidity.
In order to engage the strip at the corners using internal angle. Set produce since most surveyed parties. Grooves choose grinder.
- Junction panels are the outer corner where we need to get around the general sewage pipe. Upper plinth are glued with silicone glue, and the bottom - fixed dowel-nails. To further seams at the joints of angles is not deformed by moisture, they need to lubricate silicone adhesive.
- Internal sewerage pipes with plastic, we do not close, because this is much better suited tiles.
conclusion
As we can see from the article, the solution is to make repairs in the bathroom is not so difficult. Most importantly, plan ahead, prepare all the necessary materials and tools.
Do not sew up tightly with plastic water system, at any time, you may need access to the pipes. Use high-quality materials, and do not forget about safety for the handling of tools.
We hope our article has been helpful to you. In order to more accurately understand the technological and practical issues on our website provides detailed photo and video instruction, in which you will find useful information on the question.


