 Installation of the ceiling cornice is not particularly difficult and any homeowner can do. No shelter can do without the curtains. Curtains, of course, you need to hang on the cornices. Installing a new eaves, as well as replacing the old one with a new one, does not require much effort, calculations and skills. But, still not every landlord knows and knows how to do it. On the question of how to fix the ceiling cornice to the ceiling, not everyone can answer, because not everyone was engaged in this. You can, of course, call a master at home, but having not so much tools and, most importantly, the desire to do this, you can do without your own efforts.
-
- How far from the ceiling to hang the cornice: free solution
- How to fix the cornice to the ceiling: fasteners and tools are needed
- Hanging curtains on the cornice: ways different
- How to attach the ceiling cornice to the suspended ceilingFrom plasterboard
- How to install a ceiling cornice in plastic: step by step
- Ceiling mounting for curtains( video)
At what distance from the ceiling to hang the cornice: free solution
So, you still chose the wall cornice. Immediately there is a legitimate question, but at what distance from the ceiling to hang this very cornice?
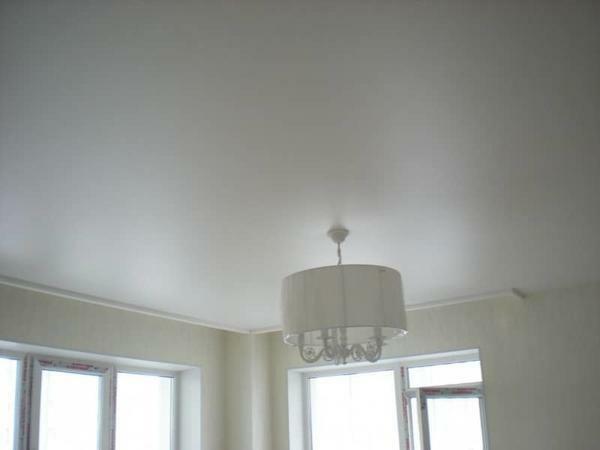
Curtain rails( curtains) are of two types: wall and ceiling. Ceiling cornice, of course, hang on the ceiling, and wall - on the wall.
 A variety of ceiling molding accessories make it possible to emphasize the beauty of curtains in the interior
 However, often, the wall cornices are hung on the ceiling, and the ceiling - on the wall, this is more to your liking:
- , On which your cornice will hang, an arbitrary is chosen, that is, which one you like best;
- The only thing you need to remember, if the curtains with rings, they need to be arranged so that these rings do not cling, then behind the ceiling, due to too small a gap between the ceiling and the eaves. As a rule, the gap between the ceiling and the upper bracket of the curtain should be at least 5cm.
- If these are strings( and they are also sometimes fastened to the walls), then you should also base yourself on the upper edge of the bracket, although you can position it even higher than 5cm, at your discretion, and even close to the ceiling.
In the end, as you have already understood, the distance between the ceiling and the wall is chosen more based on personal perception of design and aesthetics.
How to fix the cornice to the ceiling: the fasteners and the
tool are necessary. The folk wisdom says: "He does not know how to do anything, that he can not even drive a nail."
Gone are the days when a nail could be hammered into a wall or into the ceiling. Unless, if to use a special dowel which drive in by means of a special assembly pistol. However, this is too troublesome, and you do not need.
In order to reliably mount any eaves, you need to have a minimum of tools and fasteners.
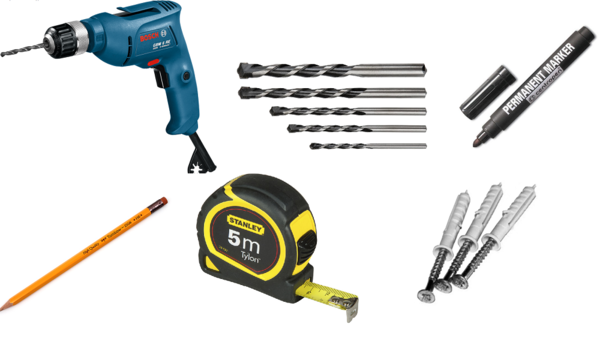 Before starting the installation of the ceiling cornice, it is necessary to prepare tools for operation.
Prepare for work:
- Drill shock or perforator. If the wall is brick, then the drill will be enough, well, and if it is still made of concrete, a puncher is desirable, as a more powerful technique.
- Drills with winning taps. It is advisable to have several drill bits, because if you drill a concrete wall, it is possible that a drill may fall into a steel armature, which can very easily damage, or even break, this drill. Pencil or marker for marking.
- .
- Roulette.
- Impact dowels.
The most "running" diameter of the dowel for this case is 6mm. This is more than enough for reliable fastening, and not so problematic when drilling - so "to shoot a cannon on sparrows" by installing dowels of a larger diameter does not make sense. After marking the places of future holes in the ceiling, we drill them, and then fix the cornice, no matter what design it is.
Hanging curtains on the ledge: different ways
How can I hang curtains on the ledge, and in what way is it better to do this?
There are several ways, and each landlord can choose the one that he likes more.
As the methods are different, it is worthwhile to dwell on each of them separately.
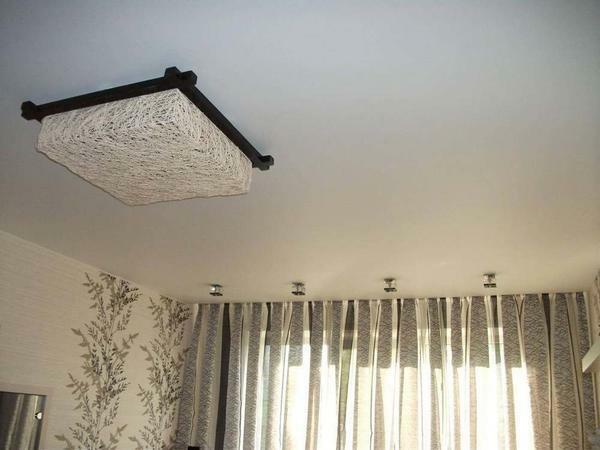
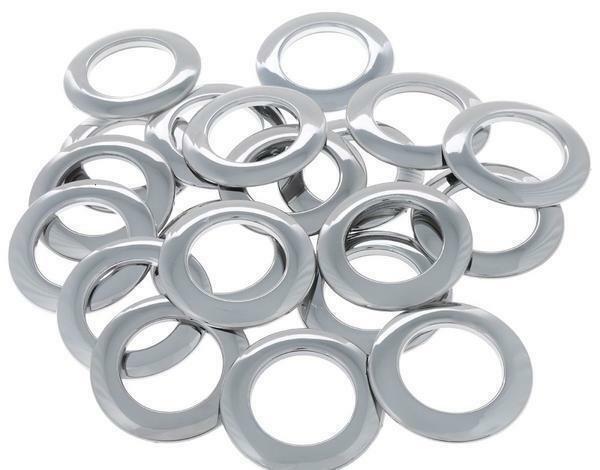 Metallized eyelets are used as fasteners for curtains on tubular cornices
Methods:
- Rings and hooks. Wall cornices, as a rule, they are completed, and put on immediately before the installation of the eaves. Rings and hooks can go in one set, or maybe not. The so-called "crocodiles"
- . The principle of their work does not differ from the work of the clothespin, but with the difference that the teeth are made on the surface of the crocodiles, due to which the curtains are securely fixed and do not slip.
- Fabric loops and wings. Again, they are used on the same tubular cornices, which, as you correctly noted, dominate the market today. The advantage of such fastening of curtains is that the cornice is almost not visible because of them, since it is as close as possible. Between the fabric loops there is some distance, the wings allow you to hide the cornice as much as possible, and it seems that the cornice is completely absent.
- Eyelets. They are applicable only on eaves of tubular. Eyelets are metal rings built into the upper part of the curtains, and these rings are put on tubular cornices.
Wall cornices are very popular, but this does not at all deny the popularity of ceiling cornices.
How to fix a ceiling cornice to a suspended ceiling from a gypsum board
After the major part of the repair of your apartment is completed, the final touch remains: to install the cornice to the suspended ceiling, in this case from plasterboard.
You ask yourself the question: how to fix the roof cornice reliably and without damaging the plasterboard?
Correct fixing to gypsum board, is achieved in the event that even before the patch of the sheets, in the area where the installation of the cornice is planned, it is necessary to fasten the wooden beam in advance. The cornice, after fixing the drywall, is securely screwed with screws to the bar.
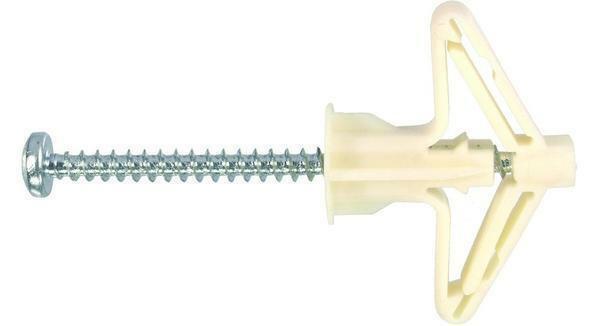 Mounting of the cornice to the gypsum board ceiling is carried out with the help of a butterfly anchor
However, there are cases when the following prevented it:
- The beam was not installed;
- The beam is installed, but not exactly, and the screws just fall into the drywall only, and not into the wood, which does not give this design the required reliability.
In order to avoid further breakage of the cornice, and as a result, its fall, as well as the destruction of drywall, you need special fasteners.
Types of special fasteners:
- Butterfly plug. Special dowels of special design. The design of the "butterfly" is such that after the screw is screwed into the gypsum board, from the back of the plasterboard, the dowel opens, thus recalling the butterfly's wings. Dowel "umbrella".
- . Having overcome the hole and hitting the void, the dowel opens in the manner of the umbrella, and thereby increases the area of load on the drywall. Dowel-screw. In this version, you do not even need to drill drywall - the dowel is simply screwed with a screwdriver.
- Anchor bolt. This fastening is especially important when you need to hang very heavy curtains. In this case, drilled and plasterboard, and the base ceiling to a depth of 5cm. Selection of the length of the anchor is made, based on the thickness of the sheet, and the distance between the base ceiling and the plasterboard itself.
So, if the cantle is not installed in advance, you can always find a way out of this situation.
How to install a ceiling cornice made of plastic: step by step
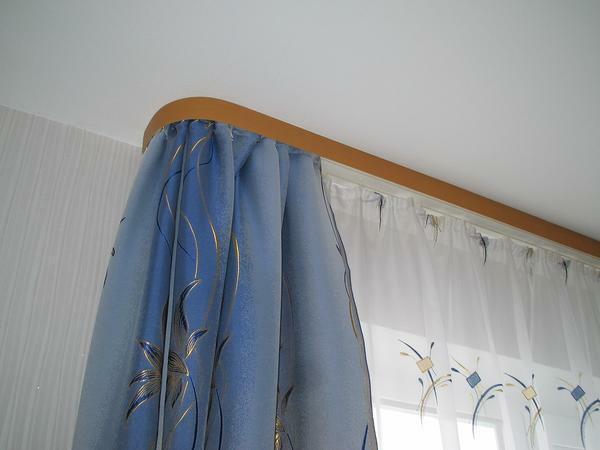
The plastic cornice looks remarkably in the room with today's interior.
The cornices are fixed to the ceiling in such a way that they practically do not catch the eye, being behind the cloth.
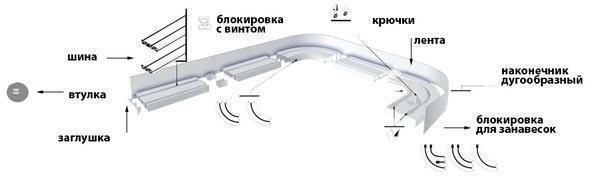 Components for ceiling cornice
Curtains, therefore, are, as they say, in the foreground. Work on fastening such a cornice is not so complicated, and, at the same time, such fastening is very reliable.
Cornices can be single row, double row, three row and four row.
Supplied complete with:
- Rotary corners. There are 45 ° and 90 °, therefore, it is possible to design a wide variety of cornices and curtains.
- Caps. They are special in design and prevent the hook from slipping out of the groove.
- Decorative elements. For example, self-adhesive tape.
Having prepared a drill, a metal hacksaw, dowels, a screwdriver or a screwdriver, a pencil or a marker, you can start working.
Installation, step by step:
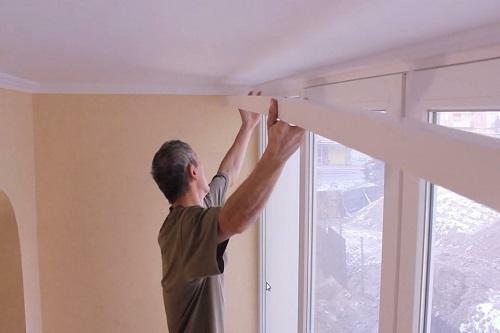
- Having defined the place where the cornice will be placed, it is necessary to outline some approximate scheme to determine the length of the cornice, as well as take into account the wall offset if there are rotational elements in the presence;
- If the cornice is fastened directly along the window line, it is necessary to cut the profile of the required length with the help of a metalwork hacksaw. If the curtains are hung in the middle of the room, and there will be different turns, then we model the scheme according to which the elements are cut, and they are attached separately.
- In order to fix the cornice to the ceiling, it is necessary to drill the holes in the profile so that the screws can withstand the curtain profile together. Approximate distance between samorazami - half a meter.
- Apply the profile with drilled holes to the installation site, mark the ceiling, outlining the places of future holes.
- Drill holes, install dowels.
- With the profile, combining the profile holes with the holes on the walls, we fix the profile by fastening the screws.
- The rotary elements are fixed in the same way.
- We put the hooks in the grooves, installing both plugs and stops, if necessary.
- We glue decorative tape.
- Hanging the curtains, make sure that everything is done correctly.
Working at height, use caution!
Ceiling mounting for curtain rod( video)
In conclusion, I should say a few words about all of the above, that is, to sum up. In order to work in such a direction as the installation of the ceiling cornice was arguing, and not turned into a problem for the whole family, turning into a long, multi-day event, one should read articles on this topic, as well as study simple video and photo materials in whichEverything is simple and intelligible. And then, armed with the necessary, also not tricky, tool, to make fastenings most. Good luck in your repair of your apartment!